 It seems the new norm is to start decorating for Christmas after Halloween, rather than after Thanksgiving. This is no surprise really, seeing as most major retailers started setting up their holiday merch at the end of September, which seems somewhat excessive if you ask me, but hey….nobody’s asking.
¯\_(ツ)_/¯
Anyway, this realization also alerted me to the fact that I never wrote my DIY Christmas Tree Flocking post after tackling this little project last year. I was late getting my tree up, and it seemed pointless to publish such a post immediately after the holiday. And then I completely forgot about the whole thing….until now. And rarely do I ever get a jump on things and post something useful in a timely manner, but it looks as though my nearly year of procrastination is kinda working out….in this one, very very specific instance=\
Before I get started with my incredibly easy non-tutorial, tutorial, here are our Christmas card photos over the last three years. The pics are only going to go downhill, so I figured I’d start off on a cute note;)

Christmas 2018 ~ Our first (and last) attempt at a family photo (minus Odie the cat): Gracie, Gertie, and Gatsby (taken right after Gatsby was trying to hump my arm)

Christmas 2017 ~ Gertie, Gidgie and Gracie

Christmas 2016 ~ Gilbert, Gertie, Gracie (above pic) and Gidgie (below pic)

When Michael and I purchased our first home, which is our current home, my parents gifted us the beautiful 10 foot artificial tree that they’d bought soon after they built their dream home in Southwest Florida in the late 1980s. I can still remember the somewhat painful process of finding that tree. I was 7-8 years old at the time, and obviously this was way before the internet and online shopping dominated the retail industry. So we had to do things the old fashioned way, spending many weekends piling into the ol’ Mercury Grand Marquis, and making long, uneventful drives from store to store to find that perfect Christmas tree.
My mom was super into the holidays back then, and it was really important for her to find a very special tree to put in their new home. I think it actually took two holiday seasons of carting us kids around from town to town to finally find her holy grail of artificial christmas trees, in a rather gloriously Griswolds-esque fashion. This, of course, is that same monster tree that now takes over our dining room for a good month out of the year, and it’s still as beautiful as ever.
I’d been thinking about flocking this tree for a couple years, but I hesitated to mess with it. I sort of felt like I had a responsibility to preserve the tree as it was. But eventually my desire for one of those picture perfect white flocked trees overcame those feelings, so after a quick chat with my mom for her thoughts on me altering her tree and learning that she couldn’t have cared less, I stormed the internet in search of the best flocking powder, and this is the one I went with.
At just $41.95 (currently) for five pounds of powder, which is about $18 less than what I purchased it for last year at the height of the holiday season, this is one of the cheapest ways to get a beautifully flocked tree. And from my research, SnoFlock appears to be the same quality flocking powder that’s used on the flocked trees you see at the store. The best part is just how easy it is to use this product, and the results are just gorgeous. 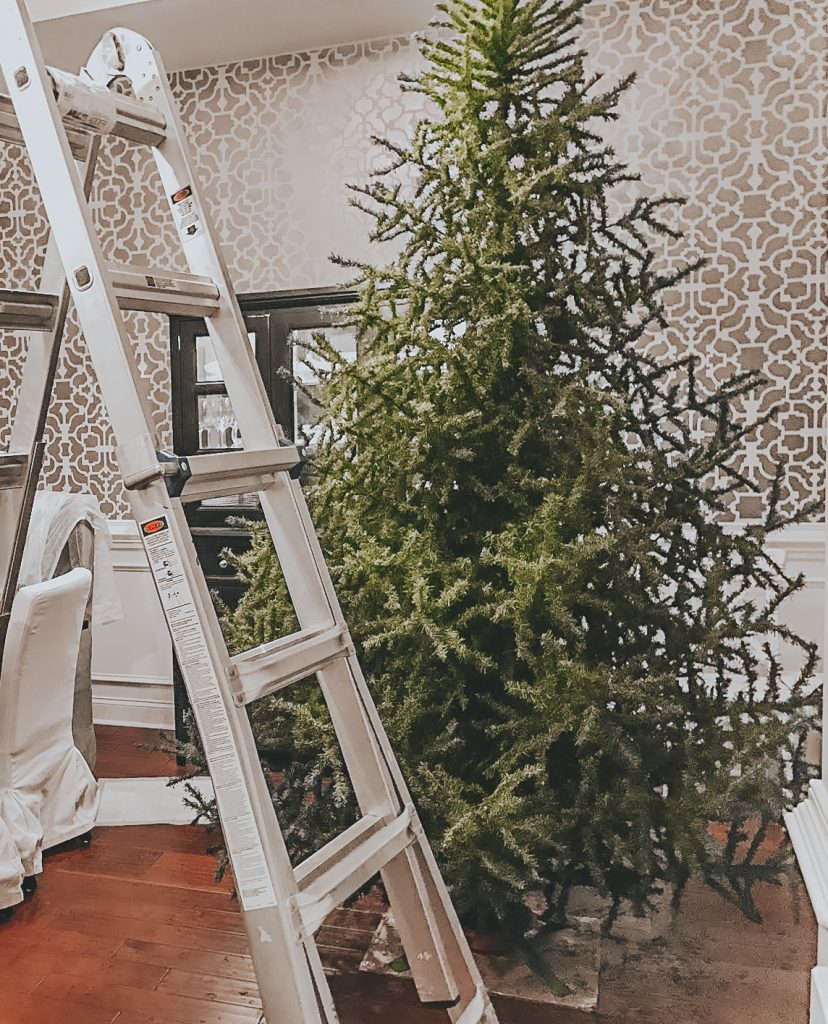 Here’s the tree I was working with. I had to dig deep in the archives for a ‘before’ pic, so pardon the poor quality and the mess (I cropped most of it out;)). I hadn’t arranged the branches completely, so it doesn’t look as full as it actually is. =\
I used approximately three pounds of powder to thoroughly cover the tops of all the branches on this extremely wide, 10 foot tree. And the process I used is so simple:
- Cover an area in some type of plastic sheeting. You definitely want to use plastic, as the flocking powder essentially turns into a paste when it gets wet, and fabric drop cloths will annoyingly stick to your feet about halfway through the process (learn from my mistakes).
- Set up your tree over the plastic sheeting.
- Fill up a spray bottle with water,
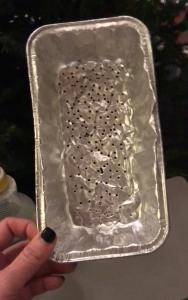
- Either purchase a mesh strainer like this or this for under $10, or if you don’t have time for that and have zero patience (like me), just create a makeshift sifter like I did;) . I still have no idea why there’s a package of foil banana bread pans stored in my kitchen, as I’ve never made any type of bread or baked good that might go in such a thing, but this mystery item finally proved useful after years of collecting dust on the shelf of my pantry. I literally just took a super small phillips head screwdriver and punched a ton of holes in the bottom of one of the foil pans, and it worked perfectly. You could also just toss the powder on with your hands. Either way, you want to be sure you keep any moisture away from the bag of powder, as you don’t want it turning into a sticky paste until it hits those branches!
- Mist the entire area you’re working on with the spray bottle, starting at the top of the tree, and working your way down. You want to be sure there’s sufficient water on the branches you’re working on, as well as some of the branches beneath. This way the excess powder that falls will hopefully cling to one of the lower branches (rather than go to waste).
- Basically mist with one hand, and sprinkle powder with the other. After a few minutes you’ll get a feel for how much water you need.
- Use as little or as much flocking powder as you want. Once you’ve achieved your ideal level of flocking, let the tree dry overnight (at least that’s what I did ¯\_(ツ)_/¯).
- Pull up plastic sheeting that’s protecting your floors and/or containing your mess, and toss in the trash.
- Decorate your beautiful newly flocked tree!
- Alternatively, if you wish to have a more uniform flocking done (so the powder sticks to the entire branch), consider tackling your tree while it’s dismantled.
- Also note, this powder is environmentally friendly, biodegradable, non-toxic and perfectly suitable to use on a live tree as well.
 I might add more powder this year (I still have about two pounds left from my five pound box). Last year I didn’t want to overdo it, so I was just going for the look of fresh snow sitting atop of each branch, versus covering each branch completely.

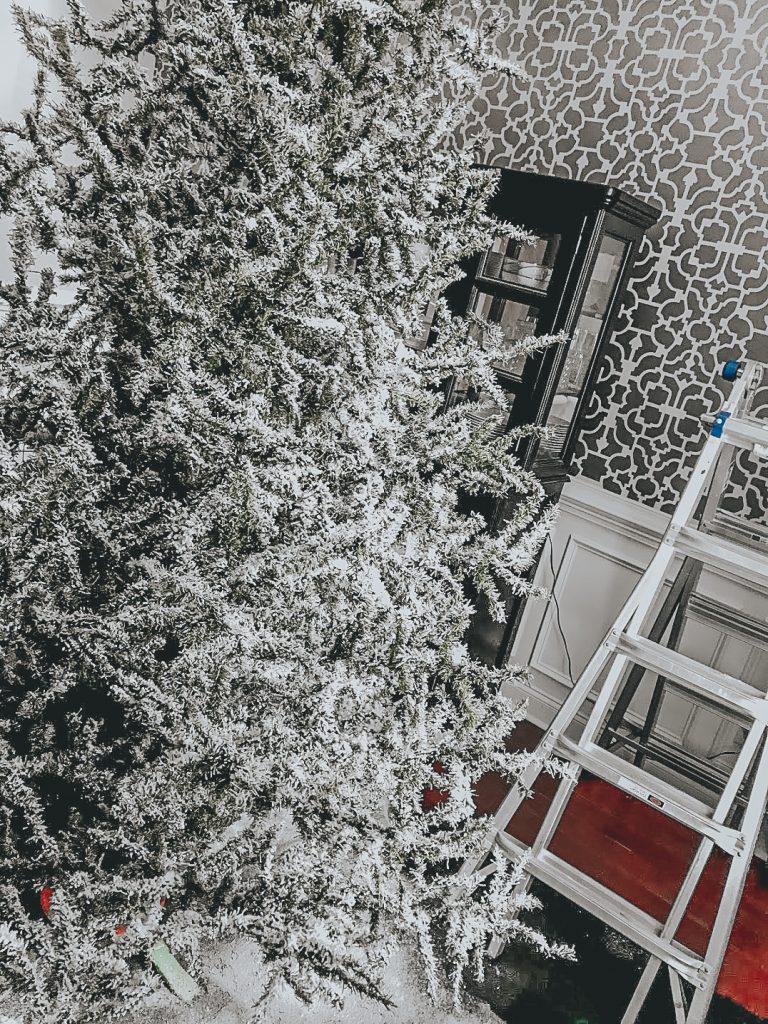
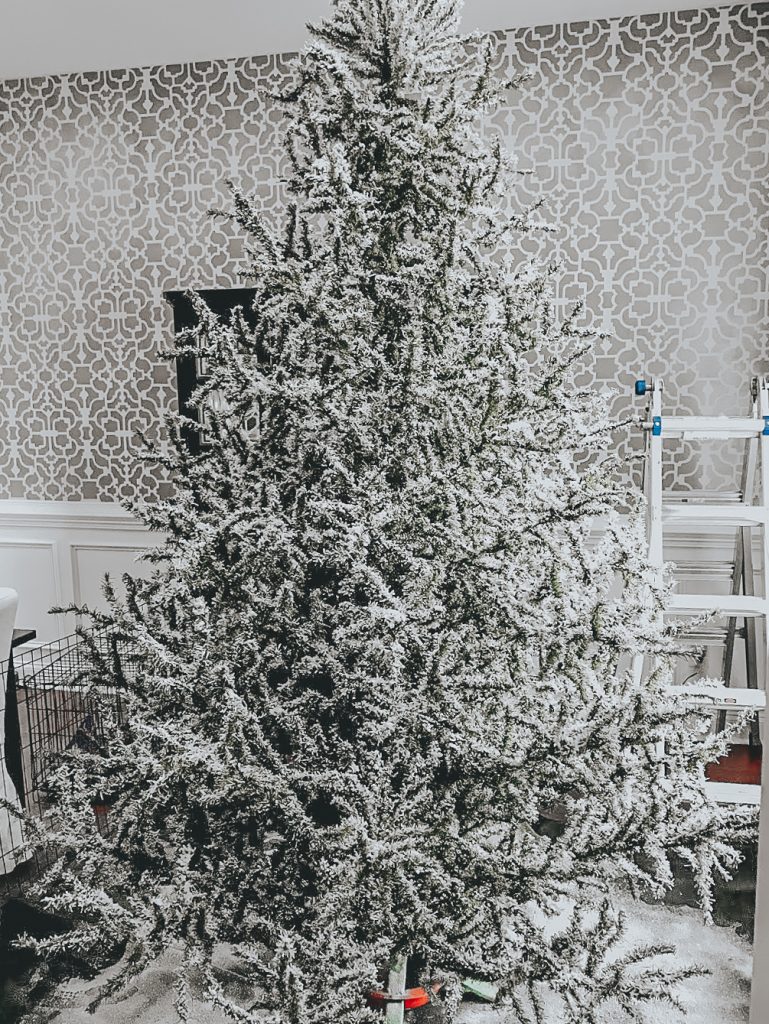 You can see the mess it makes on the plastic drop cloth. I used a multi-panel coated metal dog pen (we have a few of these laying around) to keep the monsters out of my work space. The powder then turns into an almost felt-like consistency after it dries.
I apologize for the lack of photos of the process. Apparently I did more videos on insta-stories, rather than still pics for a blog post…oops.
I’m truly so happy with how this turned out, and glad I went for it. A 10ft flocked tree is not cheap, so doing it myself was definitely a no brainer, and the effort to get it done, was just too dang easy. What I really love about this product (aside from what I’ve already mentioned) are the iridescent flecks throughout the fluffy powder. It looks nearly identical to real snow.
There are loads of Q & As on Amazon about this flocking product, so if you have any questions about using it, your question has probably been asked and answered there, but of course you can always ask me and I’ll do my best to not steer you wrong:)
If you decide to tackle this project, let me know! I wanna see pics!:)


This is beautiful!! Does the powder flake off at all once you’re putting yojr tree away for the season? Or does it stay stuck on? Asking for a friend…😄
Haha…some chunks will come off when you’re handling it or taking off decorations, as with any flocked tree, but overall it sticks really well!:)