| LED Gel Polish Dryer | OPI GelColor in Black Onyx | OPI GelColor in My Vampire is Buff | OPI Base & Top Coat |
To skip my rambling intro and get straight to everything you need so you too can have a DIY gel manicure at home in your jammies, scroll on down to the appropriately named heading.;)
So as you all know, we just got back from our vacay to Scotland (and briefly Ireland). Before I left town many of you also know that I had to make the incredibly difficult decision to help my cat, Porky, who was my very first pet as an adult, over the rainbow bridge. 🙁 He was 16 and a half years old and had terrible arthritis. About a week before I was set to leave I noticed a suspicious growth on his chin that was getting worse by the day. Of course I made him an appointment at our long time vet clinic, and that’s when I learned the growth was cancerous.
Our vet was actually more concerned about Porky’s arthritis causing him to be so disabled lately. The poor little guy was having difficulty going to the bathroom, or getting up to get food or water (he’d often lay in front of the water bowl to get a drink, rather than standing). After the sad way that our dog, Gidgie, went out (terrified and unable to breathe), I decided I really wanted to spare Porky of any further discomfort, which would only get worse with each passing day.
I swear this post will eventually discuss DIY gel manicures…..just stay with me here. =\
Michael was already in Glasgow by this point, so I had to make this decision on my own, which really sucked to put it bluntly. I felt like me leaving town was driving the decision, which felt horrible; but at the same time, I had been waiting for a sign over the last few months to tell me it was time to let Porky go.
Thankfully our vet was willing to come out to the house the next day, so Porky was able to have one last full day of snuggles and all his favorite foods, and I was able to take about five thousand pics of him. I would’ve felt terrible if something happened to Porky while I was gone, plus I definitely did not want to put our sitter in a position to have to make any difficult decisions. Our vet had given Porky a steroid injection at his clinic appointment to help him feel a little better for his final hours, and at 5pm the following evening Porky fell asleep one last time in my arms while in the comfort of our living room. 🙁
With everything going on with Porky, cleaning our house from top to bottom for the house sitter (seriously, how does so much random dog hair get in the fridge so fast?? Gag!!), making sure all our other fur-monsters were all set for their sitter(s), and the ongoing struggle to figure out how to pack for any and every possible weather condition within the constraints of a 50lb baggage limit, the very last thing I had time to do was sit in a salon for a couple hours to get a mani-pedi. I mean, literally minutes after Porky was taken from the house wrapped in a soft blue baby blanket that our sweet vet brought for him, I was rushing out the front door to take our crazy new frenchie rescue, Gatsby, to my friend’s house on the other side of town to stay with her while we were gone.
When I finally got home hours later from dropping Gatsby off, I stayed up literally the entire night packing and cleaning (not to mention I had gotten a combined 6 hours of sleep during the previous two nights). I grabbed a red bull on my way out the door to the airport the next morning, and then promptly sat in construction traffic and almost missed by flight out of Charleston. I just wanted to break down and cry, and I eventually did.

I tiny miracle happened at the JFK airport when I was able to squeeze in a gel manicure at the airport “spa” before hopping on my connection to Dublin. And for about 4 days my nails looked pretty solid, but the tips of my nails weren’t capped properly, so they started going to shit prematurely.
I’m usually not one who likes to sit idle getting my nails done while traveling, but it depends on the type of vacation I’m on. With so much to see and do in Scotland (and the lack of strip malls littered with nail salons on the Inner Hebrides), this was definitely one of those vacations where I would not be getting my mani freshened up.
In hindsight, I really don’t know why it didn’t occur to me sooner, but all of this made me wonder why I wasn’t doing my own gel manicures? I mean, I can paint my own nails, and this is the same exact thing, just with a few extra coats of polish, right?? Too easy!
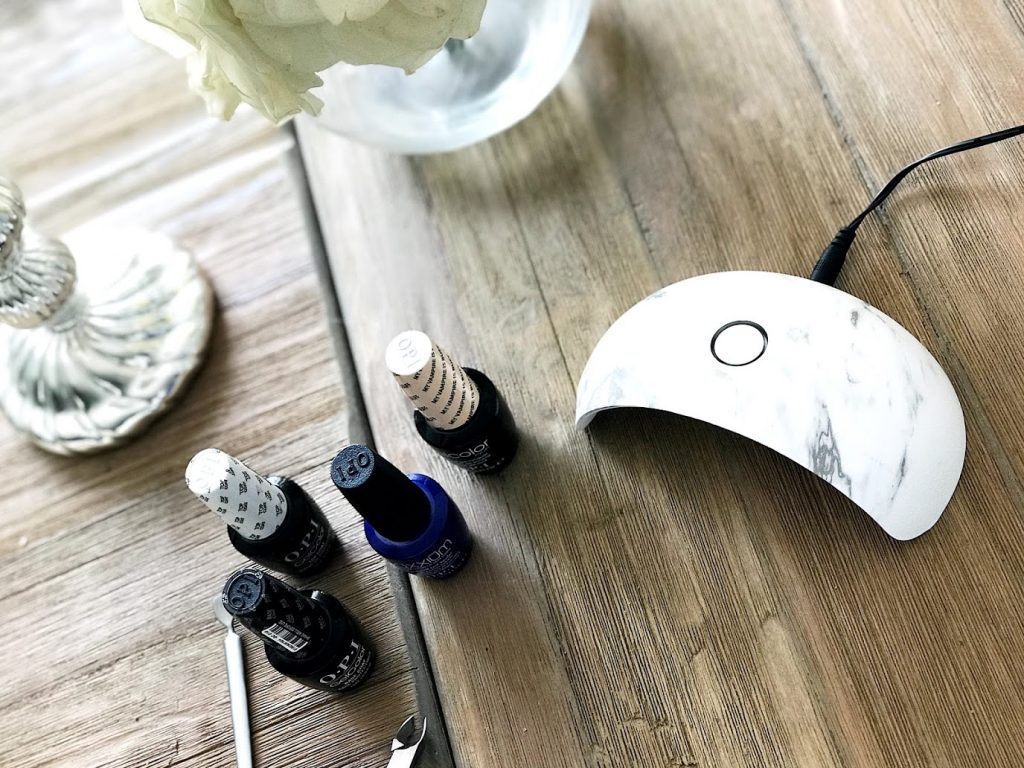
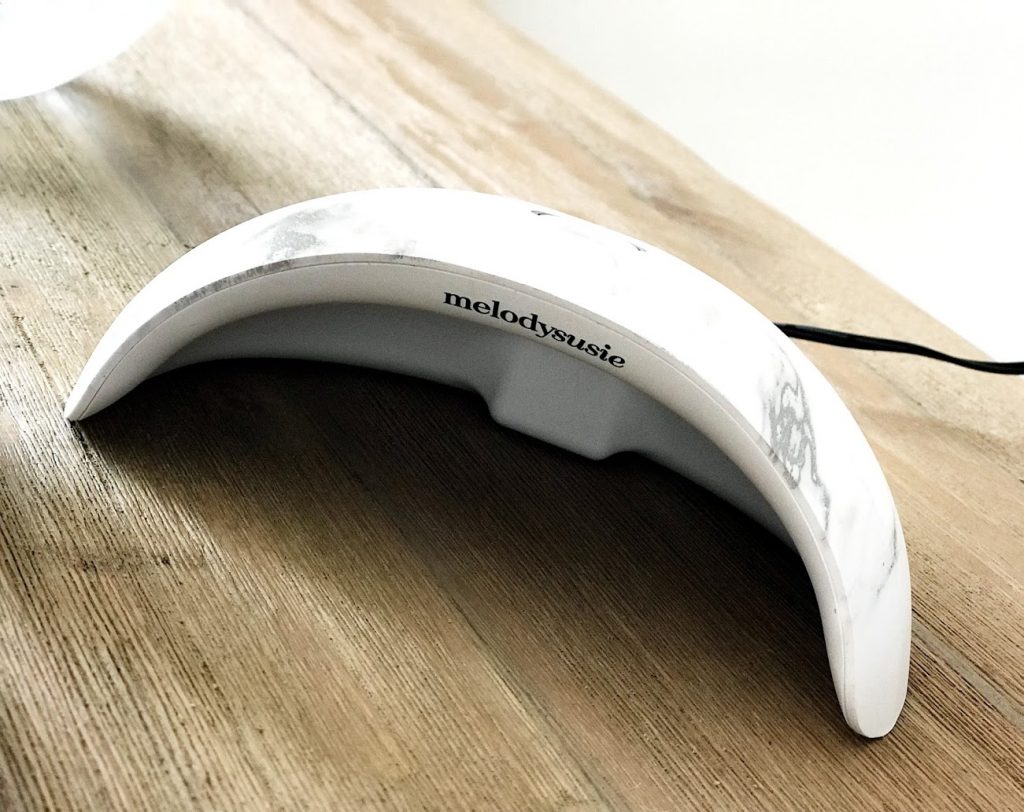
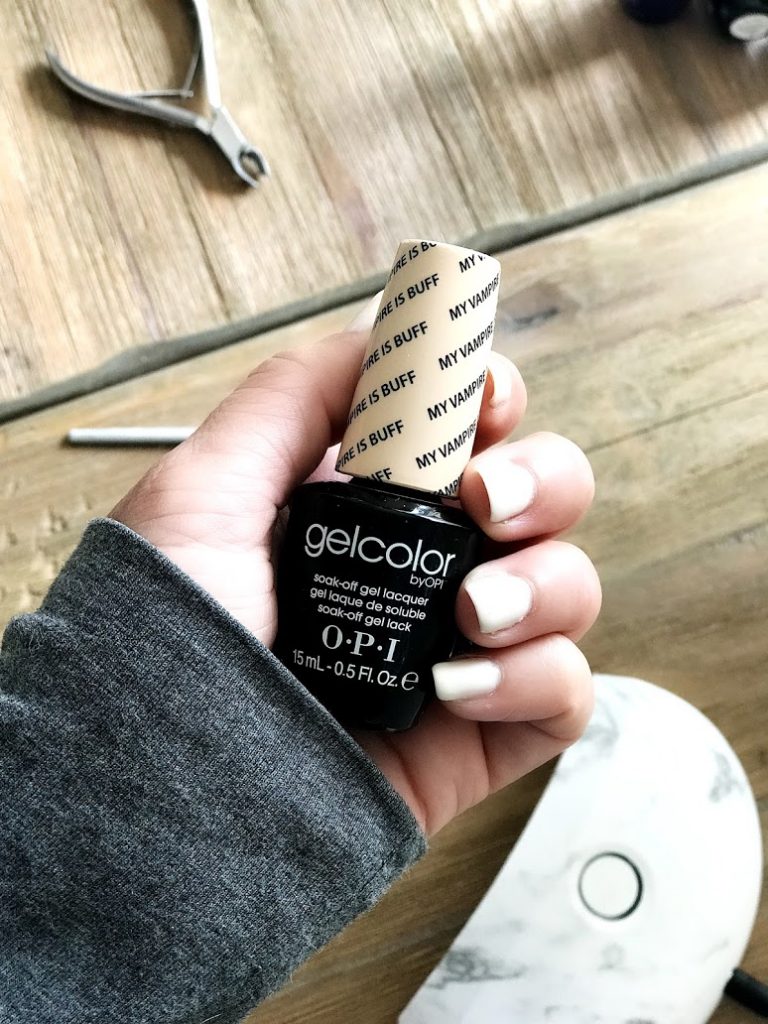
I’m definitely one of those people who doesn’t like to pay for things I can do on my own. So before I could forget, I opened my trusty Amazon app while sitting in an Edinburgh pub, found this LED drying light for a measly $16 bucks (they had cheaper ones, but I guess I just really wanted the marble pattern;)). I googled O.P.I. gel color, and found this top coat/base coat combo pack for $30 at Walmart.com. I figured I’d start out with my two favorite basic shades, so I also snagged this O.P.I gel color in Black Onyx for $16, and my other go-to color My Vampire is Buff for just $8. I grabbed this O.P.I. “sealer” too for $13, but I’m still not entirely sure if it’s a necessary step. So for a grand total of $83, I can do several long lasting DIY gel coat mani-pedis, which is less than what I pay for one gel mani-pedi at the salon.
As soon as we got back I was super eager to get started, despite being completely jet-lagged. I watched one youtube tutorial (this one because I really liked her accent;)) and confidently went to town on my nails. I can’t begin to tell you how happy I am with the results! The LED light works extremely well, and it’s small enough that I could actually travel with it easily and do my own repairs.
Some people complained in the reviews that the LED light is too small to fit your thumbs in it, so you’d have to dry your thumbs separately, but if I angle my hands slightly, I’m actually able to fit all of my nails under the light. I ran the light for two cycles just to be sure each coat had completely set. It has a self-timer that shuts off automatically, so it’s seriously such a mindless activity you can do just sitting in front of the TV;)
In the youtube tutorial she uses a special bonding coat, which I don’t have yet, and I’m not sure I need it. The O.P.I. base coat I purchased seems to be holding up really well so far (a week and a half without any chips or peeling…#winning), but I’ll be doing some experimenting in the coming months to see which product combo works best for me.
UPDATE: I went ahead and ordered the O.P.I Bond Aid for good measure after my gel polish began peeling off one of my nails. The gel polish still lasted way longer than a regular manicure (almost two weeks), but I’m curious if the bonding agent will make a difference. For $13 I figured it’s worth a try;)
If any of you are experts, I’d really love some tips!
Alright ladies, what other DIY beauty hacks am I missing out on? Let’s hear em in the comments!

Leave a Reply