

I know I can’t possibly be alone in my detest for vacuuming carpeted stairs. Not to mention the never-ending uphill battle of trying to keep them looking halfway decent when you have a houseful of pets and/or kids. We had four dogs and two cats at the time I started brainstorming about solving this issue last year, and figuring out a way to get rid of the last remnant of carpet in our main living area was definitely a priority for me. I absolutely hate the idea of floors that can’t be really, truly cleaned….like you-could-actually-eat-off-of-them-if-you-really-needed-to cleaned (I’m looking at you, carpet!). And the type of carpet we had on our stairs essentially acted like velcro in the face of fur, so vacuuming these suckers was a seriously back-breaking chore for me.
About a month before I started this project, I had just left my miserable career…and apparently had a little extra time on my hands. However, whatever free time I had gained after leaving my demanding job, the fact that we were now down to one income meant that I was basically equally as low on the funds to solve my carpeted staircase dilemma. This is when I came to the conclusion that in order to kiss that carpet goodbye, this would definitely have to be a super budget-friendly DIY stair makeover.=\
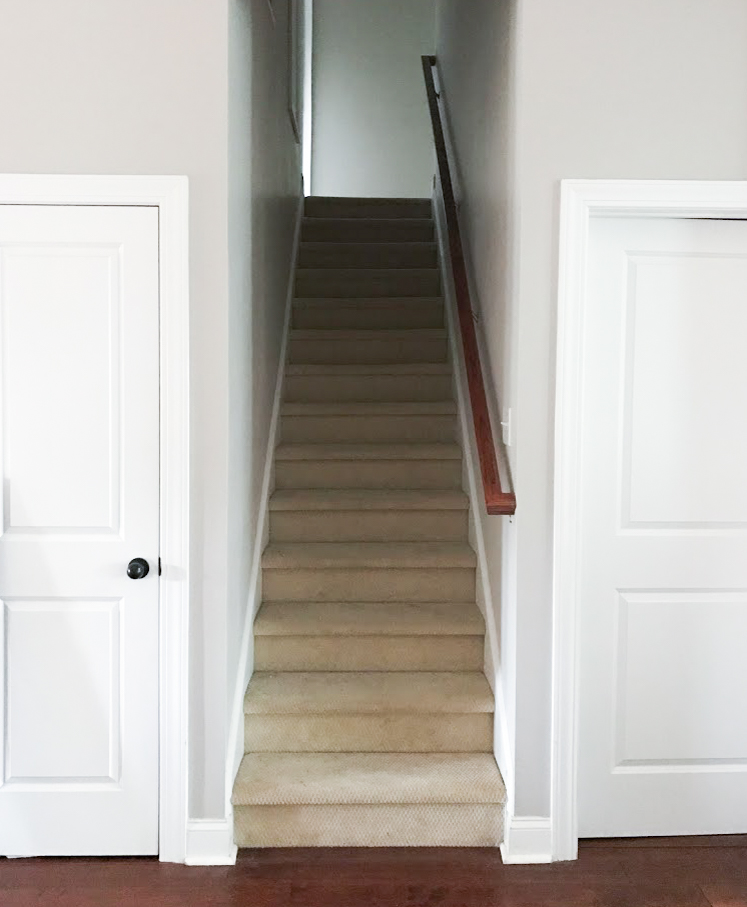
~BEFORE~ Covered in dingy carpet
So while Michael was at work one day, I randomly decided to see what was actually under that carpet. My way of thinking was that if there was just some type of particle board under there, I would just by some planks of wood, cut them down to the proper width, and then sand, stain, and slap a couple coats of poly on them. Too easy;)
Even if I didn’t have beautifully bull-nosed (meaning with a rounded front edge) solid wood stair treads, I figured the squared edged wood would still look a thousand times better than carpet once it was properly finished. Lowes and Home Depot sell stair treads (like these), but they were out of my practically non-existent budget at the time. Basically if Michael isn’t totally on board with a project, I need to find a way to do it cheap, and that’s the position I found myself in.
To my pleasant surprise, when I pulled back the carpet I discovered we actually had solid bull-nosed stair treads underneath all that ugly velcro-y carpet. Then I promptly started cursing the previous owners for letting the builder cover these beautiful solid wood stairs with carpet, but I digress….;)
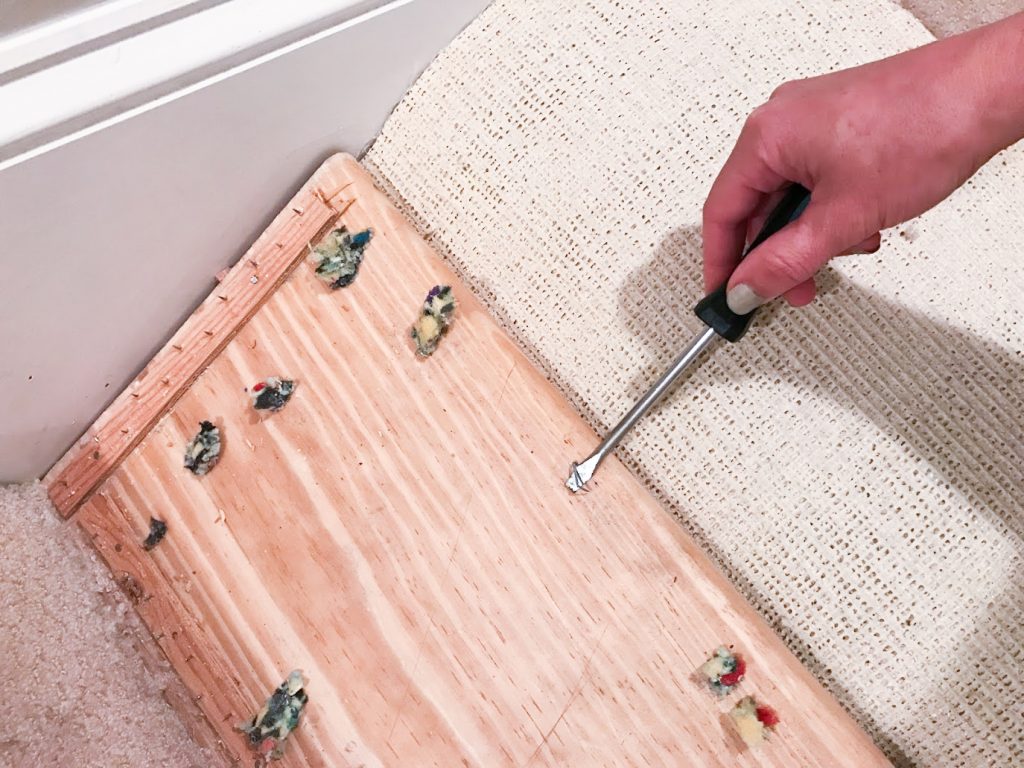
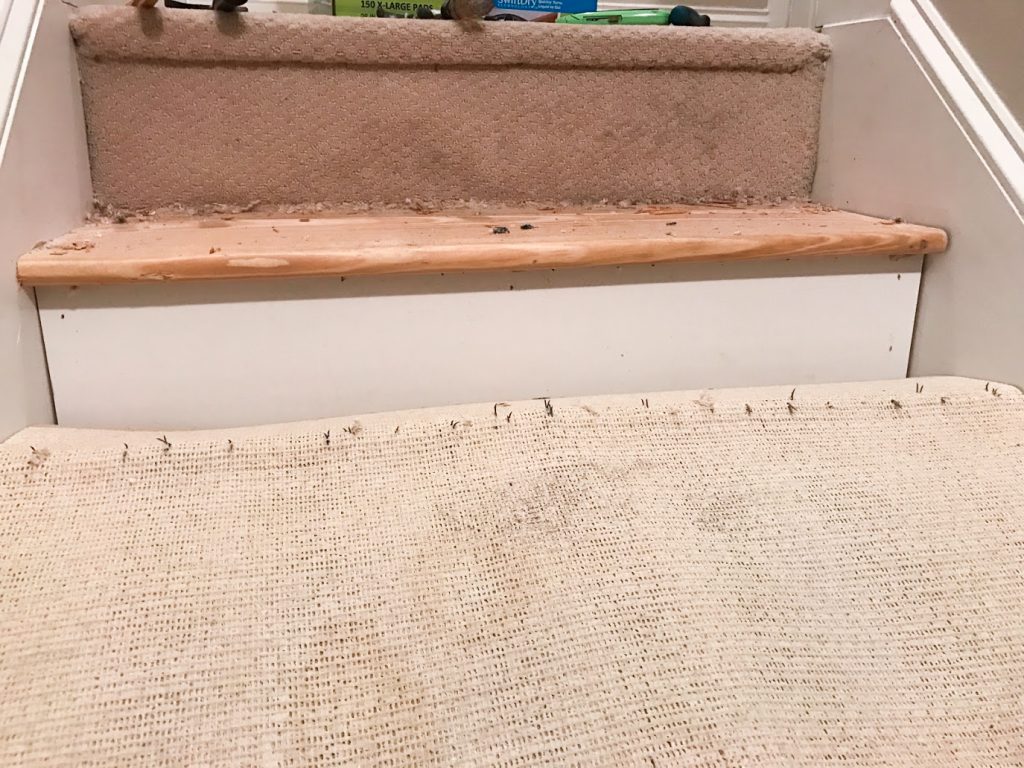
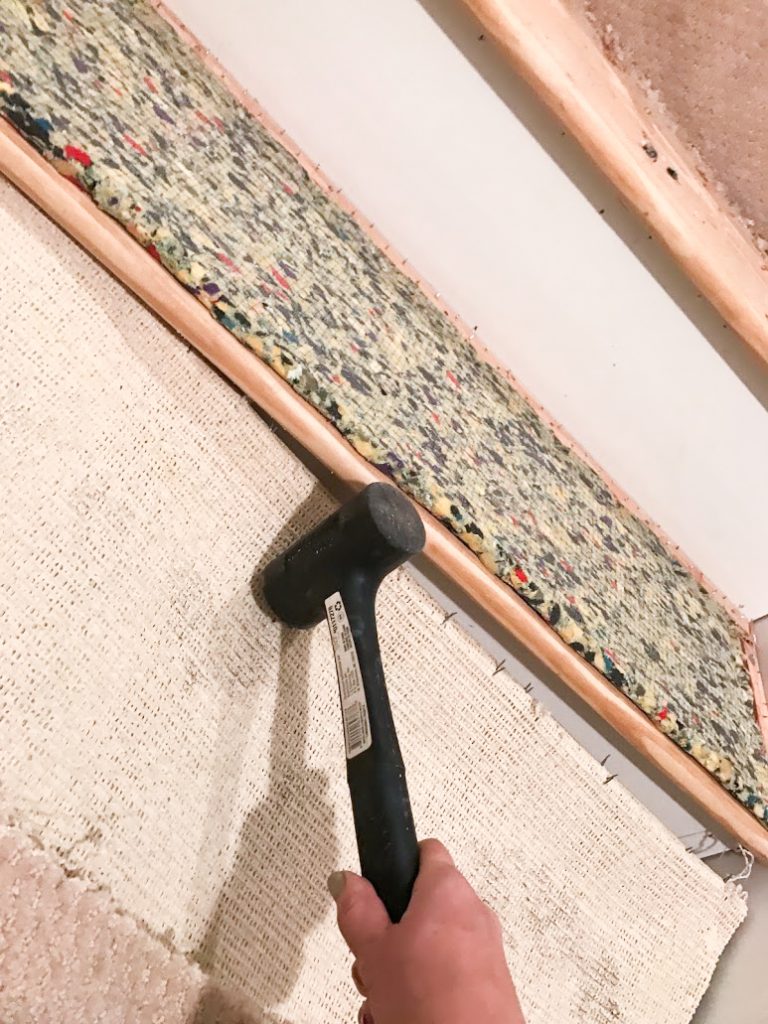
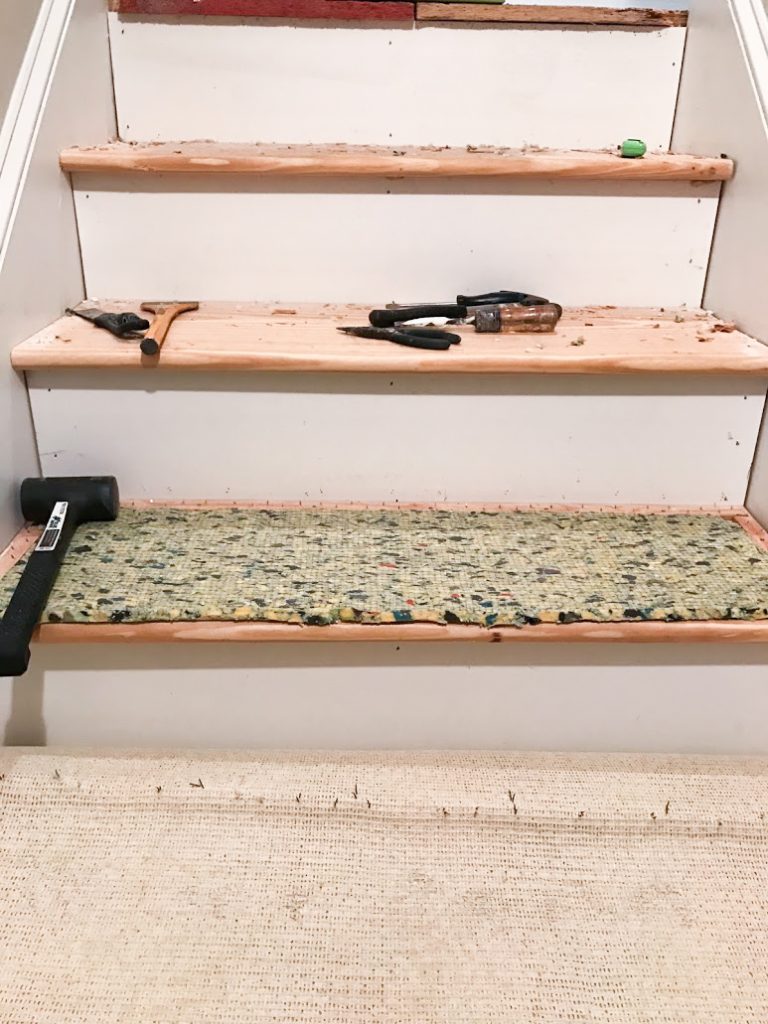
The process of pulling the carpet up was a bit challenging, but also extremely satisfying. By about the third or fourth step I had sort of refined my ‘carpet removal technique’ by pulling the flap of torn up carpet taut toward me, and then I used a little rubber mallet to basically hammer away at the taut carpet, separating the still attached carpet from the staircase, if that makes sense (see above pic).
It probably took me two days (of not working very diligently at all) to get all the carpet, tack strips, staples and nails removed. The best tools for this part of the project were an old pair of needle-nose pliers (for pulling out stubborn staples and nails), a rubber mallet and chisel (for popping up the tack strips, and knocking the carpet loose), a small-ish flathead screwdriver (for some of the staple removal), and a small hammer (for pulling up some of the nails).
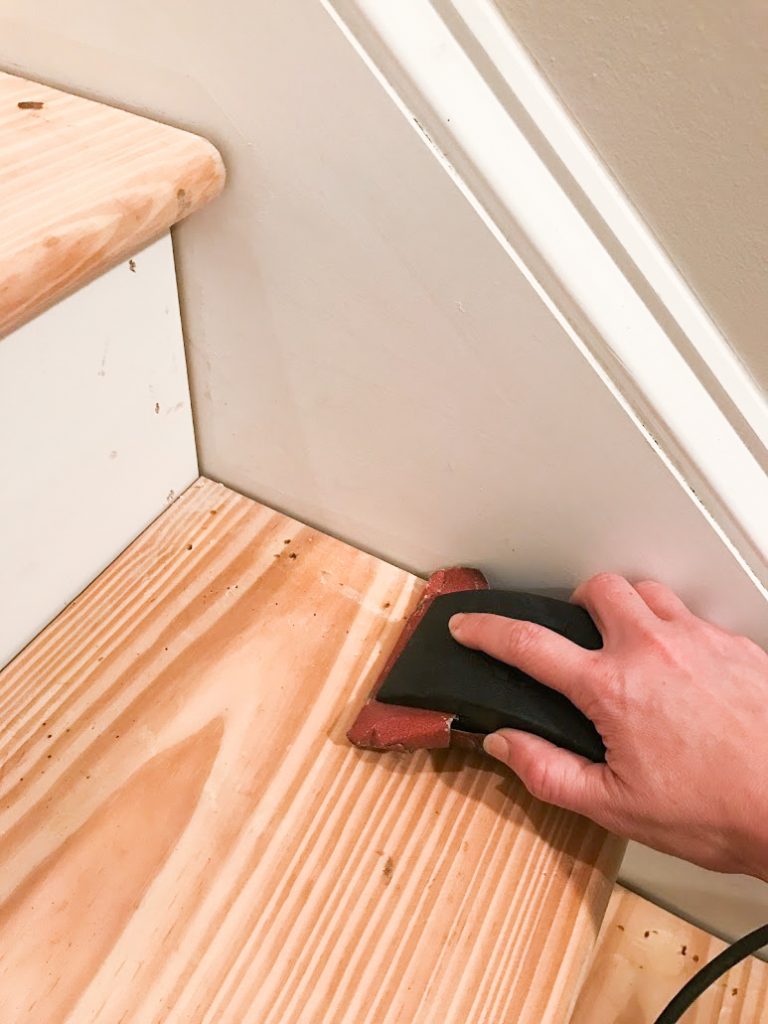
Next, I did a rough sanding by hand (sanding with the direction of the grain whenever possible) using 80 grit sandpaper to correct and smooth out any areas that were significantly damaged by the carpet installers when the house was built.
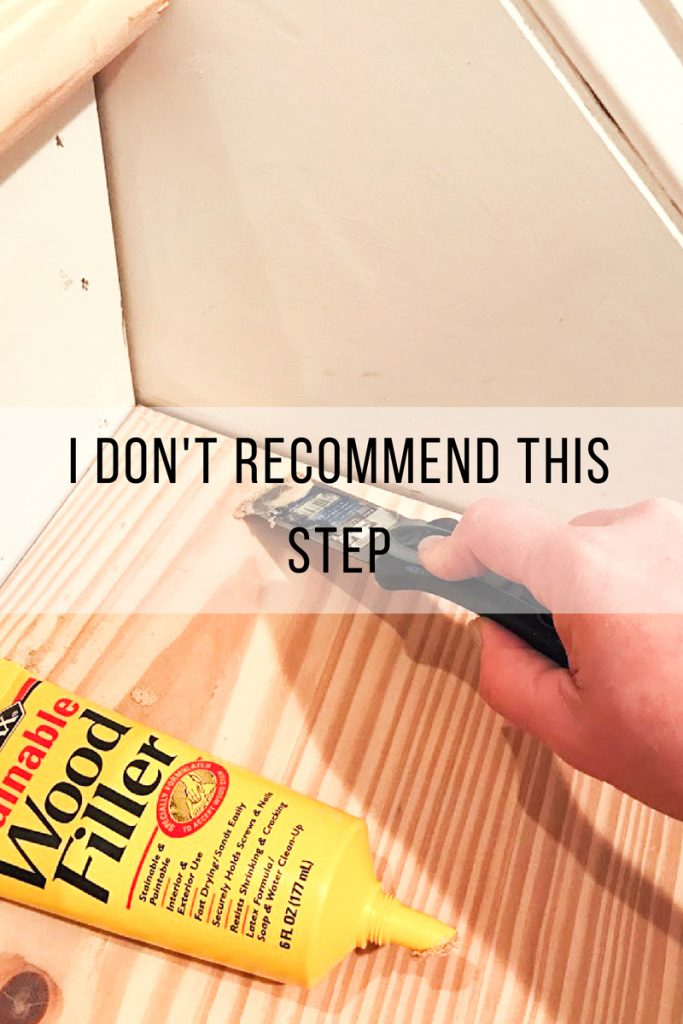
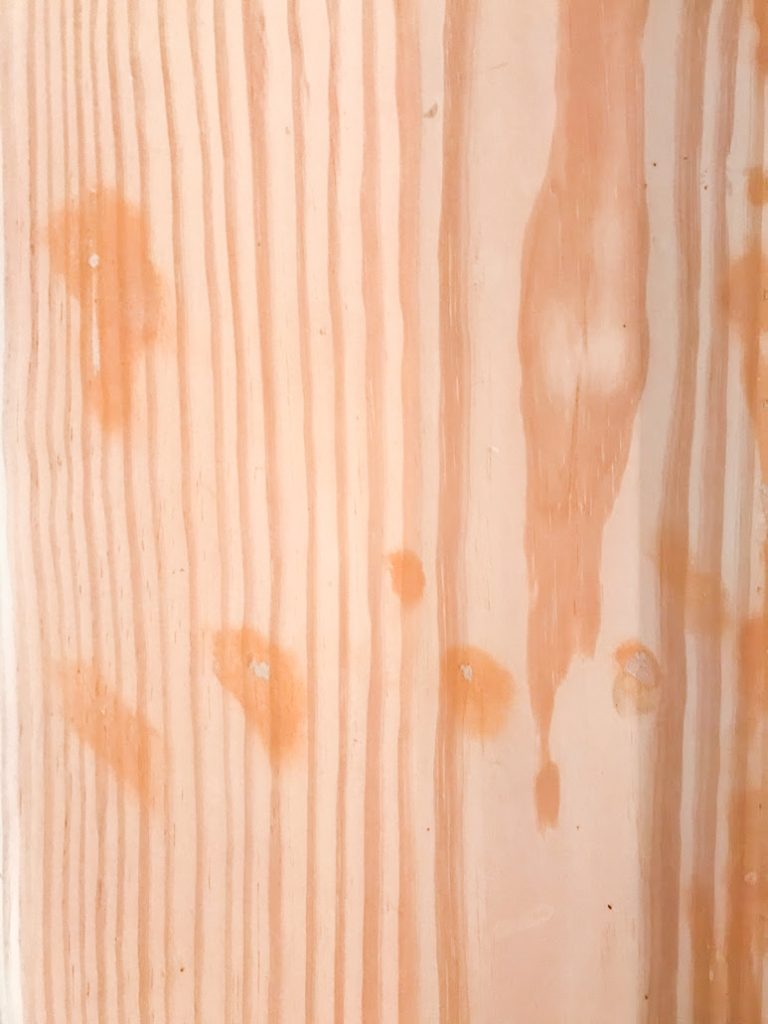
I’m a huge perfectionist, so next I decided to complete the tedious process of filling in allllll of the teeny tiny holes left behind from the nails that secured the tack-stripping and the staples that held down the carpet padding. I used the MinWax stainable wood filler, which is the same brand of stain and polyurethane that I’d purchased, so everything should have been compatible. I’m not sure if I did something wrong, but I reaallllyyyy wish I hadn’t done this step, and you’ll see why in the photos below. Even after two rounds of power sanding (with additional spot sanding) and using a degreaser to try to remove whatever waxy sort of residue that appeared around each nail hole I filled, the residue remained. As a result, the stain didn’t soak in around the patched holes consistent with the rest of the wood. It may have also been that the wood filler itself masked the natural grain, but either way, I wish I had just left the tiny holes as is, because it actually would have added great character once they were stained. Especially since the rest of our wood floors have a distressed, hand-scraped finish, so the nail holes would have fit in just fine with the theme.
Initially it drove me crazy that this happened, but since these stairs don’t get much traffic, and I’m told I’m the only one who notices the issue, I’m almost ‘over it’ now.
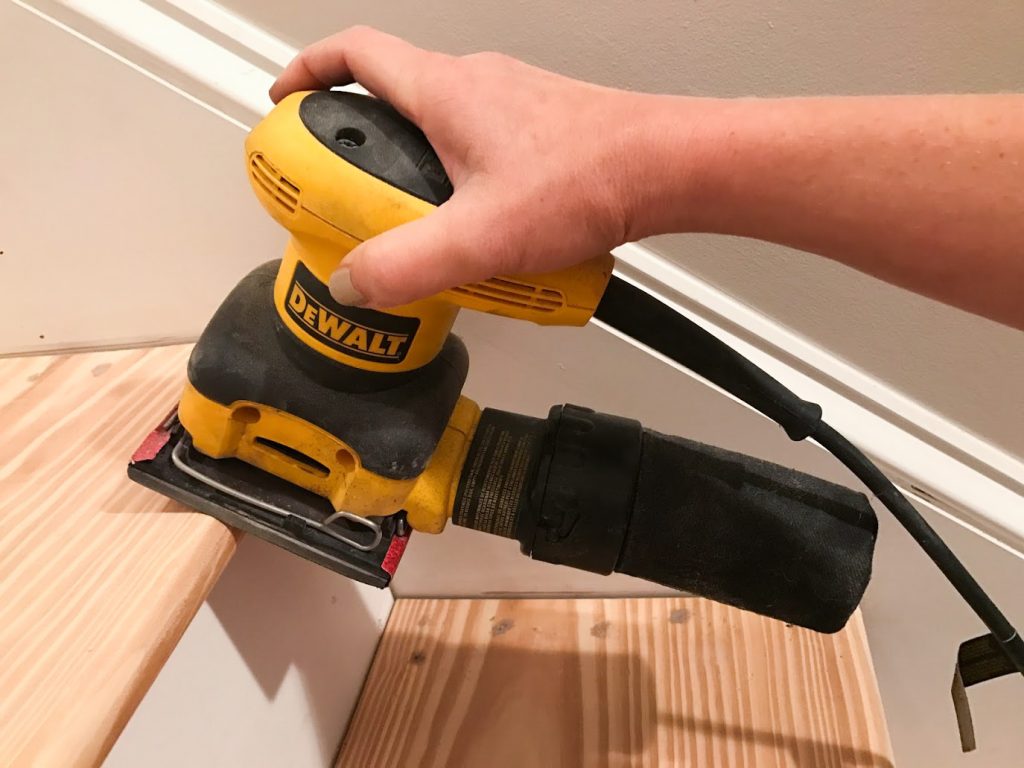
After filling in all the nail holes, I thoroughly sanded each step with 120 grit sandpaper using this relatively inexpensive electric sander (I’ve linked the new version, so it looks a bit different).
Then I went over them again with 220 grit sandpaper using the electric sander. The last round of sanding goes pretty quickly, and the wood will feel very smooth and ready for stain by the time this step is complete. If you’re tackling this project on your own, remember that it’s important to go with the grain to avoid unnatural looking sanding marks that may show through the stain (I’m sure there’s a technical term for this, but I’m not sure what the correct term is…sorry!).
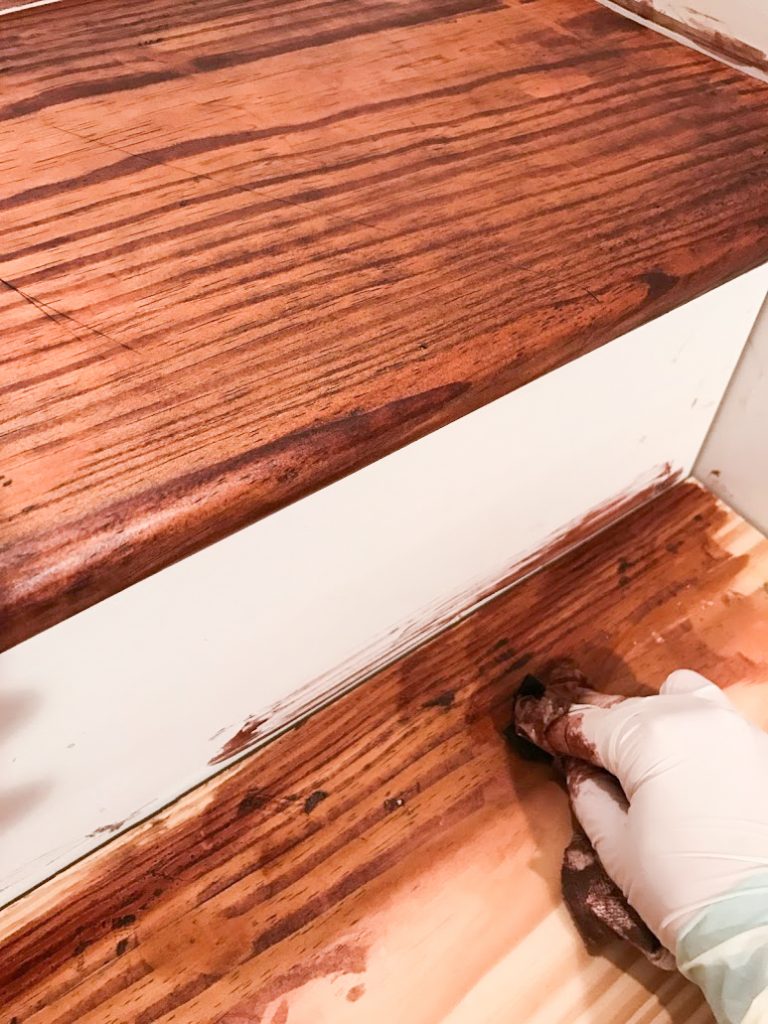
I had some deep cuts in some of my steps, which I’m guessing was from the carpet installers cutting carpet right on the wood, but it didn’t really bother me as I was expecting some distressing.
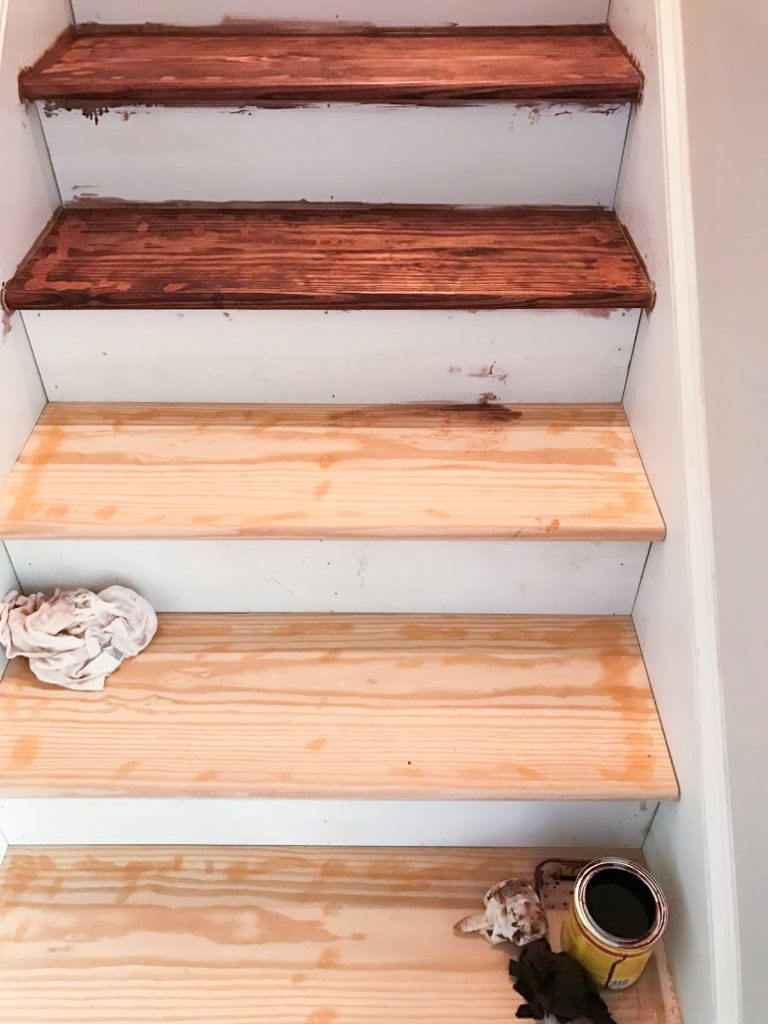
This is a good pic showing the annoying areas where I used wood filler for the nail holes, and how the stain didn’t really absorb over the filler properly.
After all my sanding, I made sure I vacuumed the stairs extremely well, and then wiped them down using a damp cloth to remove allll the dust (make sure your stairs are completely dry before the next step). I tried to keep the area as clean as possible all along by vacuuming frequently, as the sanding creates a ton of dust that will get all over your house.
Speaking of sanding dust, make sure you wear a mask to avoid getting it in your lungs. Safety glasses are also a good idea, but admittedly I skipped the glasses (oops).
Next, I was ready for stain. This is when the fun really started and I could start to see the vision come to life.
I applied two coats of this type of MinWax stain (waiting 24 hours between coats) using a random rag I had grabbed out of our garage ‘rag bin,’ which consists of socks or old t-shirts that are stained or have holes, old towels, etc. A little bit of stain goes a long way, so basically I just dipped a bit of the rag in the can of stain, and then worked it into the wood going with the grain.
It’s important to not use too much stain, as it won’t dry and just sort of sits on the wood. I only bought a quart of stain and had plenty leftover.
**IMPORTANT NOTE**
Be sure to dispose of your stain soaked rags properly, as they can spontaneously combust if they get too warm sitting in a trash can, or pile of other rags, etc. I’ve seen this happen to others who have almost lost their homes from the unexpected fire. I have my own method of disposal that involves a container of water, but please research the correct method to ensure the safety of your home.:)
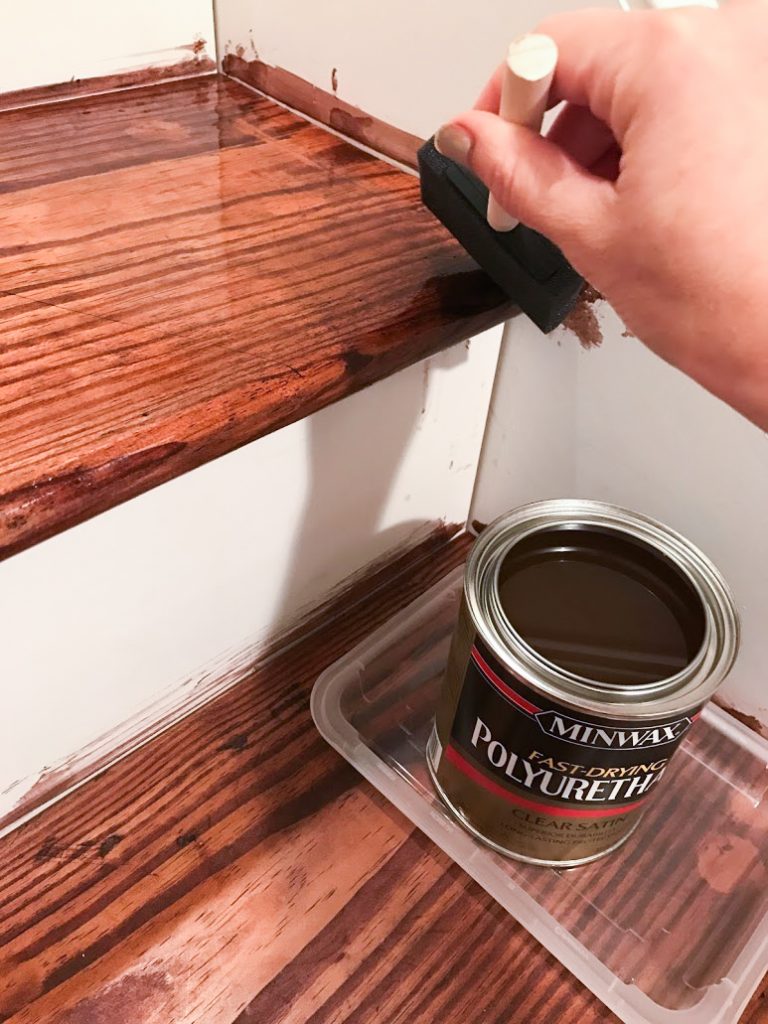
First of Three Coats of Polyurethane
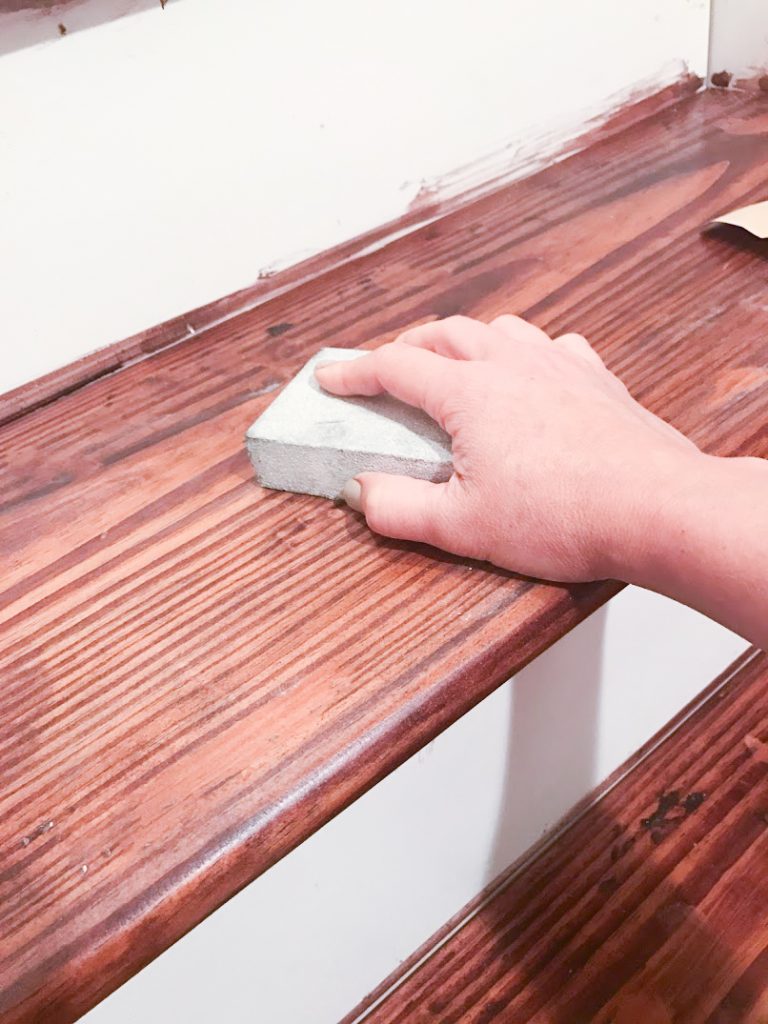
Light Sanding Between Polyurethane Coats
The next step was also extremely satisfying, and that was the application of the polyurethane. I opted for this Satin Finish MinWax polyurethane, and I applied three coats of it to be sure I had a durable finish using with those cheap little paint sponges that are less than a dollar at home depot or lowes. This step goes by really quickly (each coat took maybe an hour at most to apply), but since I had to wait 24 hours before I could do a light sanding after the first and second coat, the three coats of course took three days to complete.
I used a fine grit sanding sponge (like this one) to complete the light sanding by hand. This also did not take very long, since you’re just going over the surface lightly to sort of create some teeth for the polyurethane to grab onto.
Of course I vacuumed and wiped down each step with a damp cloth to remove sanding dust and the occasional stray dog or cat hair, then let them dry completely before applying the next coat of polyurethane.
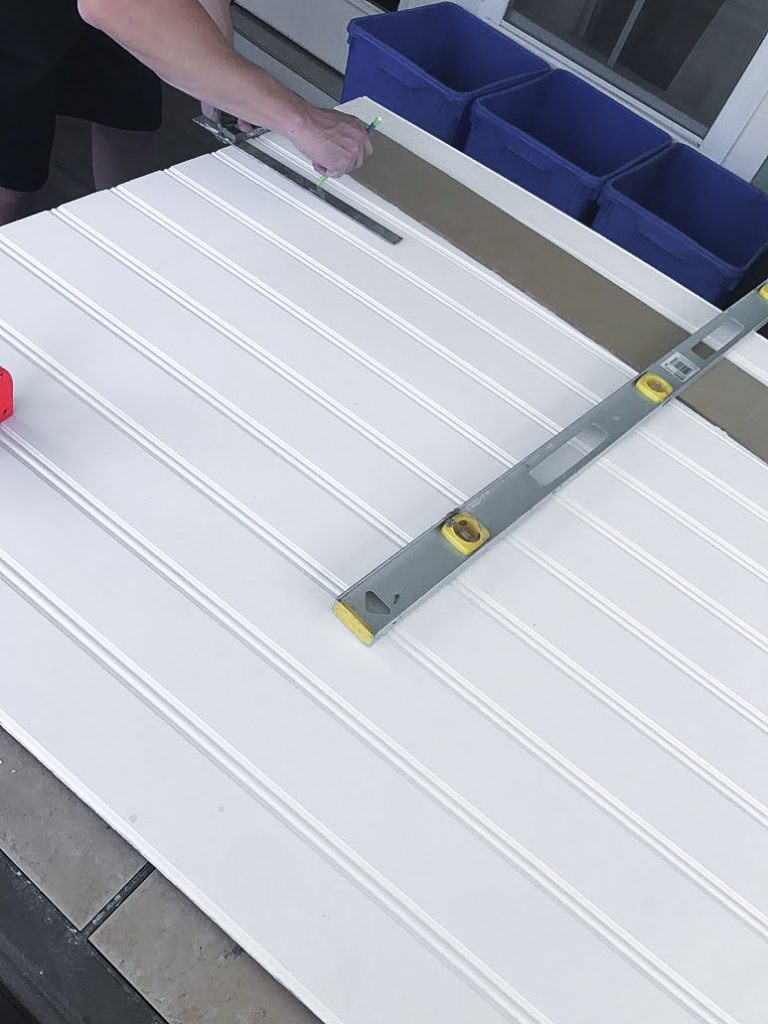
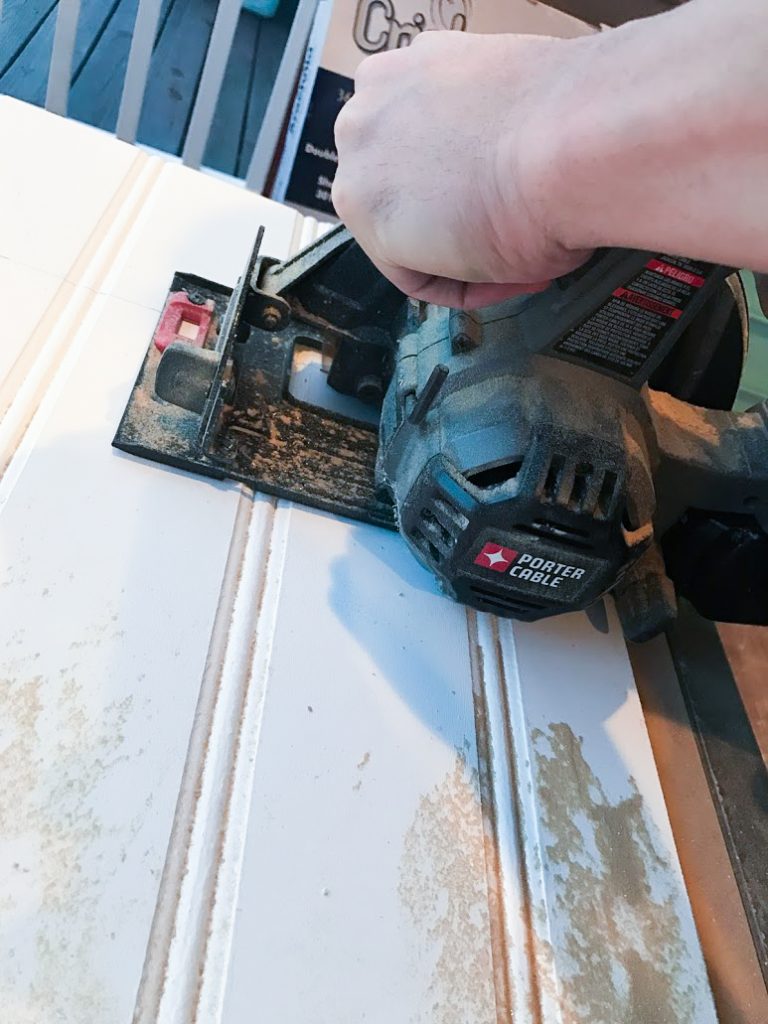
I decided to cover the old risers with this type of bead board for a more custom look, and to tie in with a few other bead board finishes that we’ve added to our home. This is when we, unsurprisingly, learned that our stairs are not built completely level or square, which unfortunately is pretty common in a lot of homes. This just made cutting our risers a little more interesting. We only had to purchase one sheet of bead board which is around $30, as we had some left over from a hallway shelving project. I can’t remember if we even needed the left over bead board, as I think maybe the one sheet was enough, but I’m not positive. =\
We would have loved to have a table saw handy to rip these bead board strips, but unfortunately we don’t own one, so we made due with our little circular saw. Michael just went extremely slowly and did a pretty solid job maintaining straight cuts.
It’s tempting to cut the risers all the same dimensions, but we found each step was a slightly different height, so we measured for each riser individually. I found it critical to number each step and wrote the corresponding number on the back of the newly cut bead board riser.
A few times my measurements would be slightly off (from trying to get the snuggest fit possible), but the good news was there was usually another spot where that particular strip of bead board would fit perfectly, so we could still use that piece without re-cutting it.
Something else to consider is making sure you cut from your main panel of bead board in a way that all of your beads (or grooves) will line up vertically when looking at your steps.

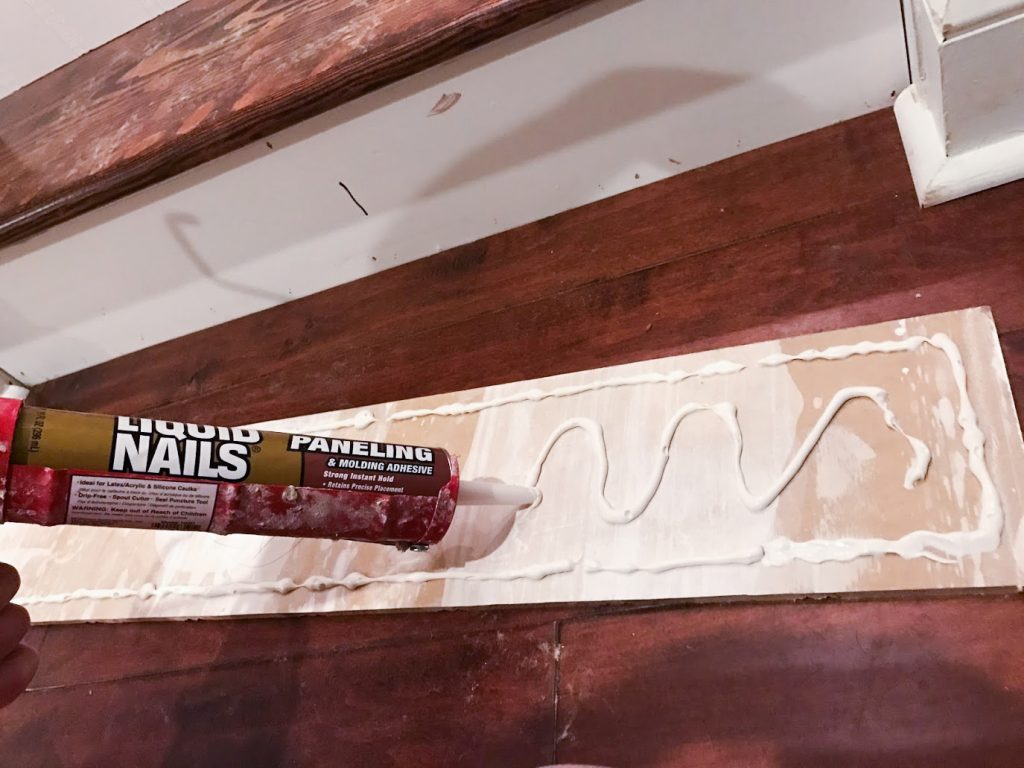
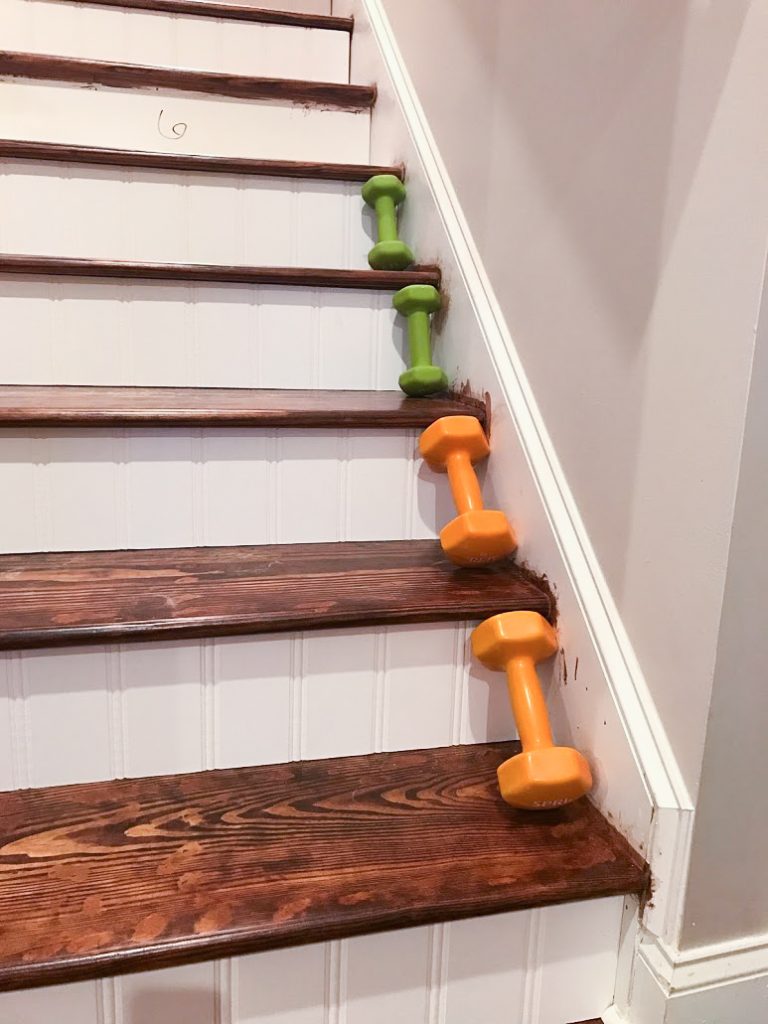
These dumbbells came in handy while waiting for the adhesive to dry:)
After all risers were cut and I was satisfied with the way they fit, I began gluing them to the existing risers with this paneling adhesive. I believe I used three tubes of adhesive to complete this step. I didn’t want to use any nails and potentially ruin the perfect bead board surface, and thankfully I found the adhesive was sufficient on its own…..those suckers ain’t moving!
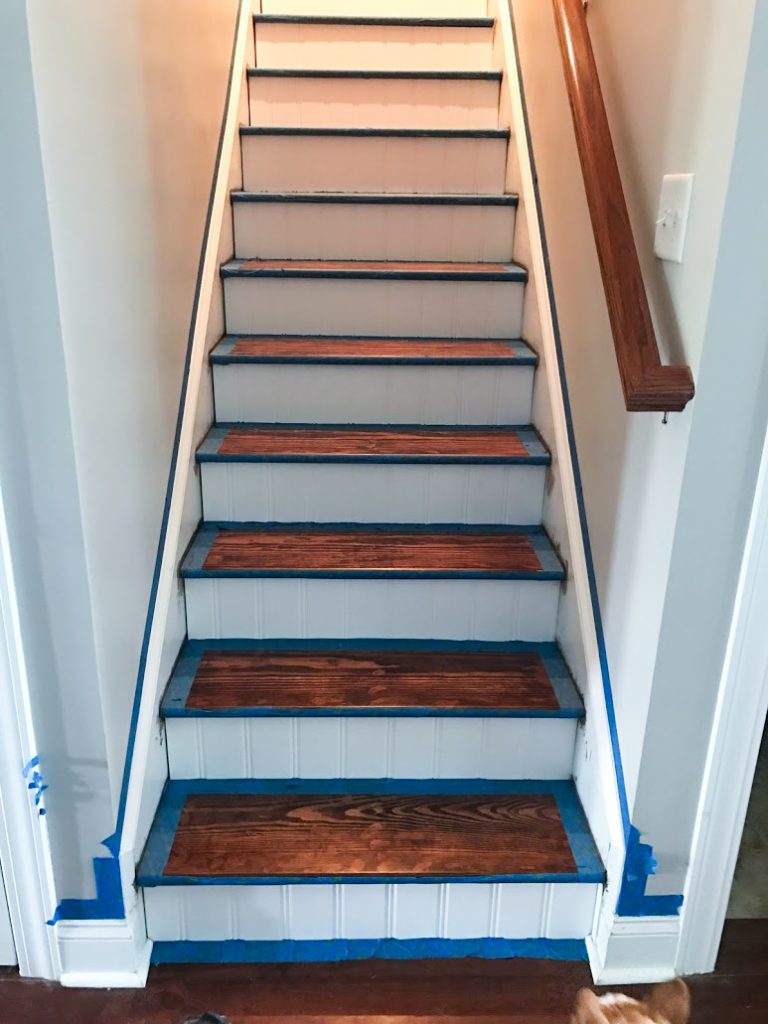
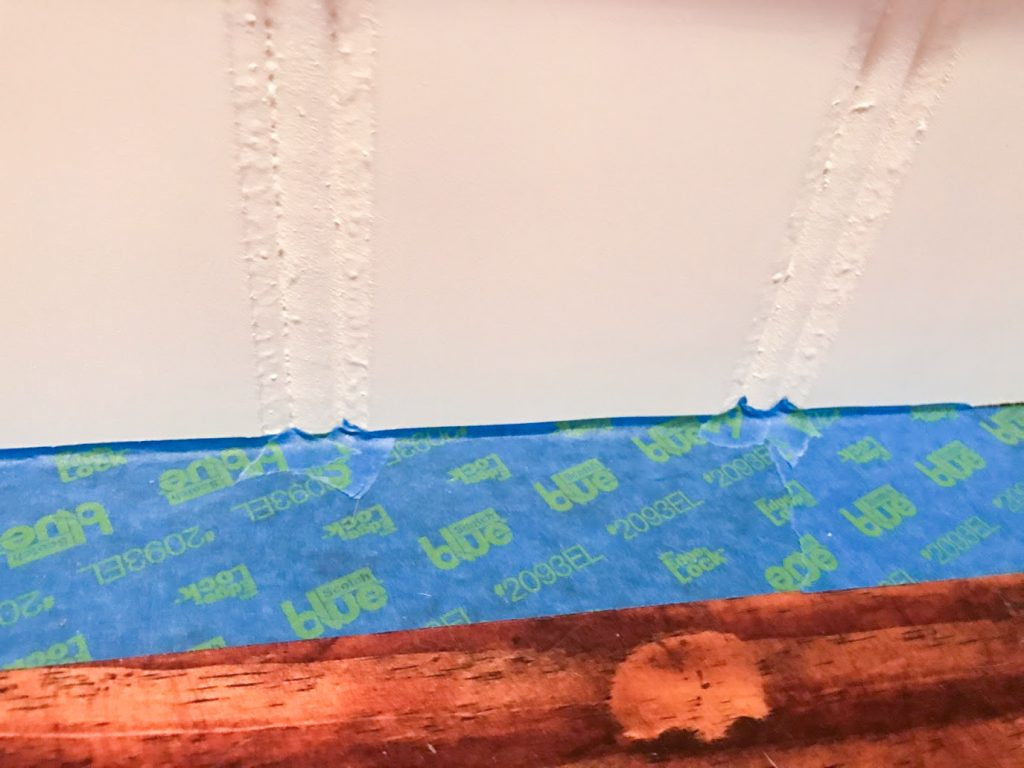
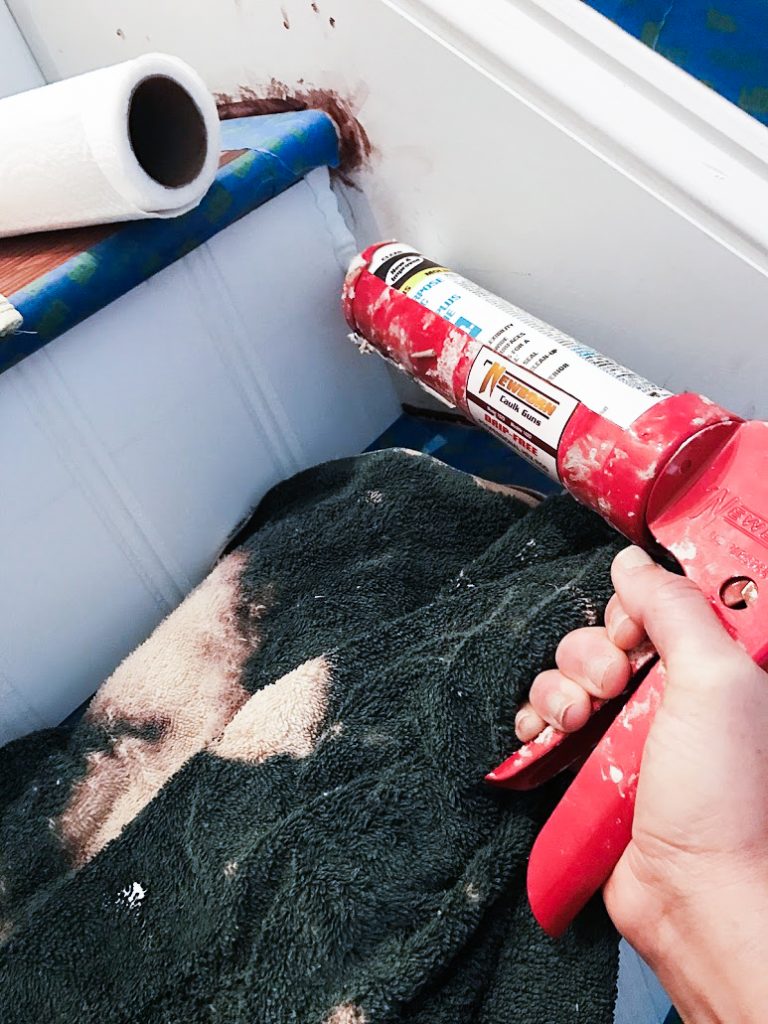
Then came paint and a little caulk along the outer edges of the bead board and stair treads.
Prior to securing the bead board, I wasn’t sure if I would need to use some type of moulding along the bottom edge of the bead board. I wanted to avoid adding it, if possible, as I figured any caulking or extra groves along that surface would just be an invitation for dirt and fur to settle. Ultimately, I was satisfied with the fit of the bead board, so I opted not to add any additional moulding. Had I known this ahead of time, I would have painted each strip of bead board prior to gluing them on, as you can see the process of taping off the bead board was a little bit of a headache.
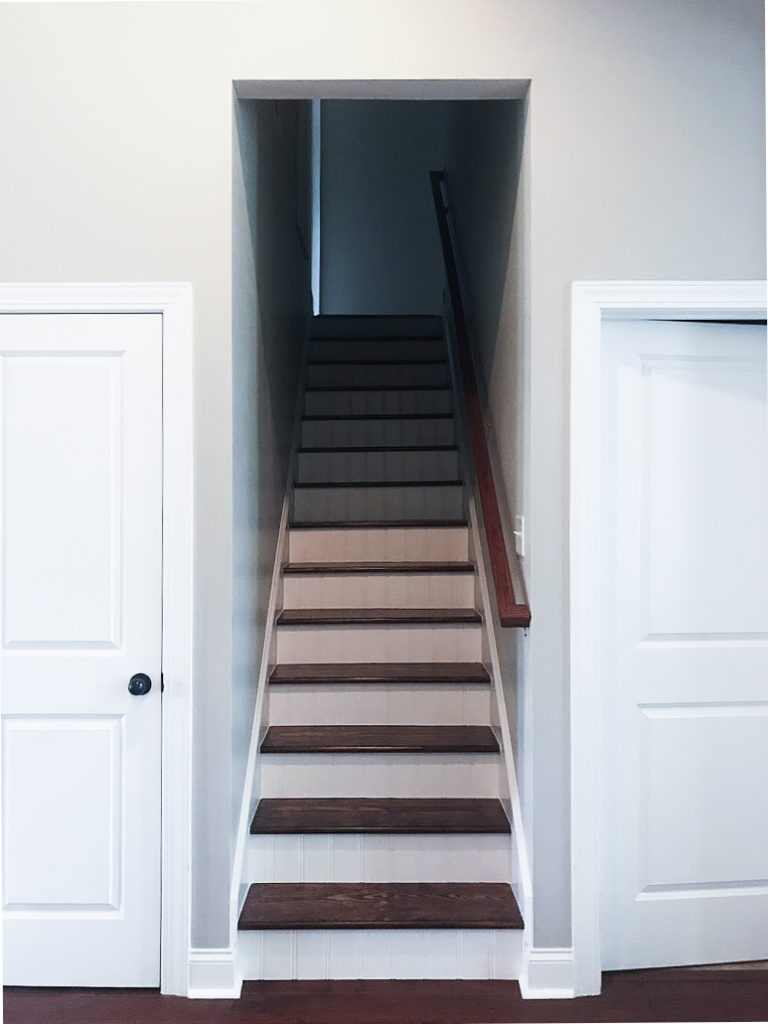
Voila!!

Just noticed Gatsby’s ears photo-bombed this pic;)
It took us about two weeks total working whenever we had free time, and approximately $70 in materials (we had to purchase stain, polyurethane, a few paint sponges, one sheet of bead board, and adhesive) and I am absolutely thrilled with the results! The only thing Michael helped me with was cutting the bead board risers, otherwise I did everything else myself. The carpet removal was a bit labor intensive, but it was obviously totally do-able for me (even though I shouldn’t be doing this sort of thing with my back issues…oops! =\).
I don’t routinely eat off of floors lol, but if I had to, I could totally eat off these stairs.;) Soooooo sooo happy that the nasty, dust-mite infested carpet is long gone!
Let me know what you all think of my DIY budget stair makeover! And if you think this is a helpful post, please feel free to pin it for your friends;)
Pin it!:)
If any of you decide to tackle this project, I would love to hear about it! Just comment below:)
Happy DIYing!


They turned out amazing! Makes me want to do mine, but i don’t think I’ll be as lucky with what I find underneath, lol.
xo, Cara
https://neverskipbrunch.com
lol I was sure I’d find particle board (like…why on earth would anyone cover hardwood with carpet these days?), so I was shocked! If you want to take a little peek, you can always staple the carpet back down afterward:)
Ok if U find particle board then what?
I explained what I would have done in one of the first few paragraphs:) “So while Michael was at work one day, I randomly decided to see what was actually under that carpet. My way of thinking was that if there was just some type of particle board under there, I would just buy some planks of wood, cut them down to the proper width, and then sand, stain, and slap a couple coats of poly on them. Too easy;)”
Just fyi for any future projects you use the wood filler after you stain. Once all the Staining is done you fill the holes And lightly sand prior to adding your polYUrethane. I only know this as my dad is Amazing at woodworking projects and taught Me things While growing up and still helps me with projects.
The stairs look amazing!
Thank you so much for this tip, Mary! Dad’s always know best!;)
There are also wood fillers that contain wood, not plastic. It makes them stainable to have wood in the product. Nice work, though.
omg you did such a great job babe! i’m not a fan of carpet either so i can totally see why you wanted a makeover. your pup is adorable btw! xx
Thanks so much, Sharon! I love including the pups whenever I can;)
Your stairs look amazing! I totally need to that in my condo 🙂
-xo, Azanique | http://www.lotsofsass.com
Please let me know if you do!! I’d love to see your before/after pics:)
Wow this is such an awesome DIY makeover!! Love the stain and finish that you used!
Kileen
cute & little
Thanks babe!:) It matched our existing floors pretty well….I was kind of impressed with myself lol;)
Oh wow, looks amazing! I love the look of hardwood stairs too, it looks really chic!
Thanks so much Deborah!! Waaay easier to keep clean now too;)
WOW this before and after is amazing!! I cannot get over how much better it looks now! It’s crazy how a little staining and paint can make such a big difference.
Thanks Kimmie!! Soooooo much better now;)
that’s such an incredible transformation girl! I love a good Diy!
Thank you so much! I love a good DIY too…particularly when it’s this budget friendly;)
OMG! THey turned out so, so good!!! I love the stain too!
Thank you, Adriana!! So glad I finally decided to go for it;)
You are a badass! I can’t believe you completed this project! Too good.
Haha thanks so much babe! It was well worth the effort;)
This is amazing! I love it!
Thanks Whit!!! XX
Your steps look amazing, clean and stylish. You have inspired my to try this for the horrible carpet stairs in the middle of my main floor. Come Oct. 2020 i will no longer be working for a few months so this is the project i want to move to the toP Of my long list of home improvements. Thanks for the pics. That helps me see that i can do this.
It was honestly one of the easier projects I’ve done bc most of the work is mindless (throw some ear buds in with a good true crime podcast, and off you go;)). So glad you’ve come across my post so you can tackle your stairs too…such a seemingly insignificant change, but it really does have a HUGE impact. Send me pics when your done!!
So ….when you were staining and applying polyurathane..how did you get back upstairs? I am trying to figure out how to do my stairs without stranding myself in the basement until they are dry!
Hey Julie! Great question! So a couple things you could do…the option I would choose would be to do every other step, allow them to dry, then finish the remaining steps, and repeat with each stage of the process. The second option would be to start at the bottom and work your way up, but this would be a bit uncomfortable working from that angle. In my case, we only have the one room upstairs, so it worked out well and wasn’t a big deal to not be able to go up there for an hour or two. Also keep in mind that the drying times aren’t too long, but you definitely don’t want to strand yourself in your basement!;). Let me know how it goes!!
This was an amazing home diy tip and trick to refresh the home staircase!
https://www.bunnybernice.com/single-post/2018/06/19/Koalas-Flippable-Memory-Foam-Pillow-Review
Thanks so much Bernice!!
This is such an awesome project. You go girl.
Thanks babe!!
Hi!beautiful results! Quick question…did you stop at the landing or did you change your carpet upstairs? I want to do my stairs but not sure what to do with the carpeted LANDINg. Thank you!
Great question! And so sorry for the delay in responding….been busy with some quarantine DIY projects so I haven’t had much laptop time=\. We had carpet at the top of the landing, but I removed it and cut the carpet at the doorway to our bonus room (aka the FROG, which is still carpeted) and then I used some leftover hardwood flooring to replace the carpet that I ripped off the landing. If that’s not an option for you, then you could just carefully unstaple/pull away the carpet that wraps around the lip of the landing at the top step, remove the part of the carpet that’s attached to the riser (they will probably already be cut in two separate pieces, so easy to preserve the carpet on the landing), and then when you’re all finished with the stair project part, re-tuck and staple the landing carpet under that lip at the top of the stairs. Gosh I hope this makes sense! You can always email me at [email protected] to chat further;). Good luck! It’s been years now and I haven’t touched my stairs and sooooooo happy I got rid of that carpet! Just be careful in socks;)
So glad this was mentioned! We aren’t ready to take up the carpet on our landing but i am beyind ready to redo our stairs. I was planning on doing the edge of the carpet like you mentioned in your comment, and now I feel like I have the wizards stamp of approval 😂 so I’m going for IT!
Yay!! You got this!! Please let me know how it goes!!
So far so good!! Using your article as my manual throughout this process haha. Day 3 and I’ve done the first ruff sanding and I’m already loving them!
It has given me very good ideas to make a repair on the stairs, cheap and very nice
That made my day! I’m all about budget friendly fixes;)
Looks fantastic and like you had a good time working out that “I hate this carpet” energy. I’m starting the same project at our home. I’m curious, though. We have an old squishy english bulldog. Do your furkids seems to have traction issues without the carpet there to help them?
That’s a great question! Our frenchies can make it up and down quite easily if they want, but we actually have to carry their big butts bc (like most frenchies) they all have intervertebral disc disease=\. You could always do a runner over it if it proved to be too slippery….I’m guessing your big squish probably weighs a bit more than our frenchies, so carrying up and down probably isn’t ideal;)
when you got stain on the white paint did you use anything before you repainted the white walls that got stain on them and did the stain bleed through the white ever?
Great question, Jill! No, I did not have to use anything before slapping some white paint on it, and years later the stain hasn’t bled through at all:)
I have painted stairs too. They can be slippery, So I bought a spray can of gritty no slip stuff. taped off carefully and ran about 2″ strip along front edge of each tread. it’s transparent and unobtrusive. Good for FAMILIEs with several medicare-age people.
This was a year ago. Will probably need to renew in another YEAR or two.
i hear you saying you can buy little non slip carpet strips, clear adhesive strips, etc. Yes you sure can but they dont work – the are not non-slip. i tried them all.
Good to know about the spray working so well!:) I don’t recall recommending clear adhesive strips, or little carpet strips. I did suggest a carpet runner, which would essentially be the same as having fully carpeted stairs. And it’s true….even fully carpeted stairs can be slippery. Gotta hang onto those railings!;)
Great makeover! I have been wanting to do something like this for a while but can’t figure out how to keep everyone off the stairs for the length of the project. Did you just stay on one floor for the duration? I thought of doing every other step one day and the others the next, which could work for the humans in my house, but I have two LABRADORswho wouldn’t get that lol. Any suggestions??
I completely understand your dilemma;) I did start off doing every other stair, but the stain and poly actually dry pretty quickly so I gave up on that and just blocked them off for a few hours until they dried (I can’t recall the exact drying times, but it wasn’t too terribly long). I think if you do every other stair, and then just gate off the stairs for the dogs until everything dries (unless they’re trained to step on every other stair haha;)) you should be able to tackle your project successfully.:) Let me know how it goes!!
I came here for this exact question, haha. I have 2 cats and a dog and i was like how the heck am i supposed to dIY my stairs similarly and keeps all the pets off of them. i was about to have just plain old wood stairs with nothing on them. but im happy to hear it turned out ok by allowing a dry time initially and then being ok with them accessing the stairs.
Haha these little monsters can definitely make projects a bit more challenging, but I promise this one is doable even with all the extra feet running around;)
These stairs looks great. I just took the carpet off my stairs ad thE wood looks good – excePt they have a very hollow echo shound when we step on them now, THey aren;t insulated underneath so I tyhink I need to insulate them and run a flat piece of plywood aong the bottom (accessible in our water heater closet). did you run into this issue? Our sound awful so I need to do something. Looking for any tips if yours did too.
Thanks!
So sorry, I didn’t run into this issue.=\ Admittedly, I’m not really sure what is supposed to be a normal sound for wood stairs though (?) ¯\_(ツ)_/¯ We’re always barefoot going up them, so I suppose I’ve never paid much attention to what they sound like. I feel like a hollow sound is pretty normal just based on my life experience walking up wood steps, but I could definitely be wrong. Sorry I can’t be of any help in this situation!=\
Absolutely great!
This post is exactly what i was looking for. When we built our home in 97, the stairs were carpeted. That carpet was replaced once. I know the steps will be square and not rounded like prettier stair treads but im looking to pull up the carpet and do something with the wood underneath. I eNjoy a diy project so have found this information very helpful. Wish me luck and thanks for sharing and providing so much detail!
I hope they turn out beautifully! Almost anything is better than vacuuming carpeted stairs!;)
We ha tho exa same stairS, and had difficulty getting a stain that worked well with the yellOw wood. We ended up going with JAcobean. It is really dark. We have another set of stairs to go. What color of stain did you use?
Thanks
It was “early american”….the closest I could get to match my existing floors=\
I peaked behind our carpet and thEre are Huge gaps From the wall and the risers. Not sure hoW I’d be able to fix it on a budget. But really want the carpet off the stairs. So once i figure That It’s on!
Oh no! Can you put some trim around the edges, caulk, and then paint to match the walls?
Hello love. I was wondering what color stain you chose ? I can’t click on the link.
So sorry! Not sure what happened to the link, but I just went out to the garage to see if I still have the can, and indeed I do! The color is called “early american”….it seemed like the closest match to our existing floors, otherwise it probably would not have been my first choice. Hope that helps!
I started this project and I found thr needle nose pliers to be to time consuming. I watched a video and it said to use a horizontal pliers. It went A LOT faster and easier on the hands!! Love your new stairs!
Glad you found a solution that worked better for you!:)