So before I decided to start a blog last month, I stumbled upon an intriguing DIY mirror project here at the Lettered Cottage’s blog while I was googling around looking for a large mirror to fill a recessed area in our foyer. It would have been much easier to run to Homegoods and fill the space with some art work, but I try to incorporate mirrored pieces whenever I can, as the main living area of our house is somewhat lacking in the natural light department, unfortunately.
Anyway, it looked doable, so I decided to go for it. All the while my husband cringed at the thought of me taking on yet another DIY project, as it usually requires a bit of help from him. Needless to say, he does not share my passion for home improvement and always thinks everything looks just fine as is. Oddly enough, he’s usually the first to sort of brag about how great my our projects turn out, but I digress….;)
If I had known I was going to start a blog, I would have documented the process more thoroughly, so once again, here is the link to the tutorial from The Lettered Cottage that I used as my guide to recreate the $700 Pottery Barn Eagan Mirror.
If you’ve had a chance now to read through their tutorial, below are some tweaks we made that I feel worked well for us.
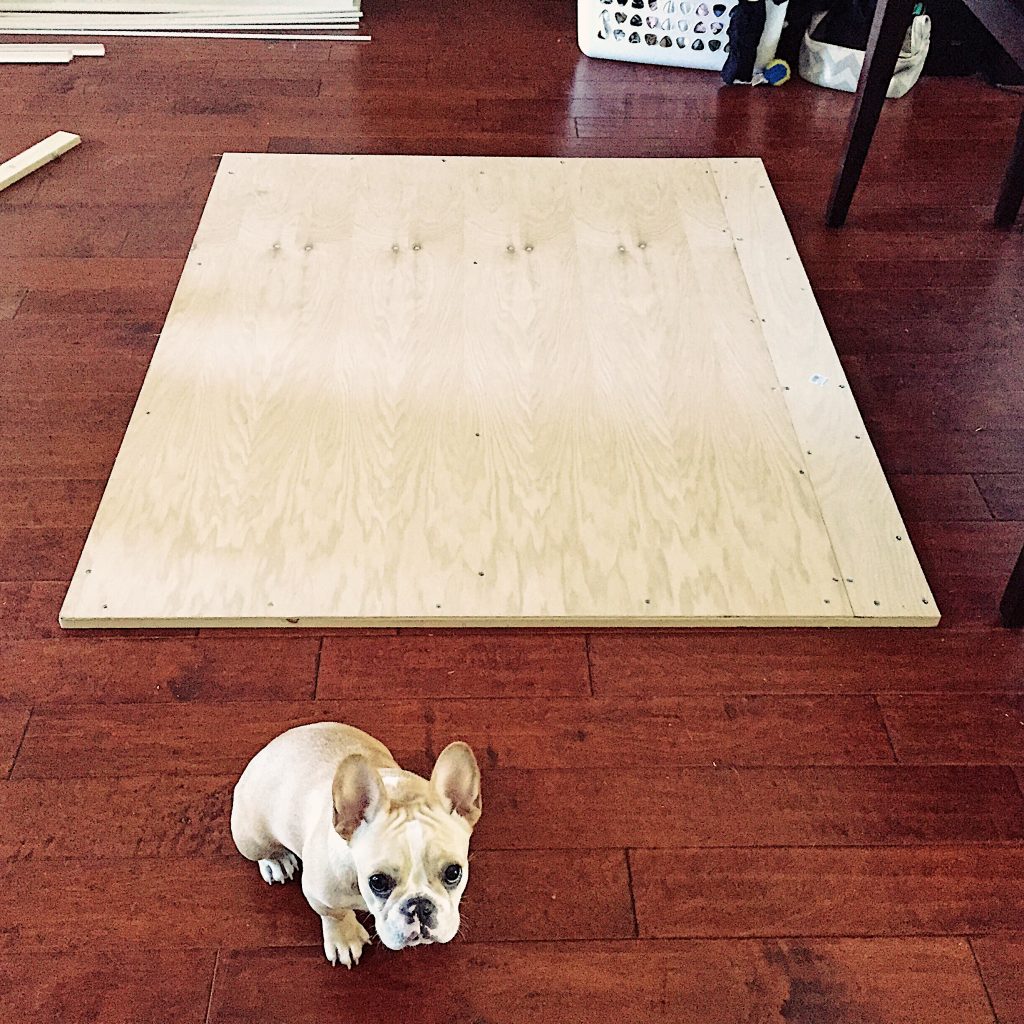
The first tweak we made was not using particle board, as it’s somewhat heavy and we knew our mirror was going to be substantially larger and mounted on the wall. We instead used 1/4 inch plywood like this, which is pretty flexible since it’s so thin, so we reinforced it with some left over 1″x4″s we had from a master bathroom project.
The wood we used to reinforce the 1/4 inch plywood, also served a second purpose of allowing us a sturdy way to connect an additional strip of 1/4 inch plywood to the larger sheet, since they don’t sell sheets of plywood large enough for the dimensions we needed. Gracie is happy to show you what the foundation of the project looked like before all the real fun started (see below). You can also see the type of wood we used to reinforce the entire sheet of plywood laying on the floor to the left.
When reinforcing the very thin quarter inch plywood sheet, we ran the 1″x 4″s (thjs was the leftover wood we had from the master bath project) along the perimeter of the entire sheet (securing it with wood screws), and an additional 1″x4″ the length of the seam where we added the extension of plywood (you can see where we put screws on each side of the seam through to the 1×4 attached underneath). Then we ran one additional piece horizontally across the center for additional support, as you definitely don’t want too much flexion since a bunch of glass mirrors will be glued to it.
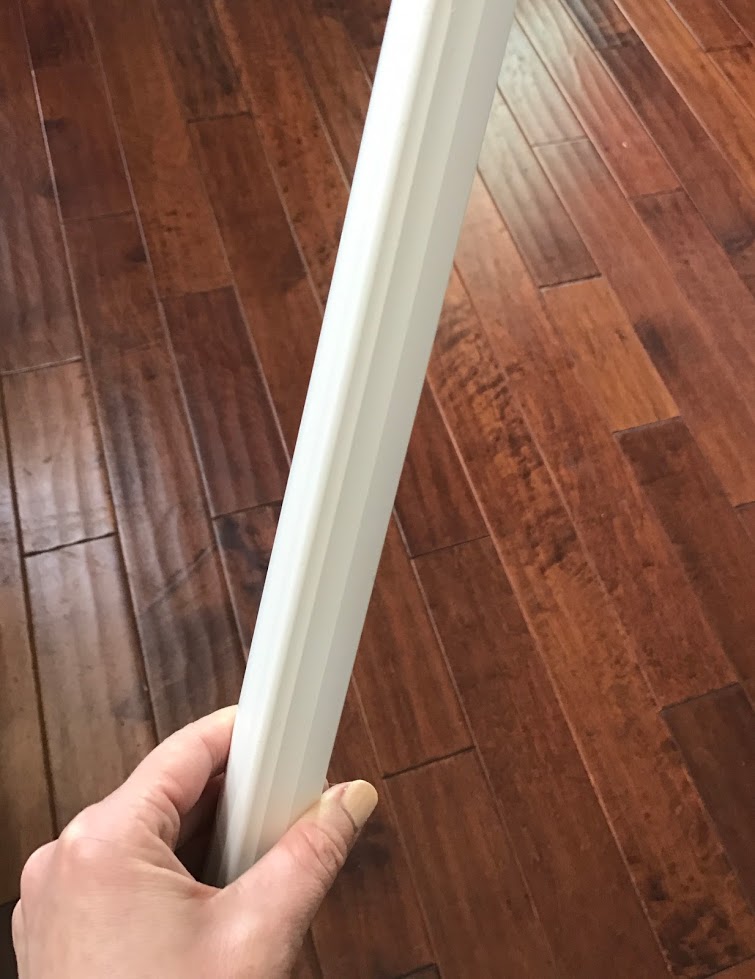
The second tweak we made was using a more decorative trim to frame out the perimeter. We still wanted something clean and simple looking, but a bit more substantial than the plain strips used between the mirror tiles. We went with these corner trim pieces (see photos below). Also note, we went with the faux wood trim pieces for the entire project, as they’re cheaper than real wood, and also they’re super light weight compared to real wood.

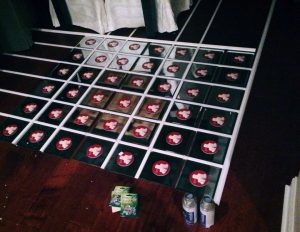
The other tweak we made came about as a result of my disdain for math, and actually comes into play before the above construction begins. Instead of doing the math described in the brilliant tutorial I used, I ended up laying everything out to figure out how big my plywood base needed to be. This was much easier for me, and I was afraid even if I calculated the measurements perfectly, things would still end up being slightly off due to there being so many elements and saw cuts factored in the measurements. The below image shows a rough layout (I was excited once we got all the materials and wanted to get a feel for how big it would look), but I ended up doing this again on the plywood pieces to finalize the dimensions. I hope that makes sense.
Here are the composite wood strips I used in between the mirrors, and here are the decorative plastic rosettes that are used to conceal where the wood joints are in between the mirrors.
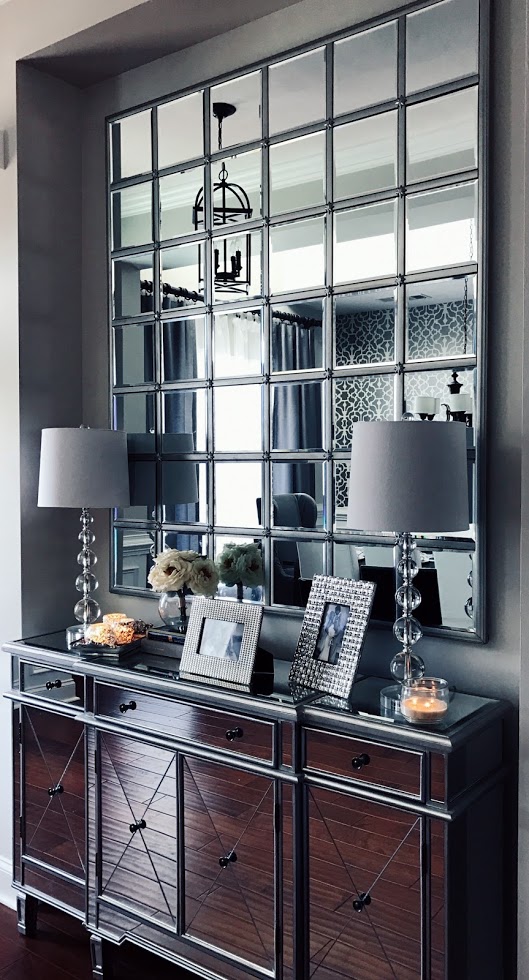
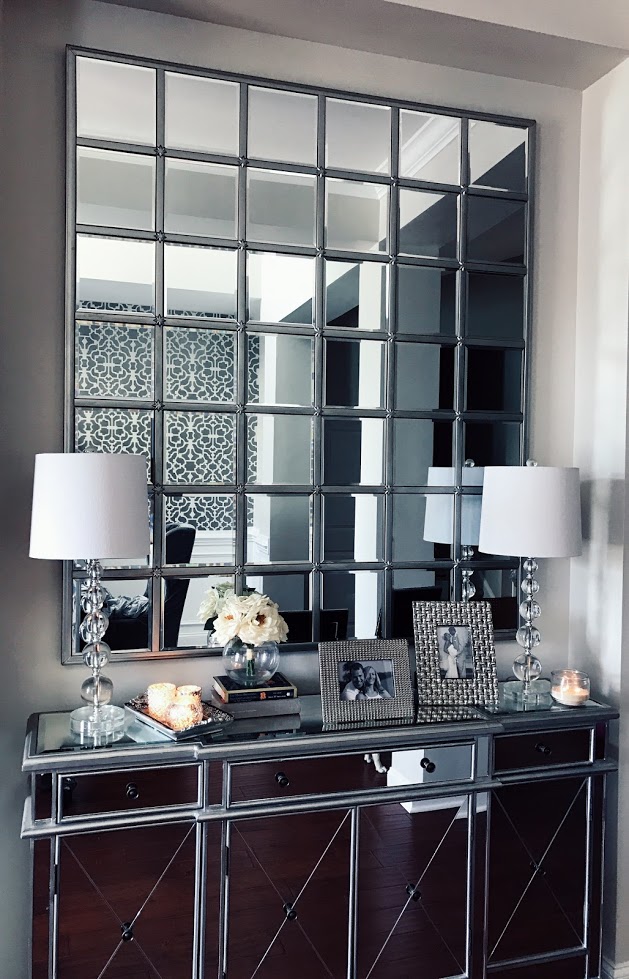
The fourth tweak we made was that I did not paint anything until all the trim pieces were glued to the plywood base. I didn’t see the benefit of pre-painting the strips of wood ahead of time since they were going to get cut and roughed up a bit during the construction; which brings me to the fifth tweak: we glued the wood strips (the ones that separate the mirrors) to the plywood base, rather than nailing them, as I wanted a flawless finish and didn’t want to have to worry about filling in tons of nail heads. The nail heads are probably less noticeable when the mirror is painted oil rubbed bronze like the original Pottery Barn Mirror (this is THE BEST paint if you want that finish), but I painted mine with this silver Rustoleum spray paint to match the console table the mirror was going to be hung above. Sidenote: I absolutely LOVE this spray paint. I’ve used it for so many projects that required a metallic finish because it goes on so smoothly and the finish is flawless.
Also, I made sure everything was laid out, including the mirrors, and fit perfectly before I started my gluing. The hobby lobby mirrors are all supposed to measure at 8″x 8″, but you’ll quickly learn there is some slight variation there. Remember to wait to start gluing on your mirrors until after you’ve spray painted all the wood. Also, don’t make the same mistake I made by not removing all the stickers off the mirrors with goo gone before you glue them onto the plywood with the mirror adhesive. I learned the hard way that the goo gone will ruin your perfect paint finish; so again, while it’s exciting to get those mirrors on and finish the last step of this project, take the time to get those stickers off before you start gluing the mirrors on.
The last change we made was we used safety/heavy duty flush mounting brackets like these to be certain that this giant creation will never come crashing down on anyone. If you’re planning to mount your mirror, I recommend figuring out exactly where you want your mirror hung and installing the mounting hardware before you glue on your mirrors. This sucker gets very heavy once those mirrors are on, and the safety mounting brackets require some precise measurements to ensure both components of the brackets match up perfectly when you go to hang your mirror.
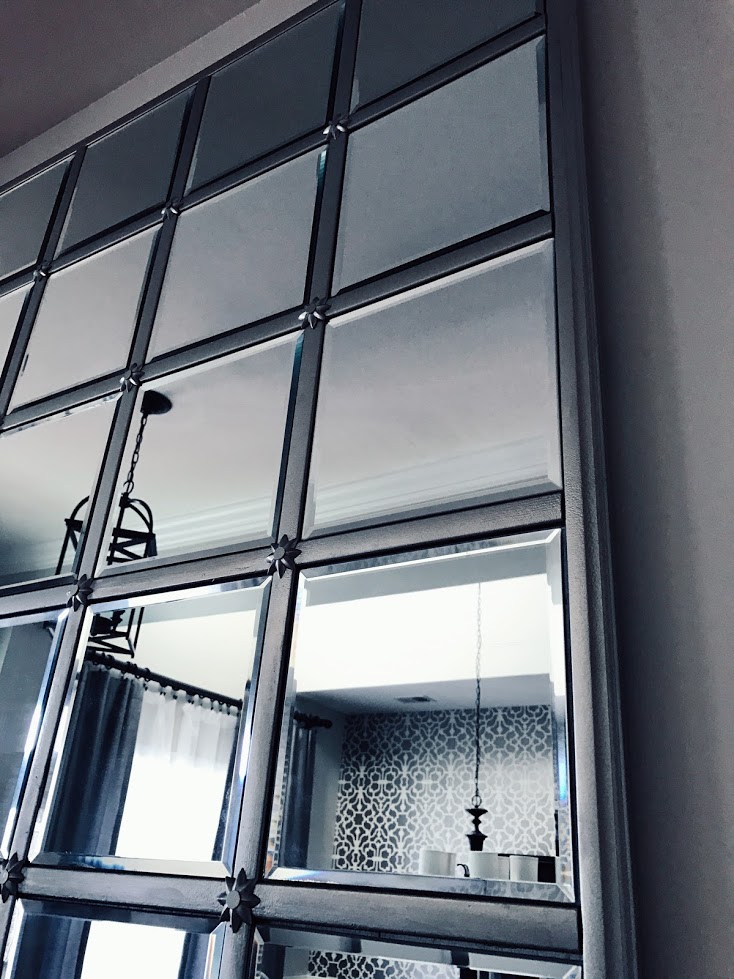
Other than the above minor changes, we followed The Lettered Cottage’s Tutorial and are extremely happy with the results, even though the Goo Gone kind of ruined my flawless paint finish….womp womp 🙁 It’s made such a huge improvement to our entry way, and it truly wasn’t difficult to make. The most challenging part was mounting it since ours was so large, but the two of us managed pretty well.
 Let me know what you all think! And if you tackle this project on your own, I’d love to see your awesome results:)
Happy DIYing!;)

It looks stunning Bree, Oh my word. We’re not worthy, we’re not worthy. Happy blogging and I can’t wait to see what you do next.
Thank you so much Michelle!! I wish I could say I thought the idea up all on my own….basically I’m just pretty okay at following instructions haha;)
I love this! PLEASE PLEASE PLEASE MAKE ME ONE! IM NOT SO GREAT AT DIY!
I promise, Melissa, you can totally do this!! It doesn’t have to be this large…I just needed something to fill a pretty big space.=)
This looks great!
Thanks Heather!
OMG – this is amazing!! I’M CONSTANTLY TRYING TO FIND DIY PROJECTS, CRAIGSLIST RESALES, ETC… FOR POTTERY BARN & RESTORATION HARDWARE. SO INSPIRED TO GO HOME AND DO THIS 🙂
Do it!! And definitely let me know how it goes!! If you have any questions along the way, just holler at me=)
SAME HERE, I AM LOOKING FORWARD TO WHAT YOU DO NEXT.
IT’S JUST THE RIGHT INFO.
Thanks Elina! I have quite a few projects going on now, which is why I haven’t been posting lately…oops!=\
THAT LOOKS FABULOUS! Great job! I would definitely make one of these in my home!
Thanks so much, Katriza!! =)
Hi there 🙂
I am very interested in making this mirror and wanted to know the dimensions of your plywood base prior to attaching the faux wood border. thank you so much!
Hi Christina! I will definitely take some measurements tomorrow and let you know!
Hi again! I’ve just measured and it’s 53.5″ x 62.5″. Keep in mind that I had to combine two pieces of plywood together since the standard sheets of plywood are not wide enough for the space I was trying to fill. The dimensions of the plywood you end up with are also going to depend on what type of trim pieces you use to frame out the entire piece and between all the mirrors. I figured out the plywood dimensions I needed by laying out the mirrors with the trim pieces on the floor first. Hope that makes sense=\ Please reach out if you have any more questions! XX, Bree
Trying to purchase the more decoRative wood for the strips SURROUNDING the mirror and havIng a DIFFICULT time finding the wood. I found the wood to frame IT But not strips. Did you use screen wood? Does the wood strip Have a bevel edge Or just radiOus.
Hi Barbara! I’ve just linked the exact composite trim pieces that I used around the mirrors. Hopefully the link will be clickable once I post this. Just in case, I’ll add the link within the actual blog post as well. Hope that helps!! Good luck!! https://www.lowes.com/pd/Common-1-4-in-x-8-ft-Actual-0-25-in-x-0-75-in-x-8-ft-Crystal-White-Vinyl-Traditional-Lattice-Moulding/50147998
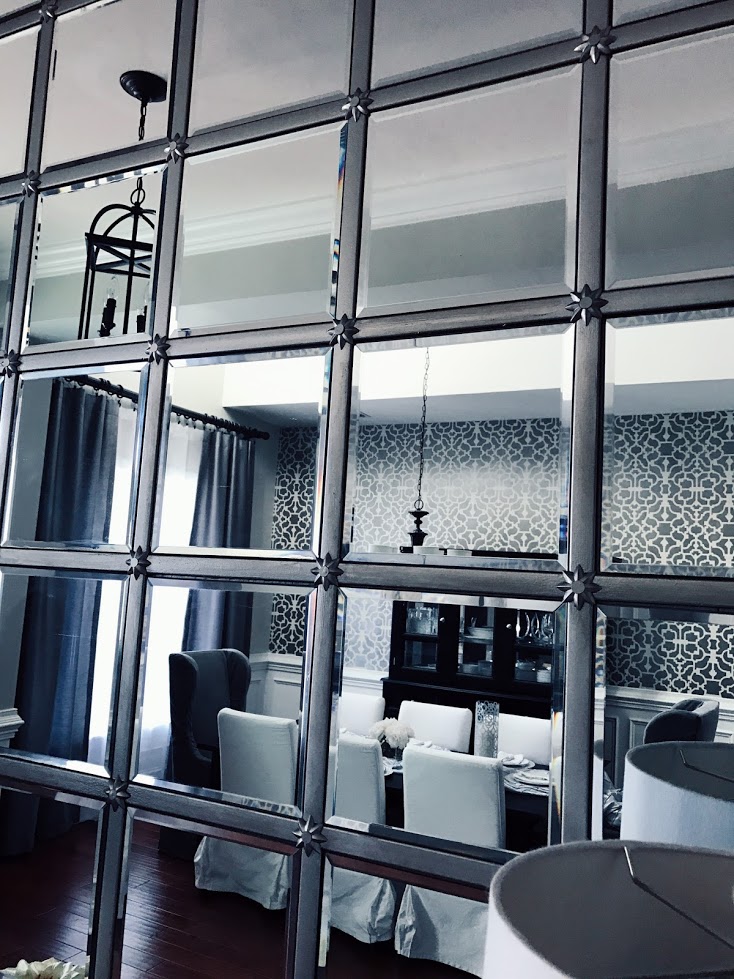
I looove this diy and I’m going for It! One QUESTION- those little star details in between the mirrors, what are they and where did you get Them?
Hi Christine! Thank you so much for pointing out that I forgot to include this detail! I found mine at Lowes, but here is an amazon link to the same thing:) http://bit.ly/35PW3nG
Hi bree amazing job!! this looks even better than pb. One question how many flush mounting brackets did you use to hang this one? I am going for exact same dimes tions and Size.
Hi Ana! That’s a great question, and I just tried to squeeze my big head into the little recessed area where the mirror is hanging to check, and unfortunately I can’t see the brackets=\. I want to say we used 4 (?) but that’s just a guess. How many you use will depend on the weight that each bracket can hold, and the weight of the mirror. I remember that we used more than enough brackets (weight-wise) bc I obviously didn’t want the whole thing to come crashing down. Several years later, it hasn’t moved…thankfully;) Sorry I can’t be of more help!!