When we bought our house back in 2011 it was only 10 months old. The couple who had built it ended up having to move back north due to work, so even though many of the finishes were not what I would’ve chosen, it was the best option on the market at the time. The downside of it being so new was that the ol’ hubbs did not always agree with my many ideas for home improvements. After all, why would we tear up a perfectly good, new kitchen, right? Ugh.
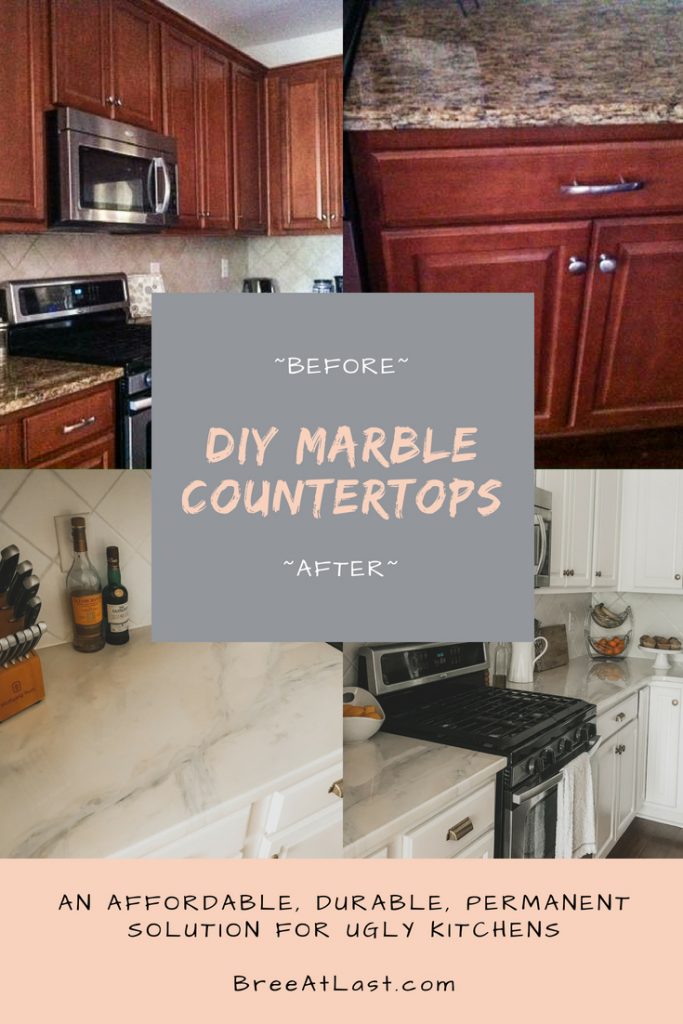
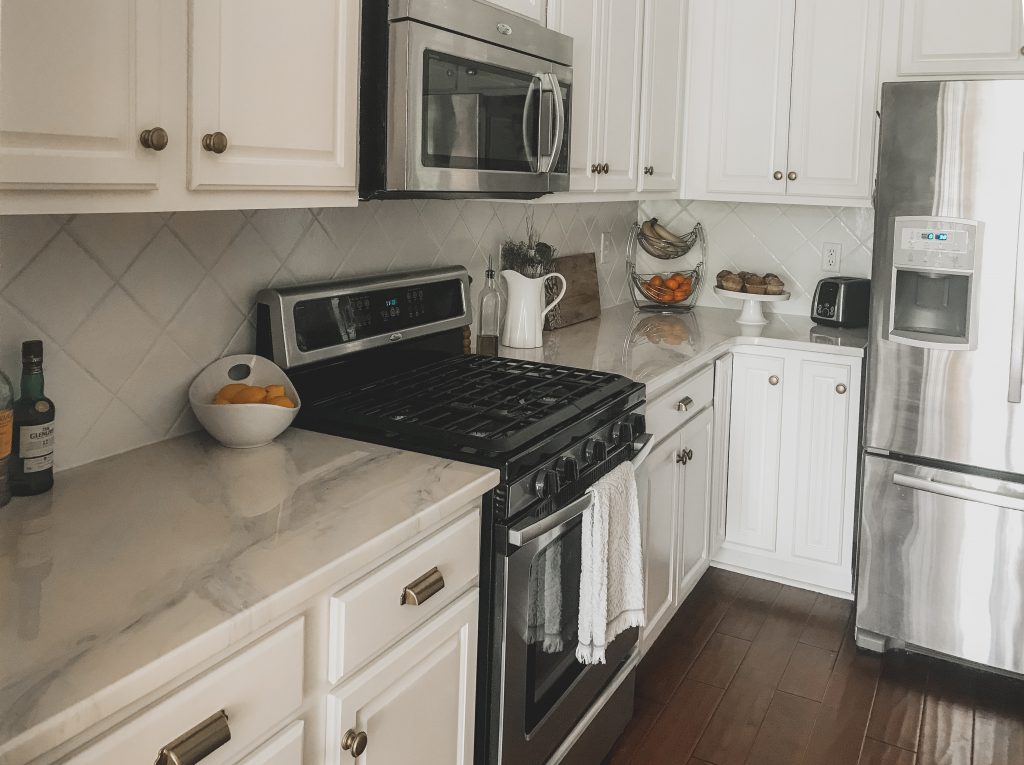
After a couple years of living with this dark cave (also known as our kitchen) that you see below, my husband FINALLY agreed to let me paint our cabinets white. He helped with the paint project, which took up about three weekends of our life that we’ll never get back, but the end result was totally worth it.
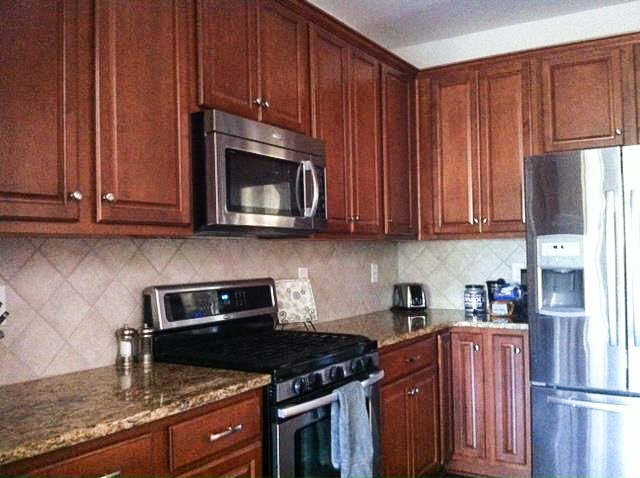
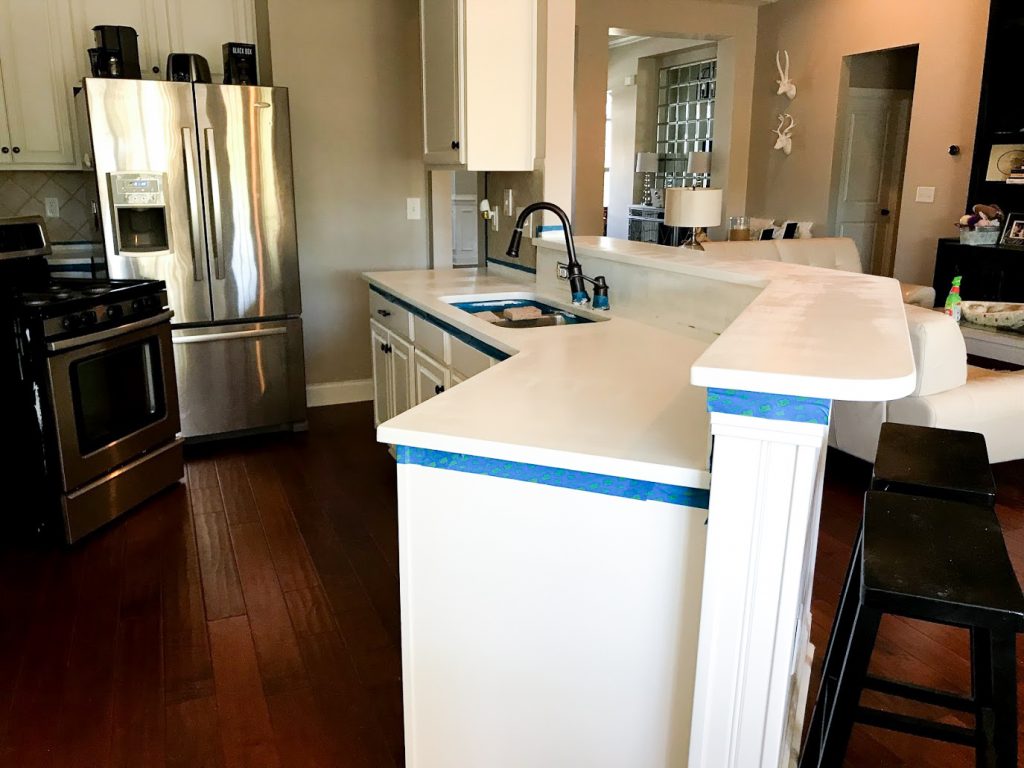
Our ‘new’ white cabinets were a great start and held me over for a few years, but eventually I just could not live with these brown granite countertops any longer (I know, I know….first world problems). I love cool, clean tones, so they’re just not my thing.
So for about a good year I would intermittently go down the Google rabbit hole looking for solutions to cover our existing granite. I was mainly looking for ways to paint over the granite, which I’ve learned is nearly impossible, as paint just doesn’t really stick to this surface. In a perfect world my husband would’ve allowed me to call in a profesh to install marble countertops, or really anything with a white base…..I just wanted something, anything that was more bright/clean looking.
I must’ve been using the wrong search terms during my year of intermittent google research, because nothing useful ever popped up. But one day….one magical day in the fall of 2017….my google search results finally delivered something that restored my faith in my kitchen. Something popped up and gave me hope. Something popped up and showed me I really could have my dream kitchen. And I could have my dream kitchen without spending thousands on new countertops. Something popped up that was even better than new countertops (at least in my opinion;)).
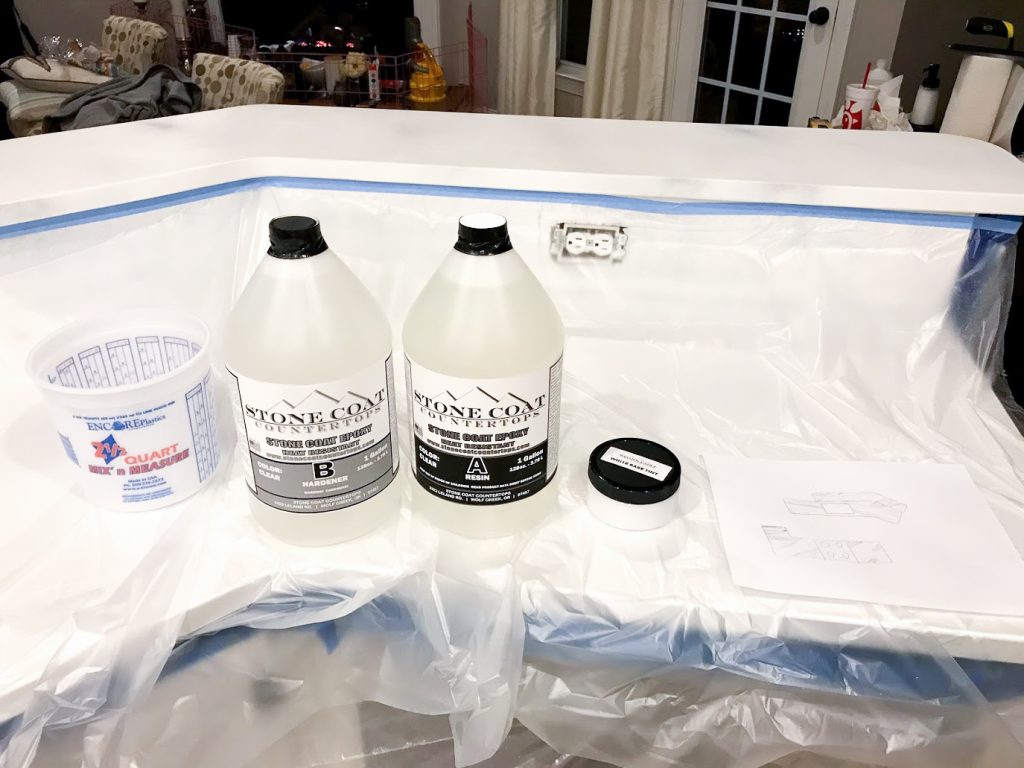
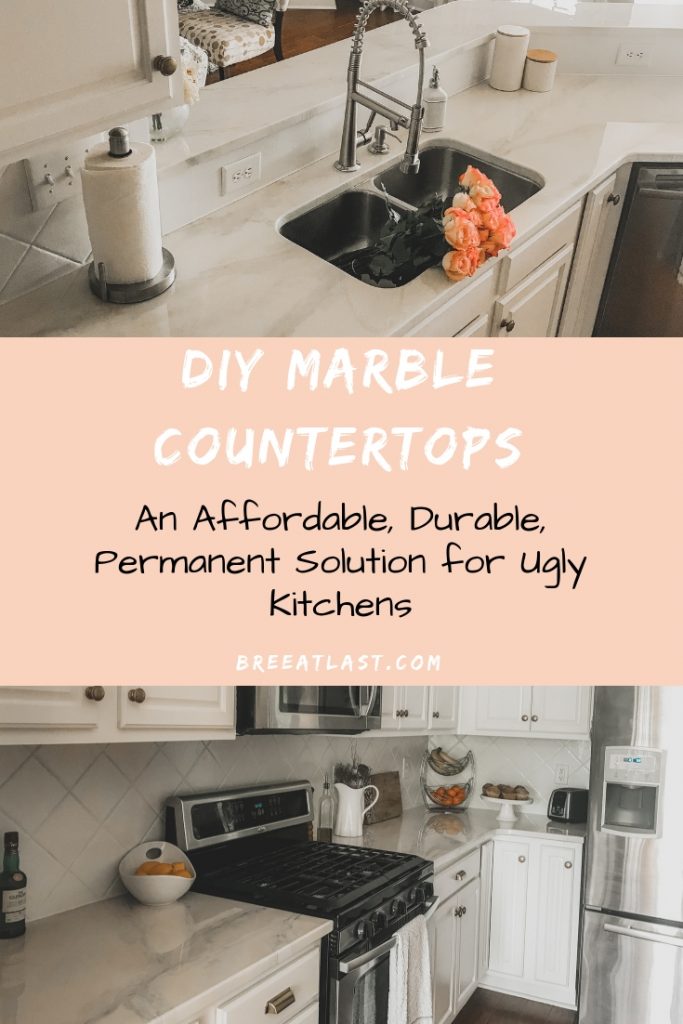
That magical fall day was the day I stumbled upon Stone Coat Countertops and my DIY world was officially rocked forever.
I suggest visiting their website for a wealth of info about the product (make sure you scroll down for my discount code before you make any purchases;)..and please note this post is NOT SPONSORED! In a nutshell, Stone Coat Countertops is a food grade epoxy that can be applied to any type of countertop surface, OR you can even construct your own countertops out of MDF (they do a detailed tutorial on that here). It’s incredibly durable, so this is definitely a good permanent solution. There’s a video where they put a pot of boiling water directly on the surface, as well as a hot frying pan, and there’s no damage. I think there’s another one where he even pours out some alcohol on the countertop and lights it on fire to demonstrate that it’s heat resistant. It’s also scratch resistant, but obviously you don’t want to use the surface as a cutting board, as it will scratch like any other solid surface when abused.
So armed with inspiration, I spent the next month pouring over their website and youtube videos showing allllll the different techniques to recreate different finishes. They even have a technique that mimics concrete countertops. Seriously, the sky’s the limit with this product, but I figured I’d go with a classic marble look.
After doing a hefty amount of research, I still had a few lingering questions, so I sent off an email through the contact page on the SCC website, and within a day I got a friendly reply from the founder himself, Mike Quist. He is just as chipper via email as he is in his YouTube tutorials, and answered all my questions thoroughly. He even welcomed more questions should I have any, which put me at ease a bit since I knew there was great customer support in case I ran into any issues.
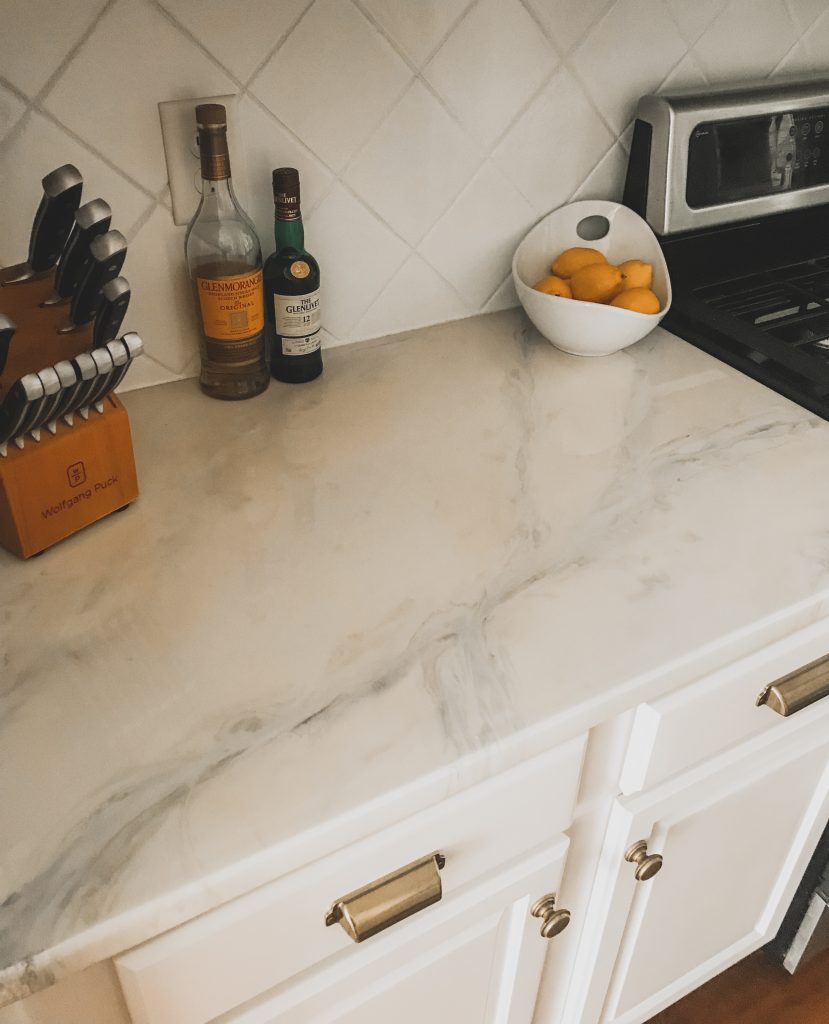
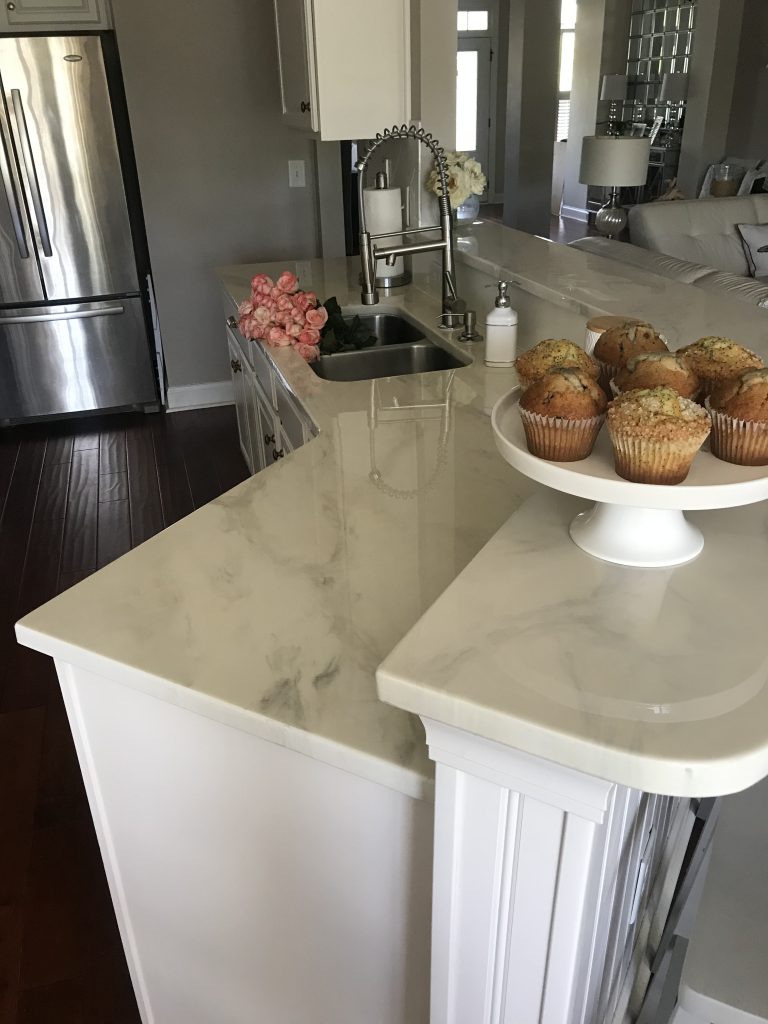
To prep for this DIY undertaking, outside of watching hours and hours of Mike’s youtube tutorials, I also googled marble slabs to see what look I gravitated towards. I had no idea just how many different types of marble there are, but holy balls…..there are A LOT. I saw soooo many cool looking slabs, but in the end I decided I really wanted something that was primarily white, versus the typical carrara marble that’s commonly used in kitchens. Even if that meant it may end up not looking as natural, that’s the look I wanted. Honestly, I’d be cool with plain white countertops, but why not add a bit of flair?
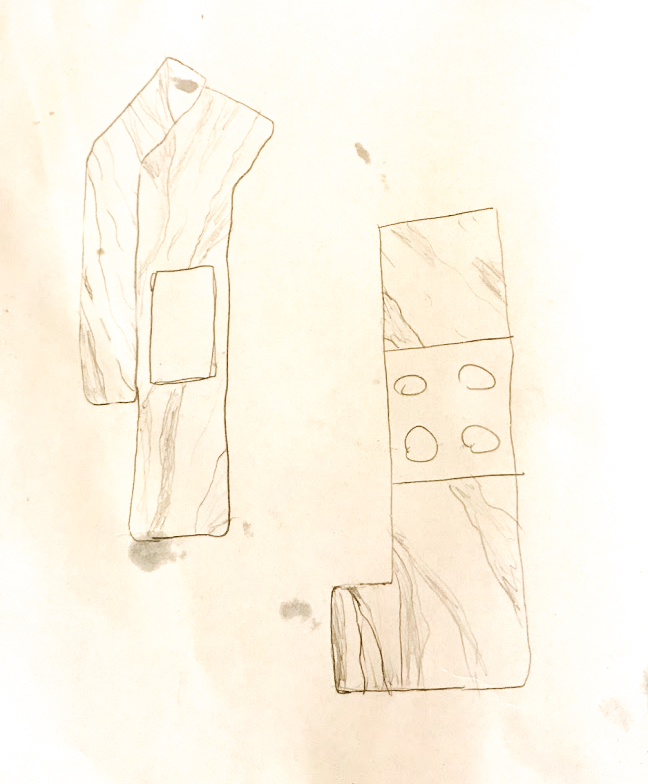
Once you watch a few of Mike’s video tutorials, you’ll understand that you have to work kinda quick with this product. After a batch of the product is mixed up and poured out onto the surface, you’ve got about an hour to work with it before it starts the process of firming up (so it gets more tacky). In light of this fact, I didn’t want to ‘choke’ as soon as I poured the epoxy on the counter, so I wanted to make sure I had a clear plan in place of how I wanted my design to go. That’s when I decided to do a little rough sketch of our kitchen lay out so I could plan out which direction(s) I wanted my marble veining to run. I know it may not seem like a big deal, but this small step helped tremendously. I wanted long veins to make it appear that each piece of countertop was part of a large slab, while also having the veining on each separate section of the kitchen flow in a slightly different direction. I felt this would make the whole look more natural and cohesive. Hopefully this will all make sense once you see my sketch below (I’m not an artist, so please bear with my drawing skills;)).
 I should mention that my intention with this post isn’t to do a full tutorial, as there’s nobody better to guide you through the process than Mike Quist himself, but here’s a quick run down of the basic steps.
- Clean, Degrease, Sand existing countertops
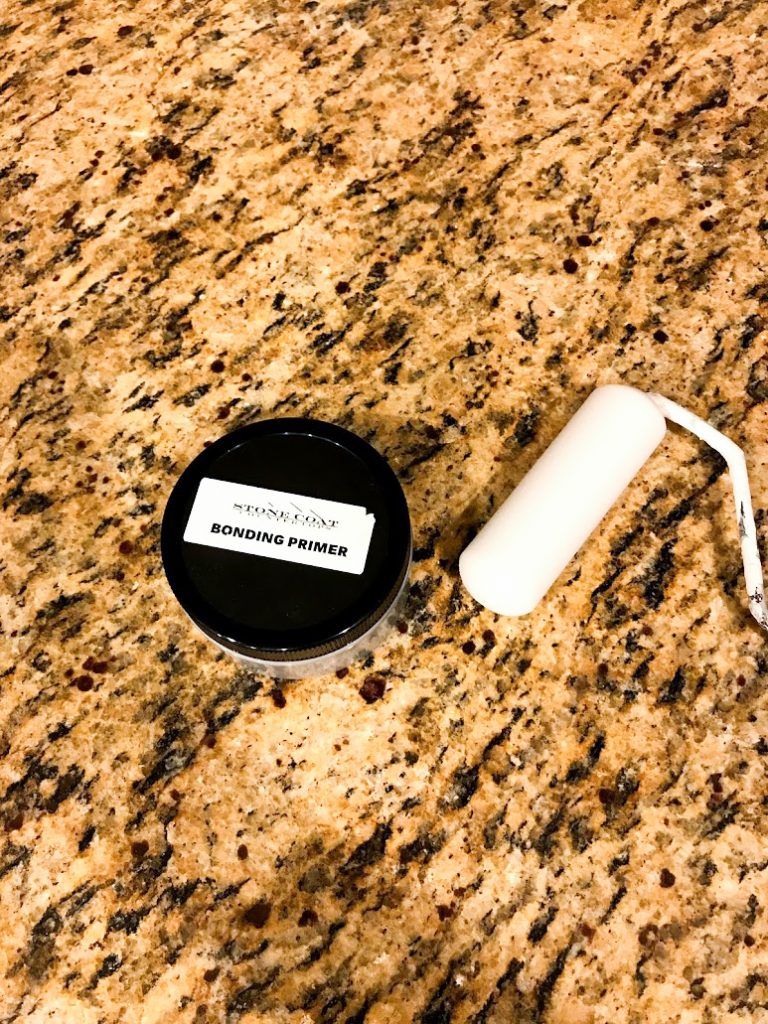
- Prime existing countertops with Stone Coat Countertops Bonding Primer
- Lightly sand, clean off dust, then apply your base paint (This step is optional, but I used their white base paint on ours since I really wanted a solid white foundation. I also used this paint to tint the color coat of epoxy)
- Lightly sand, clean dust, then you’re ready for your color coat of epoxy….this is when the fun really begins;)
- After about 4-6ish hours scrape off drips with a credit card (there is a magic window when this is super easy….I’m going off memory, but I believe 4-6 hours after application worked pretty well)
- After 24 hours, lightly sand the dried first coat of epoxy, then clean dust
- Apply clear “flood coat’ of epoxy to seal in your beautiful work.:)
- Sand and polish to desired sheen (it’s been almost a year and we STILL haven’t done this step bc they look so gorgeous so we haven’t felt the need to, but we will eventually;))
***Please note that there are so many details you must know in addition to these steps to make sure your project is a success (which you can find here), so DO NOT refer to this post this when tackling the project yourself.
Regarding the paint supplies, Mike advises in his videos that you can purchase base paints and tints at your local hardware store, but you have to be sure you get the proper formula (ex. you cannot use latex paint to tint the epoxy!). Outside of some mica powders I purchased on amazon, and some spray paints, I ended up just using Stone Coat Countertop products to make sure everything I used was compatible.
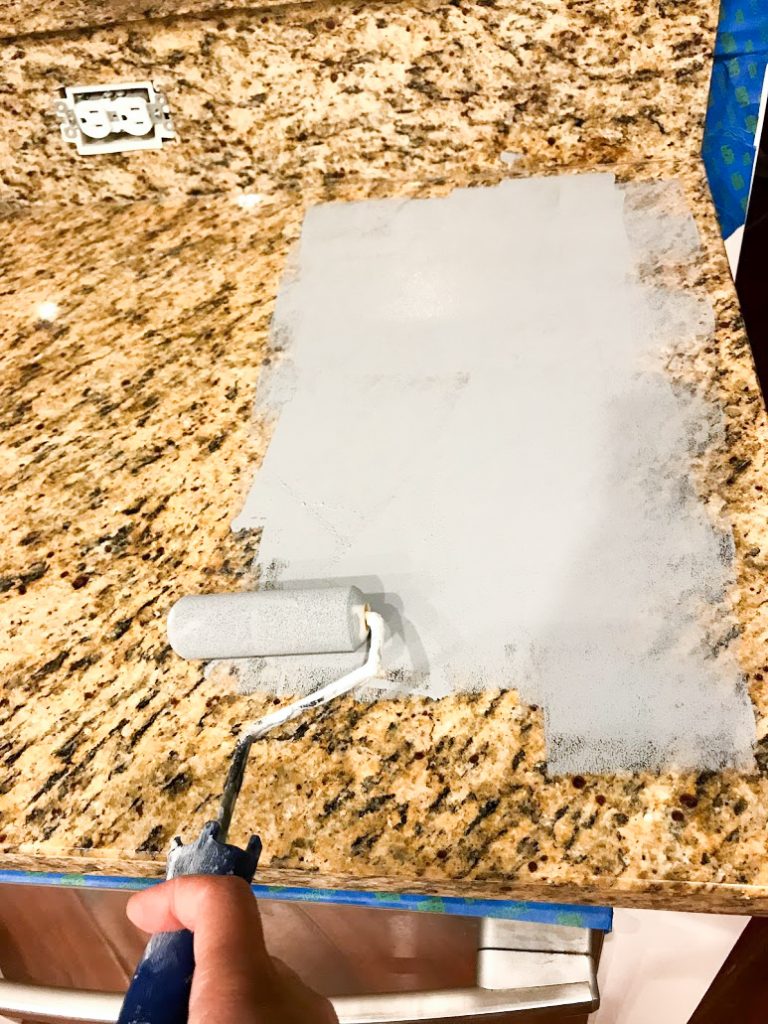
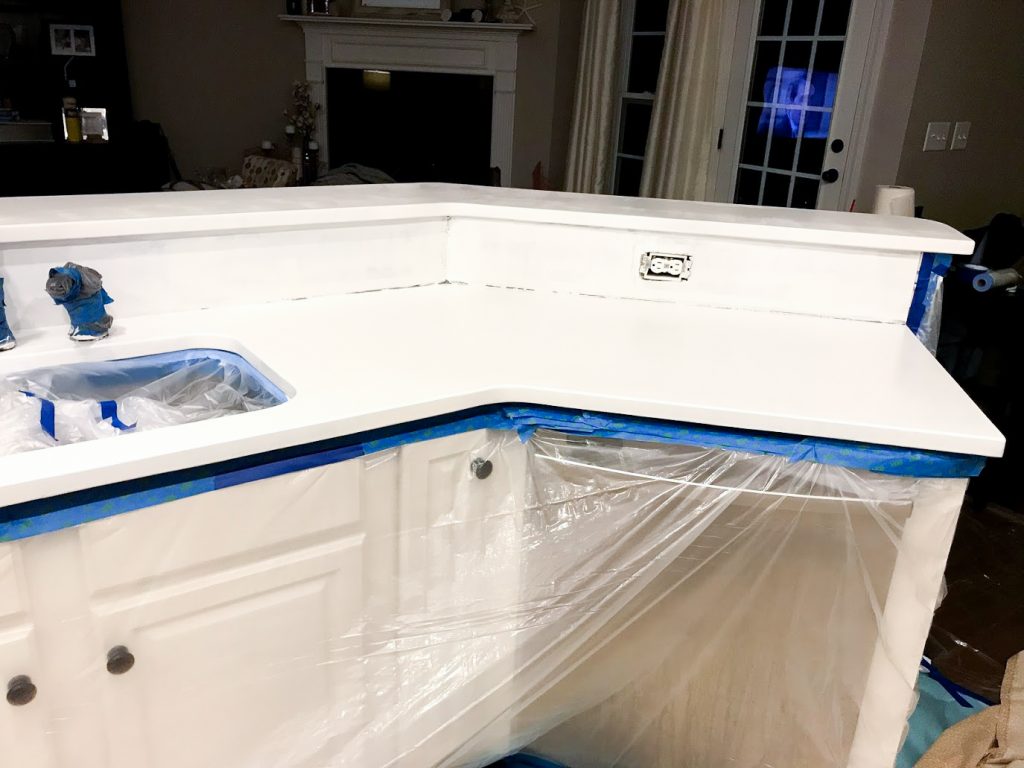
I can’t tell you all how excited I was just to be covering the granite with primer. This girl was positively giddy to be saying goodbye to alllll this brown and gold. It just doesn’t match anything else in my house.
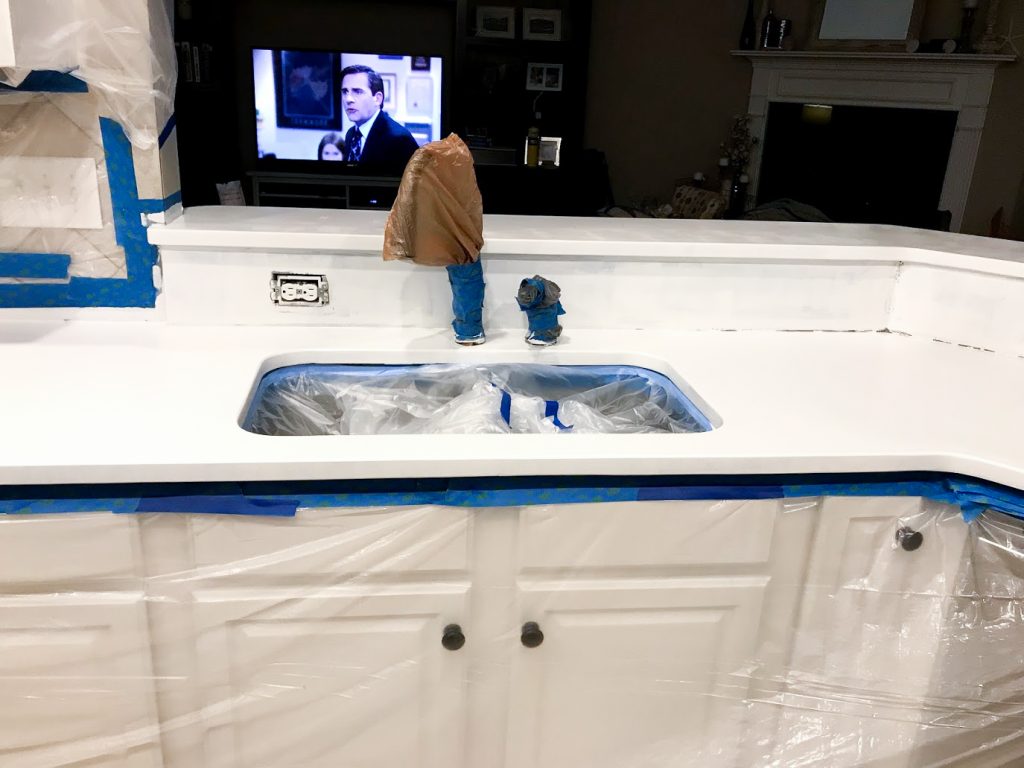
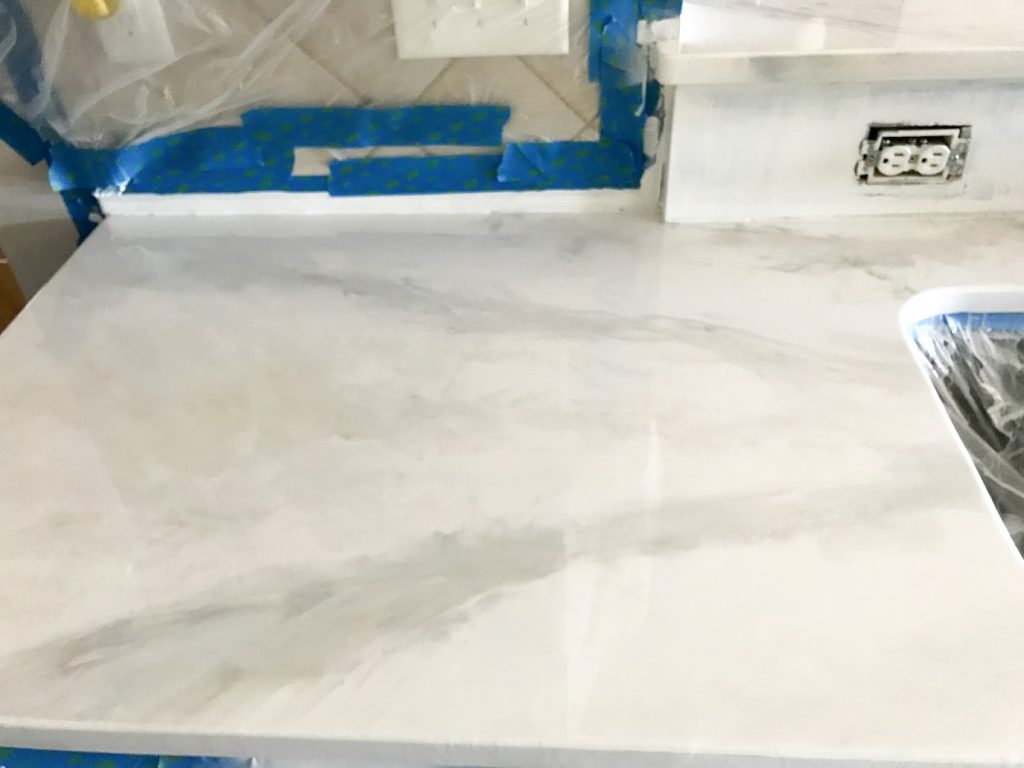
After the primer went on. Already like a million times better, right??
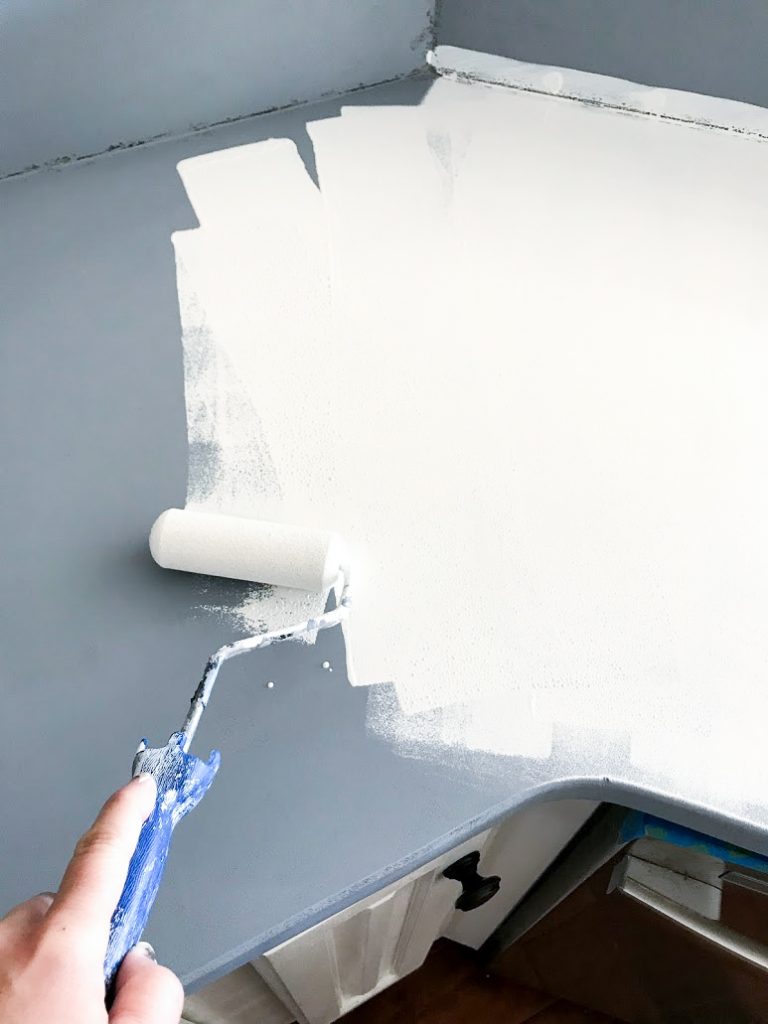
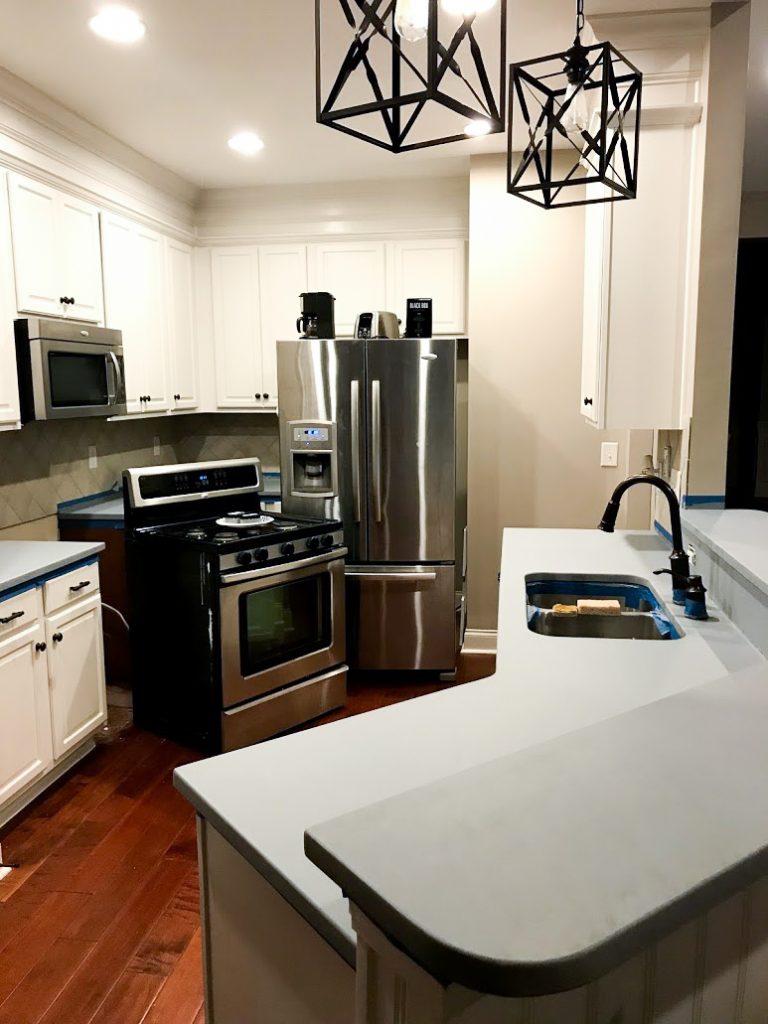
After applying my white base color. It’s gettin real now!
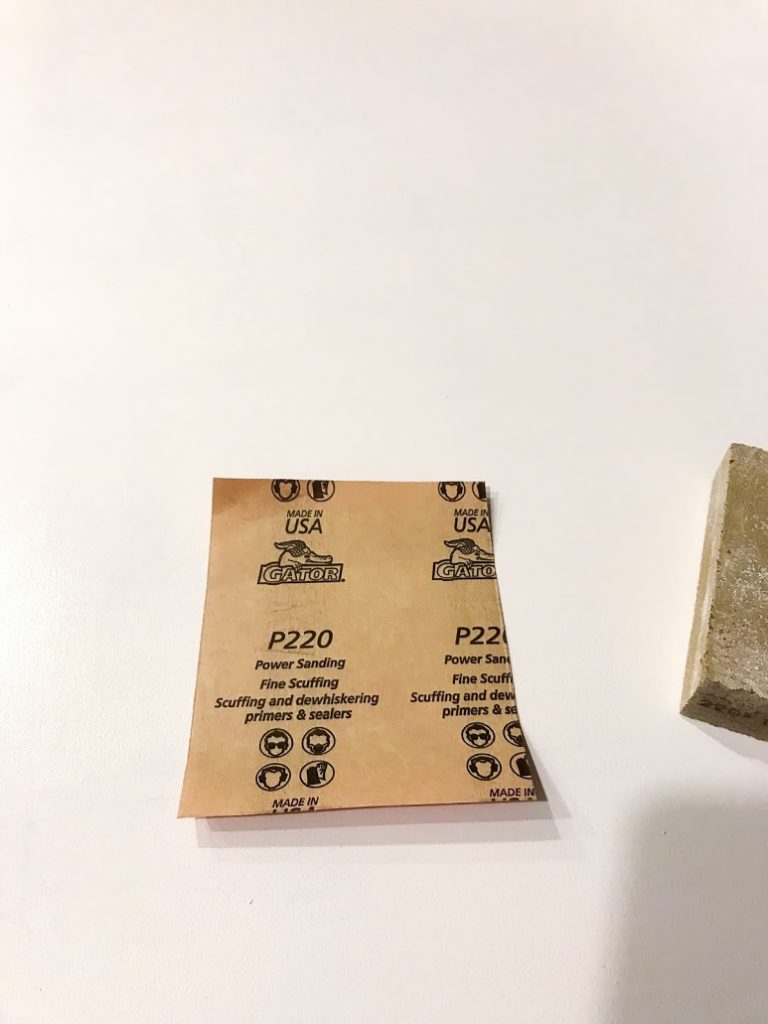
It’s super important to make sure you sand between each coat to help give it some teeth for bonding. Granite is not the best surface to paint or bond anything to, so it needs all the help it can get.
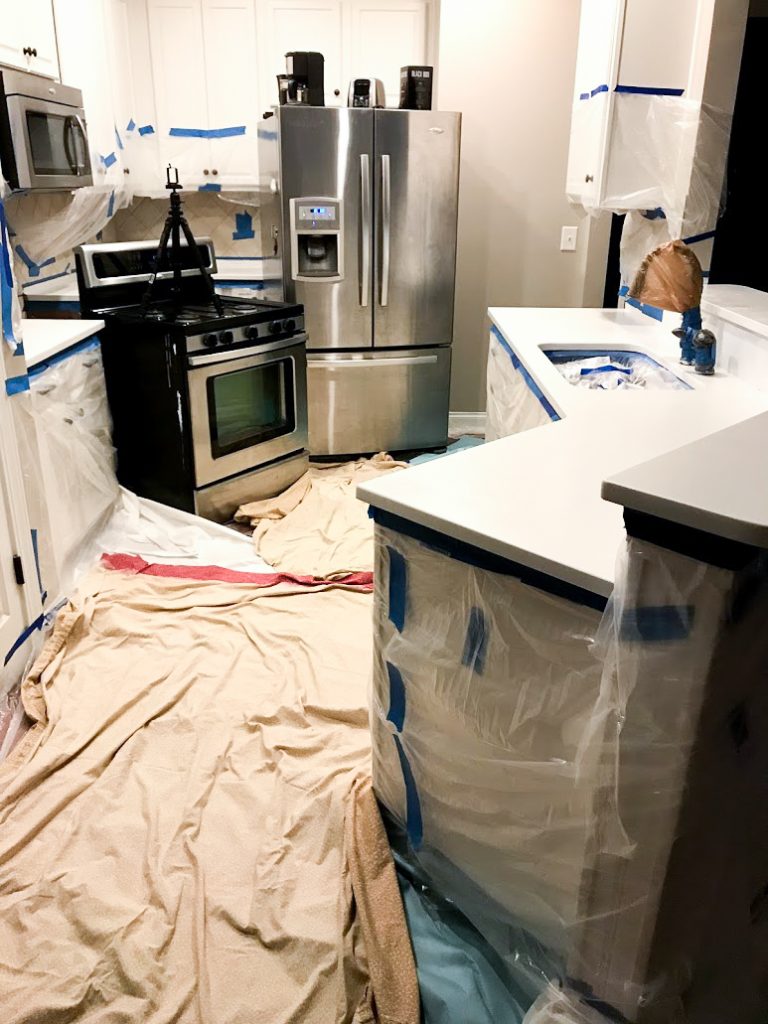
Tip of what NOT to do…..don’t leave your kitchen faucet halfway attached and propped up like I did. Michael didn’t really want any part of this project, so I had done everything myself up to this point of needing to remove the faucet, but plumbing is not my strong suit. He was busy and in a bit of ‘a mood’ when I needed help removing it, so I called my dad for plumbing advice, which is when Michael finally decided to “help.” I didn’t want to push my luck, so I told him he didn’t need to remove it completely, but that proved to be a stupid decision. What a giant pain in the arse it ended up being trying to work around it. Made it harder to prep and tape off the sink, trowel the epoxy, AND because I wasn’t able to do a great job of smoothing out the epoxy around the faucet, when we went to replace the faucet a few months ago we had to retrofit rings around the base of our new faucet and soap dispenser pump to cover up my flawed finish (our original faucet had a wider base that covered the flaws).
Of course I had The Office crew keeping me company;)
The least fun part of the project. Prepping everything for a whole mess of epoxy. I’m pretty thorough and layered up, but still had a few breaches. I caught all of them as they happened, as they were mainly due to stepping on the draped plastic causing it to come untaped. This stuff will be in little pools all over your flooring, so you have to do a great job protecting it. I used a combination of plastic drop cloths with old sheets and blankets over top so that the fabric would absorb some of the epoxy, rather than it running freely across a plastic surface. The sheets and blankets made it more pleasant to walk on too, instead of having plastic sticking to my feet and tripping me up.
We had four dogs and two cats in the house at the time, so I joined together two of these 8 panel coated metal dog pens that I had laying around (I have tons of dog paraphernalia in this house;)) to block off the kitchen. The last thing I needed was a dog running through a pool of epoxy in my kitchen and tracking it all over the house and furniture. I also made sure I moved the sofa far enough away so that our kitties couldn’t leap onto my beautiful epoxy finish before it cured. Additionally, for basically three days we tried to take the ‘long way’ when walking through our house so that we didn’t kick up dust and fur that could potentially stick to the surface. Even if a piece of fur or hair does get dried into your beautiful finish, or if a bug flies into it…..have no fear, because this can all be fixed during the very last step of sanding and polishing (YAY!).
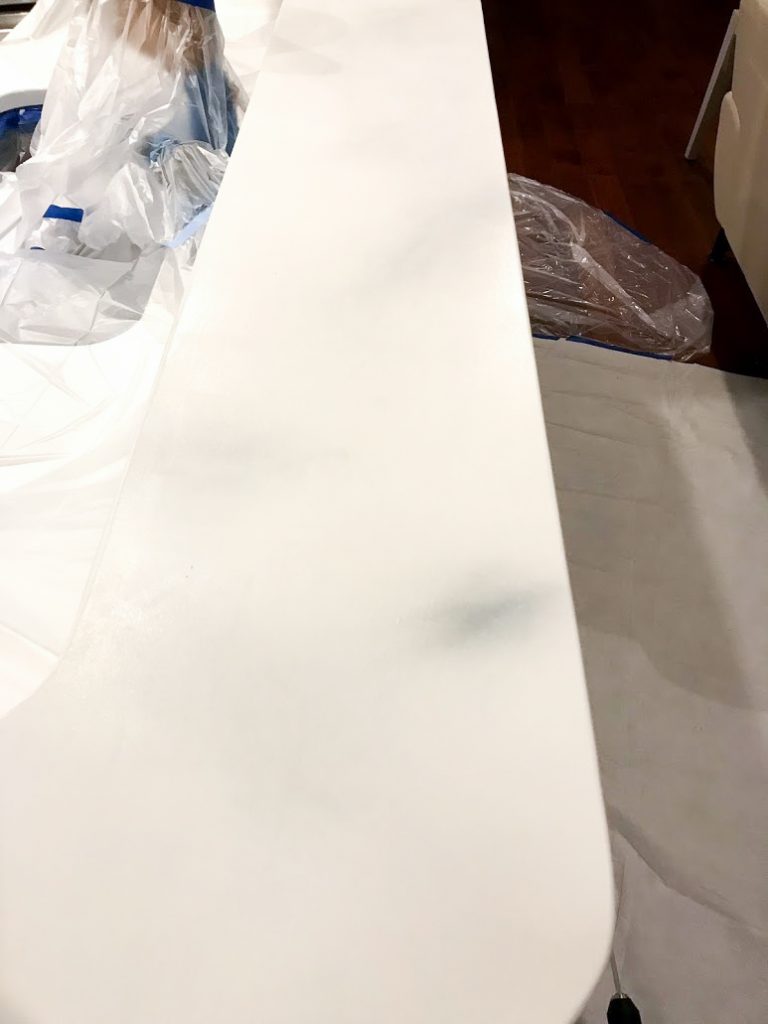
Per Mike’s YouTube tutorials, I “fogged on” some dark charcoal gray spray paint to add some depth and a more natural element to the finish.
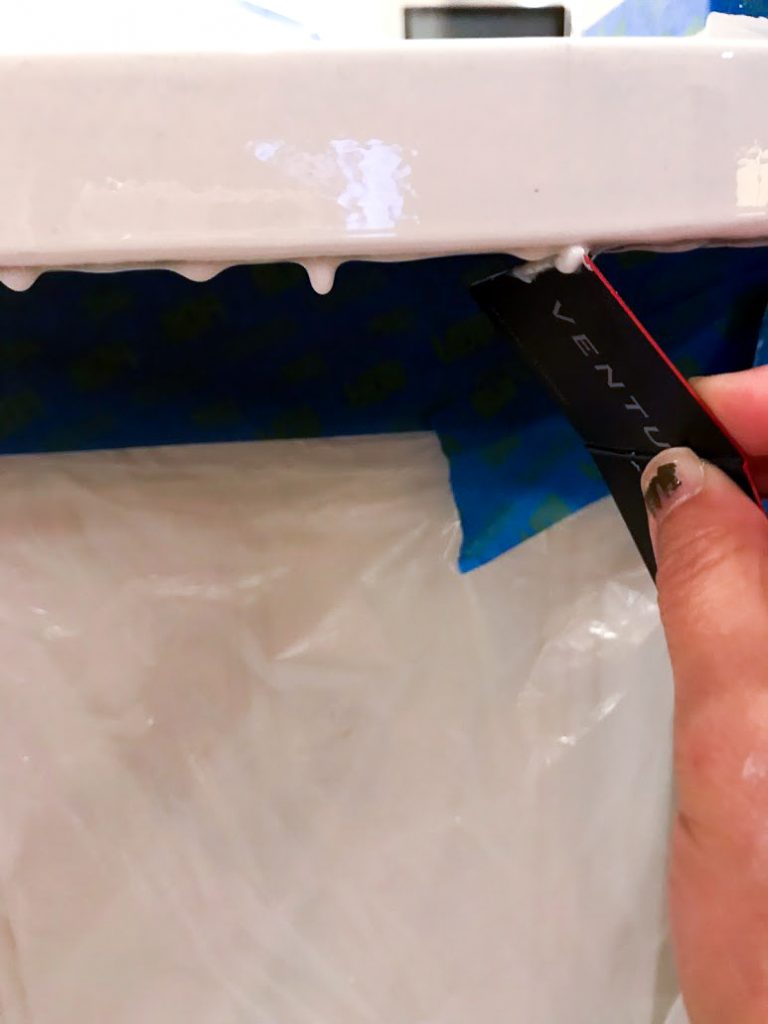
Removing the drips once the epoxy started to get tacky.
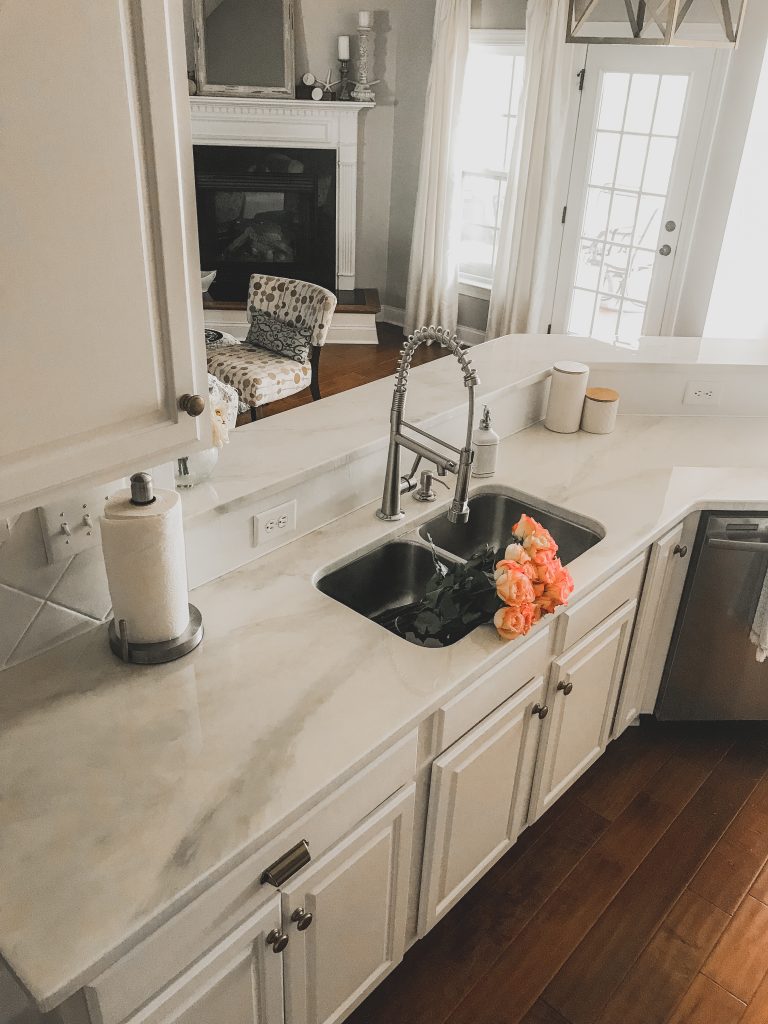
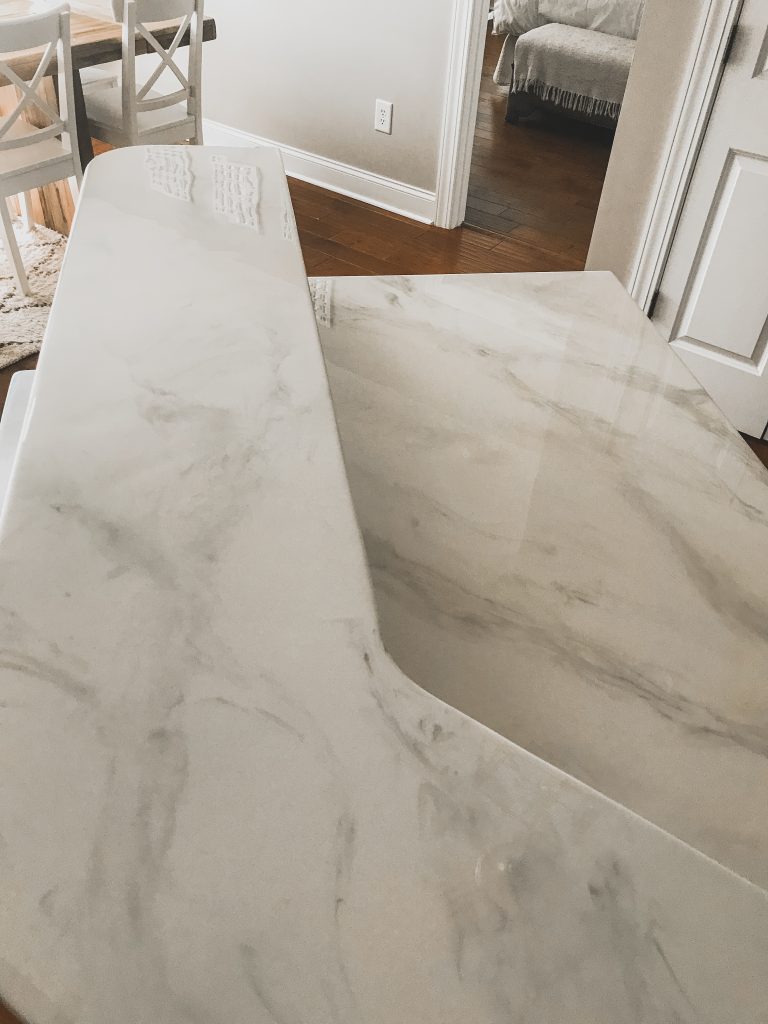
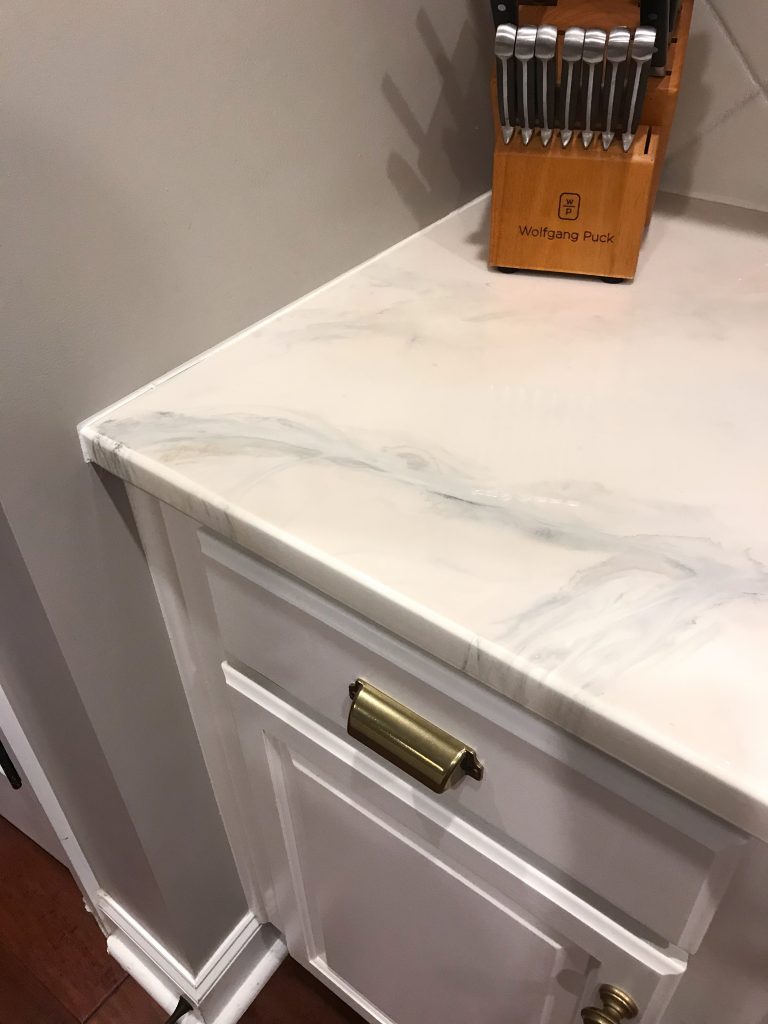
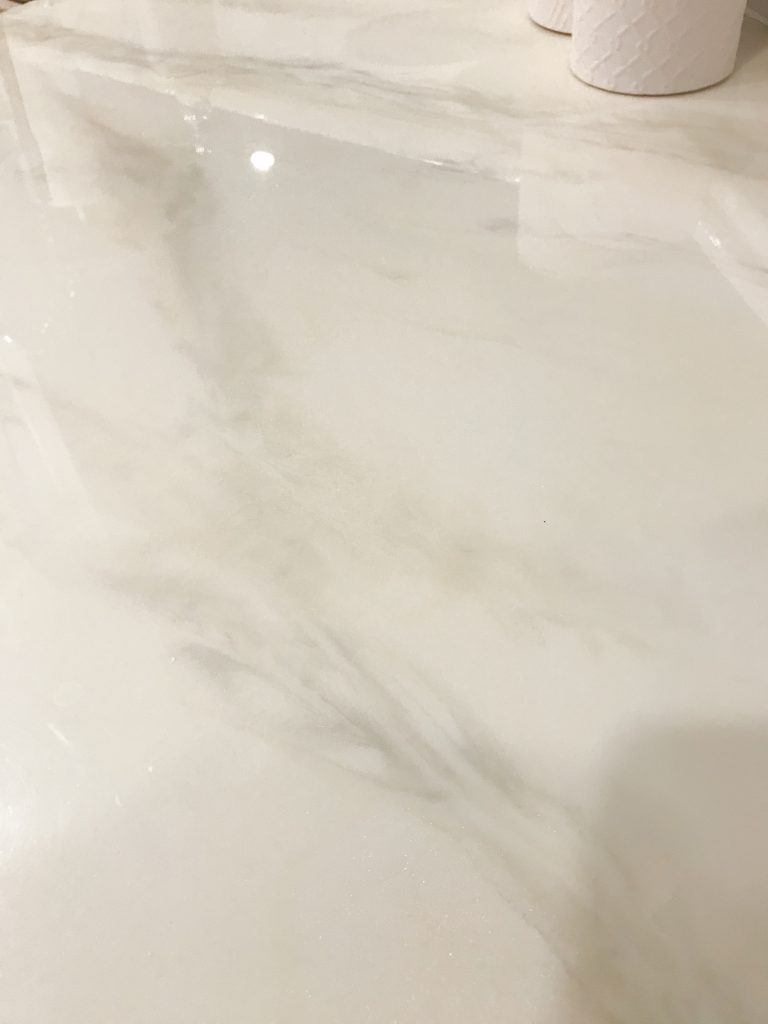
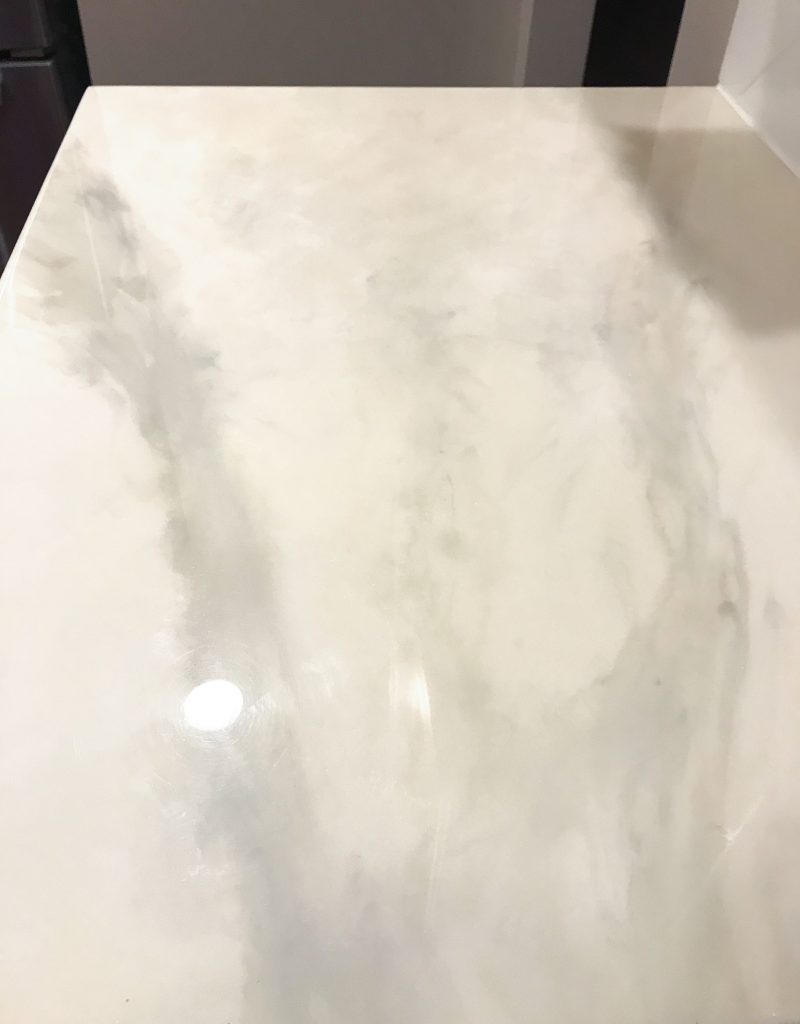
This was the last section that I did, and naturally this was my favorite since I had finally figured out what the heck I was doing. In this section I used more of Mike’s “chopping” technique to blend the veining. I wasn’t 100% satisfied with how my veining was turning out on the sections by my stove and fridge, where I was mainly just sort of swirling the colors through the epoxy with a paint stick (I’m a major perfectionist, so I tend to be overly critical), but my husband thinks the sections by the stove and fridge are the neatest looking, so……¯\_(ツ)_/¯
Here’s one of the ‘swirly’ areas by my fridge. It definitely looks more dramatic, but I feel like it looks less natural (even though there are soooo many types of marble and I’m pretty certain there’s a marble slab somewhere on this earth that probably looks just like this;)).
P.S. I apologize for the photo quality! We shot with a Nikon DSLR and with my iPhone, and I think all of these pics are my iPhone pics. My house is soooooo hard to photograph in natural light bc it stays quite dark in here. I also took some snaps at night under artificial light where you can see the beautiful shimmer of the mica powders (keep scrolling for those;)).
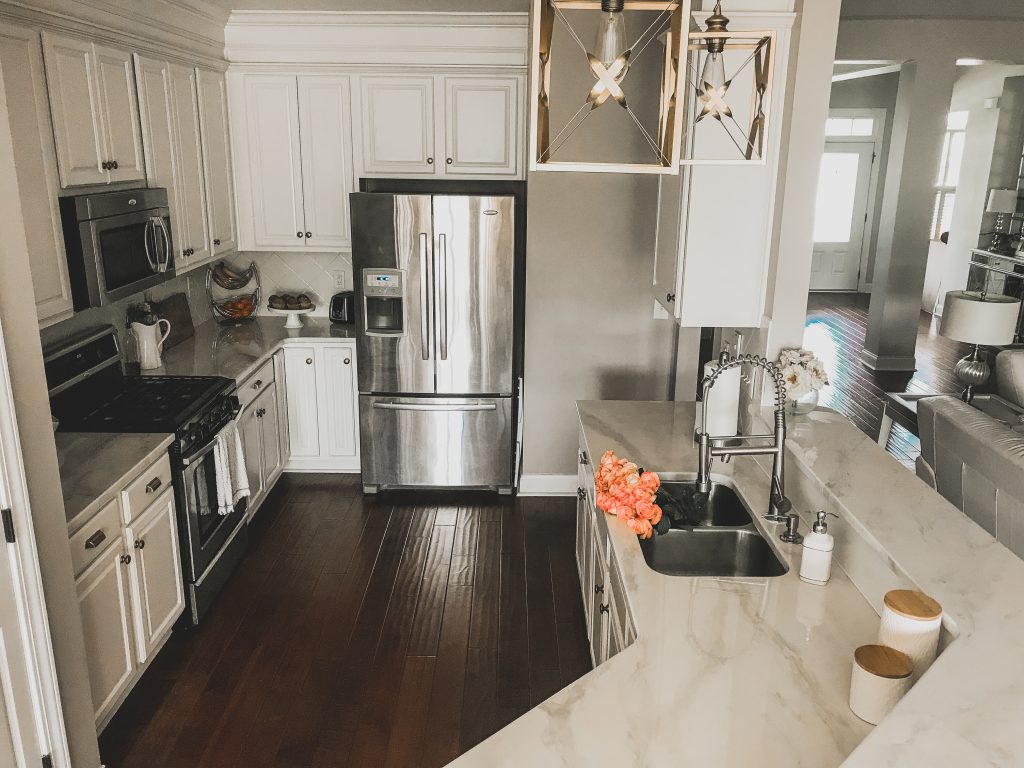
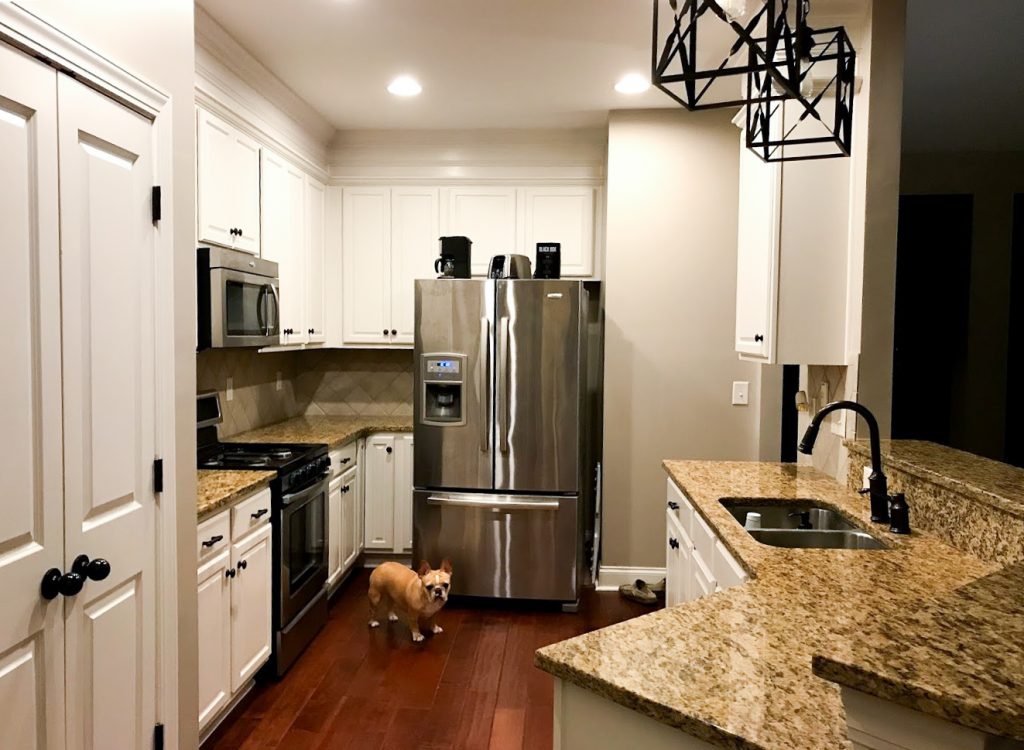
As you can see, we’ve since changed our cabinet hardware, faucet, and I painted our existing light fixtures gold. And right before we did the counters, we added moulding to bring our cabinets up to the ceiling. It looks so much brighter with the moulding reflecting light, vs when we had a huge shadow looming along the top of the cabinets. What a difference, right??

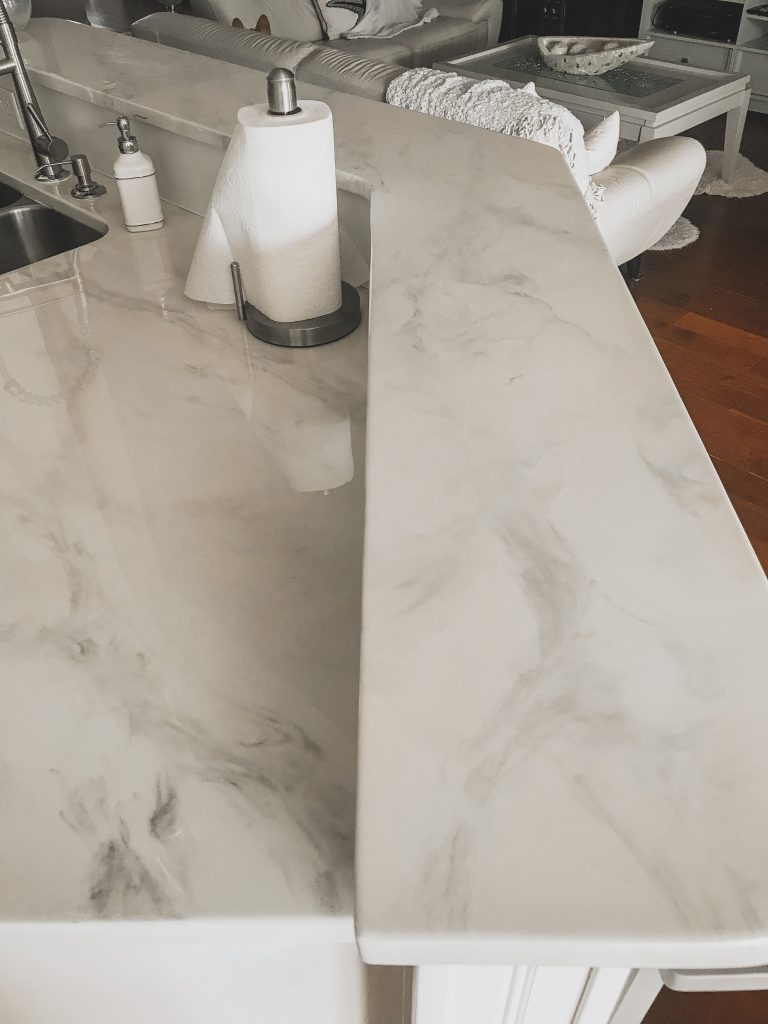
One of the areas that I really wish I would have “chopped” to blend in the veins in a bit, but at least Michael thinks it looks cool;)
I had to work strategically, so the first piece that I poured epoxy on was this bar area. Of course I had the lower level all covered up with plastic while I worked on the bar, as part of the process involves troweling the epoxy to the edges until in runs over. By the time I completed the other two sections of countertops by the stove and fridge, and was ready to work on this lower level, the bar area had stopped dripping and started to tack up. So it worked out perfectly and I was able to remove the plastic barrier and finish this lower section.
**All of the pics below were taken at night under artificial kitchen lighting.
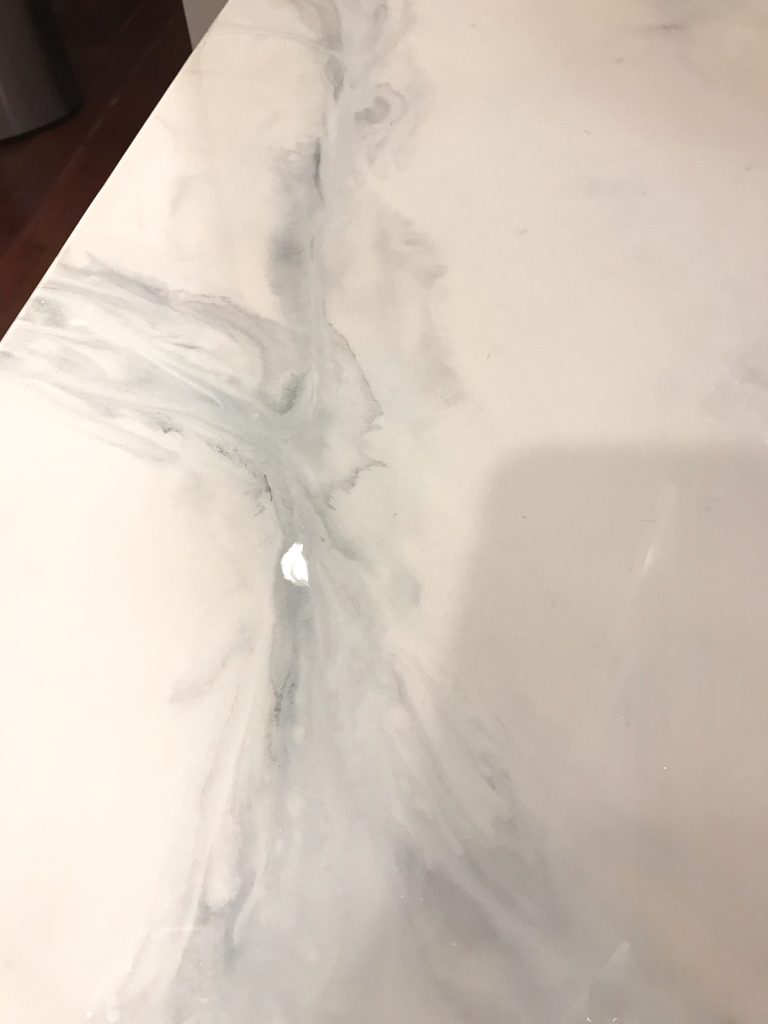
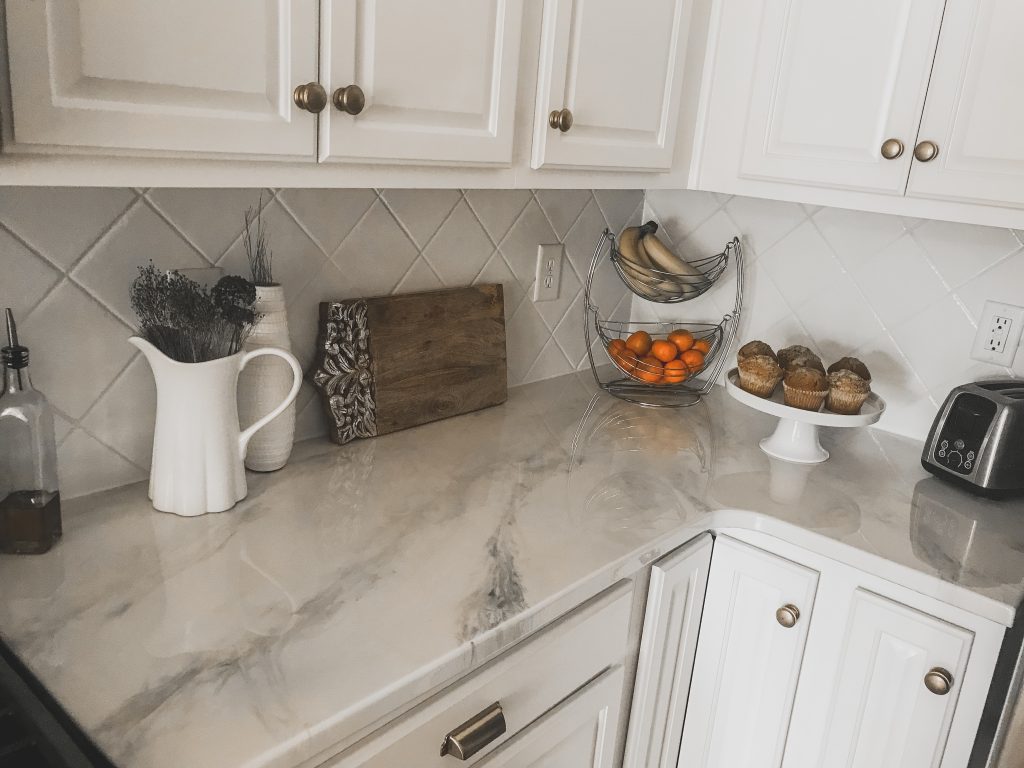
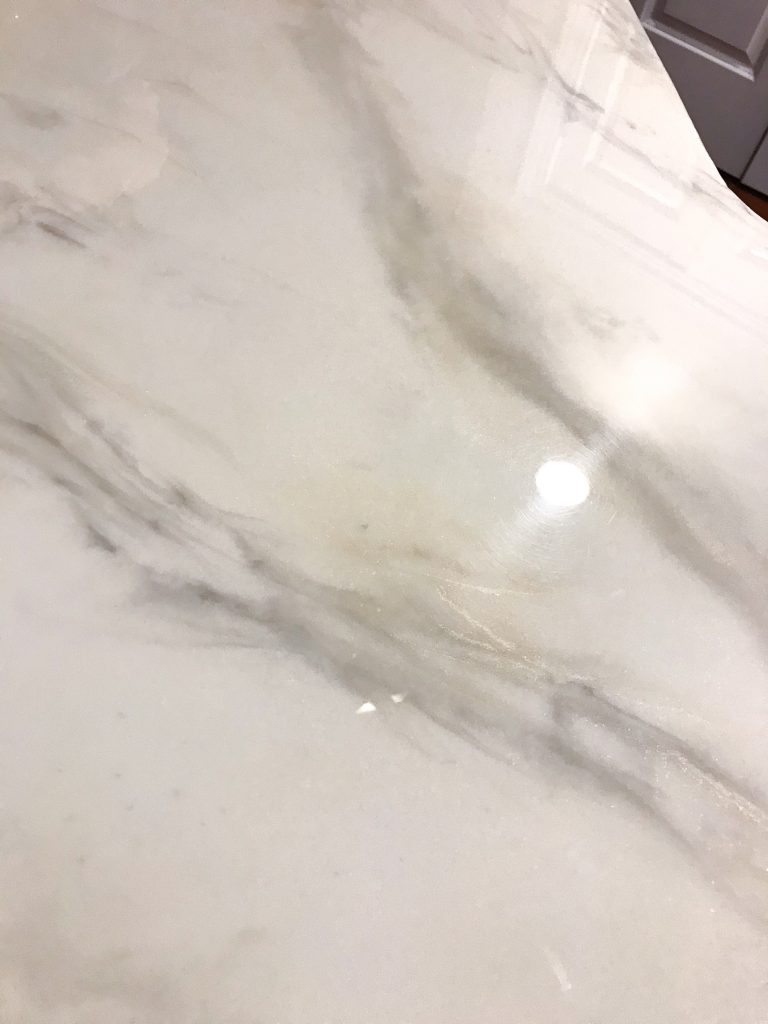
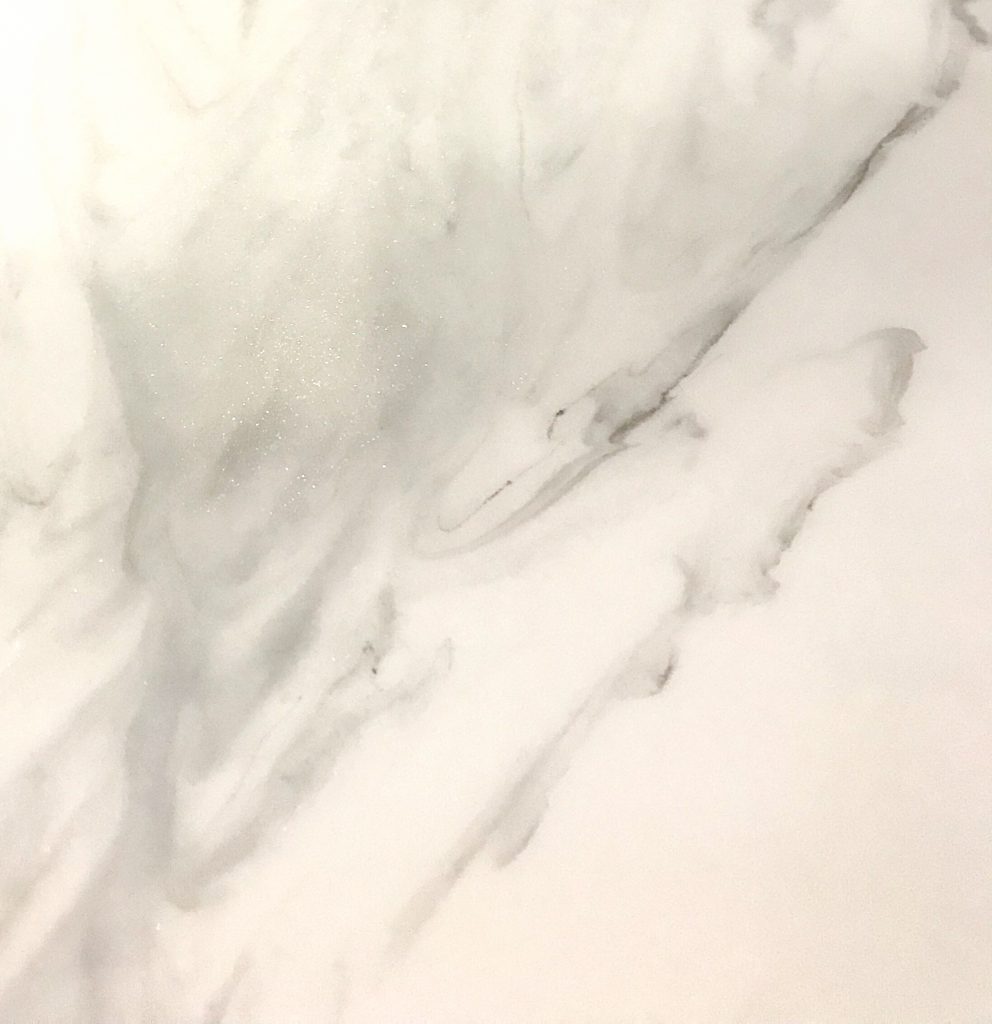
These two pics (one above and one below this) show the difference between me “chopping” the veining with a brush (as seen below) vs just swirling the colors into the epoxy (as seen above). I personally prefer the below look. It’s more subtle and natural IMHO, and kinda wish I had done the whole project like that, but it’s not a huge deal that they look different since they’re on separate slabs of countertop, on opposite sides of the kitchen.
Mike recommends practicing on a scrap of wood or granite first so you can perfect your technique, which is great advice. Unfortunately I’m an ‘all in’ kinda girl, so I just went for it. Plus I figured once I get tired of the marble look, I can always completely change things up in a few years and refinish the counters with a totally different look:)
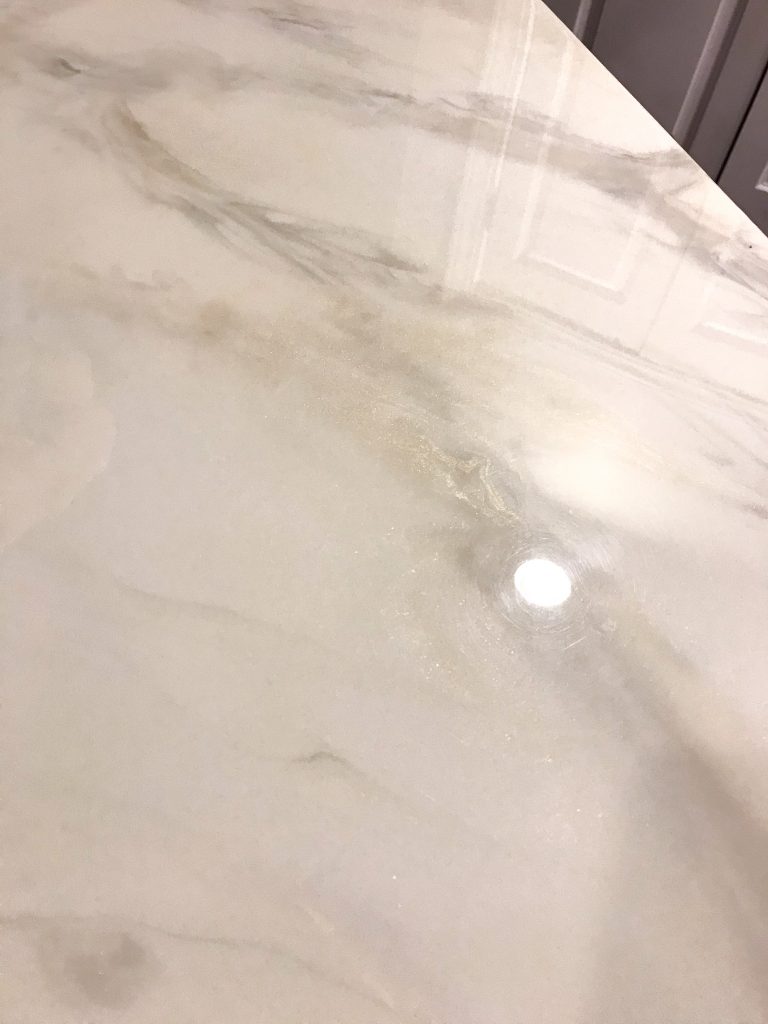
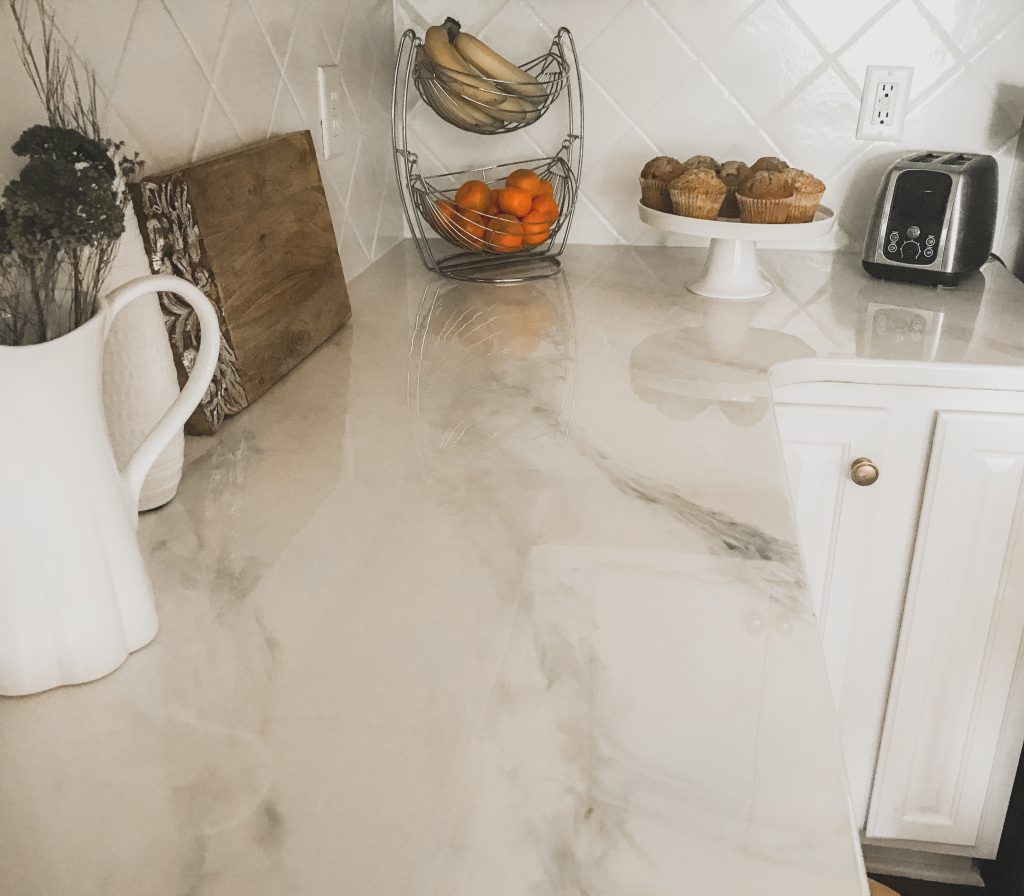
I randomly added a few hints of this champagne gold spray paint and this slightly gold iridescent mica powder throughout the project, since most natural marble does have a gold effect. You can see it in the pic above, and the one below as well. Photos seriously do not do it justice though.
It’s soooooo hard to capture on camera, but below you can see the faint shimmer of one of the pearl iridescent mica powders I used. When the light hits it right, it really is just stunning.
I’ll link everything I used below, but note that I probably went a bit overboard with all the paints and mica powders I purchased….oops.
¯\_(ツ)_/¯
In addition to the items I’ve linked, I also purchased a charcoal gray spray paint, and a light gray one that I grabbed at wal-mart and no longer have the cans (and don’t recall the color names), but honestly I didn’t use them much during the project, as I soon realized the light gray paint had a blue tint I didn’t care for, and the dark charcoal one I only used to “fog” on as a base before I poured on the white tinted epoxy. I relied mostly on this dark gray mica powder for my marble veining. If an area got to be too dark for me, or if I didn’t like how it was turning out, I simply sprayed on some of this white spray paint and started over on that area. Keeping in mind I had to work fast, which is why it was actually better to just cover up the mistakes and start over.
I did not collaborate with Stone Coat Countertops on this project, and I wanted to be sure I was 100% satisfied with the product before I endorsed it. It’s now been almost a year since I completed my countertops, and they are still stunning and have held up extraordinarily well, so I definitely feel confident recommending SCC to others.
If you’re nervous about tackling a project like this, I just want you all to know that I did the entire thing on my own, with the exception of the faucet (semi) removal that I talked about earlier, and after seeing the incredible finished results of the first application (the color coat), my husband actually wanted to help with the clear coat (“flood” coat). I think he mostly wanted to play with the torch, but he helped nonetheless;) My point is, if I can tackle this product basically on my own, pretty much anyone can;)
I do have a video of me completing the first section of countertop. It’s not meant to be a detailed tutorial, but I do describe the steps I’m taking along the way. I also do a quick rundown of all the other changes we’ve made to our kitchen since moving in.
Here are a few things I learned during this project:
- If you’re not planning on sanding/polishing soon after completing your project, make sure you take every precaution to minimize dust/fur particles landing on your project before it dries. Make sure there aren’t any drafts in the room (turn off the HVAC and be careful with open windows). I also avoided wearing long sleeves or baggy clothing and pulled my hair up. When we did the clear coat, I actually made Michael go topless, and I wore a sports bra lol. Basically every article of clothing in our house has some level of dog and cat fur on it, so I guess we went a little extreme to try to prevent any fur from getting stuck on our beautiful new counters. Then while they dried, we tried to walk slowly if we needed to pass through the house near the kitchen so we didn’t kick up dust. Otherwise, we really tried to take the long way around the house to avoid walking near the counters until they dried completely.
- I used both these spray bottles, and these squirt bottles for my mica powder/alcohol mixture, but the squirt bottles worked best and got clogged up less.
- If you have pets, or kids (or a cranky husband who doesn’t like to be inconvenienced), I’d recommend doing the work overnight after everyone goes to bed. I started taping off everything one week night while Michael was winding down for the evening, and then after he and the dogs went to bed, I started working my magic;) By the time they got up in the morning, the messy part had been completed and cleaned up, and the drying process was in full effect (so I wasn’t as paranoid having them move about the house).
- It’s better to have too much product, than not enough. Technically, according to our square footage a single two gallon kit is sufficient for my counters; however, I used a little over half the product during the color coat, so when we went to apply the clear coat, we tried to use as little as possible to make sure we had enough to finish the job. By the time we got to the last section of countertop we had more than enough, but unfortunately the first section we did (the bar) didn’t level out to a perfectly smooth finish bc we had felt like we needed to be uber conservative and didn’t pour enough product on it. It’s only really noticeable to us, but still irksome since we ended up having more than enough product at the end, but there’s really nothing we could do at that point since the bar was already partially dry, and the remainder of the product was already mixed.
- You’ll want to avoid leaving heavy objects (or even bowls, glasses, etc) for long periods of time for the first few months while the product is fully curing, as glasses left over night can leave a slight ring/indentation. Although, it’s really hardly noticeable, and this is actually only a big deal if you never plan to polish the surface. Otherwise, any flaws or scratches can be buffed and polished back to a flawless finish, which is one of the miracles of this product. It’s truly is just as durable as most countertop materials on the market today.
- Don’t over-think it, and have fun being creative:)
We spent less than $400 re-doing our counters, and that includes alllll the paints, and me going overboard on mica powders, brushes, etc. That’s way less than brand new countertops, let alone actual MARBLE countertops, and I love that I had so much control over the overall look. I seriously LOVE our new countertops, and I’m sooooo sooooooo thankful I came across Stone Coat Countertops on that fateful fall day. I actually love cleaning my kitchen now!;)
As promised, I linked almost everything I used in the widget below, with the exception of the gray spray paint, the drop cloths and masking tape I used, and the products I ordered directly from SCC, which I linked earlier in this post. I also linked our new kitchen faucet, which I’m IN LOVE with, and it was such a great deal, as well as a few other recent practical purchases for our kitchen.
What projects would you like to tackle with Stone Coat Countertops? Let me know in the comments below, and if you have any questions, please don’t hesitate to ask!

UPDATE
SCC now sells their epoxy kits on Amazon for even easier purchasing:)
If you like it, pin it!
Happy DIYing!!
**May 2023 UPDATE**
It’s been six years since I completed my countertops…..yes six! And they’re still going strong! I haven’t done a single thing to them, other than every day cleaning. So as far as durability goes, we’ve had no issues and they’ve been maintenance free. Keep in mind that I applied this product over granite, which might make a difference when compared to wood substrates.
Where it’s fallen a bit short, which likely won’t come as a surprise to most of you, is the fact that white epoxy finishes will eventually amber, which is a nicer way of saying they’ll start turning yellow. I’m almost embarrassed to say this now, but frankly when I completely this project back in 2017 I had zero clue that this was a risk with epoxy, but in hindsight it makes total sense. The dozen or so marble tutorials I watched on the SCC youtube channel back in 2017 made no mention of it. Nor did Mike Quist when I emailed with him about my project. Perhaps I overlooked a video where it was mentioned. I don’t know. But the good news is in 2023 there are now so many resources available for epoxy DIYers, that I think most people (even epoxy novices like myself) are aware of this issue with white or light colored finishes.
2017 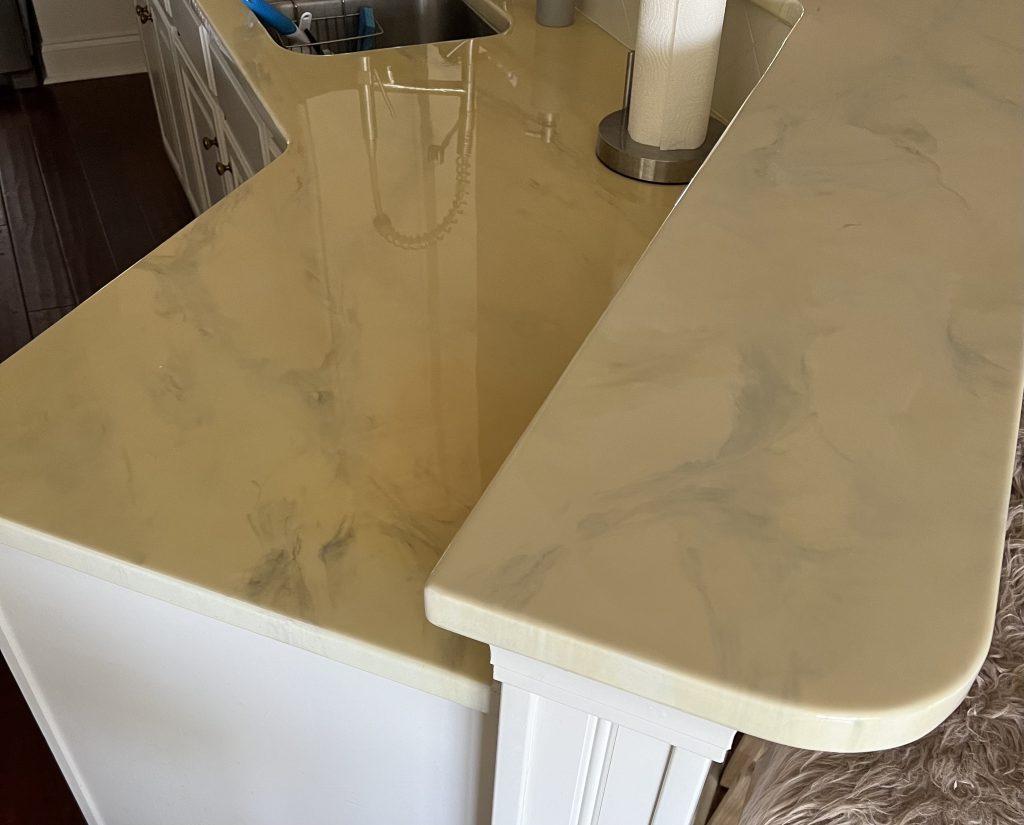
2023
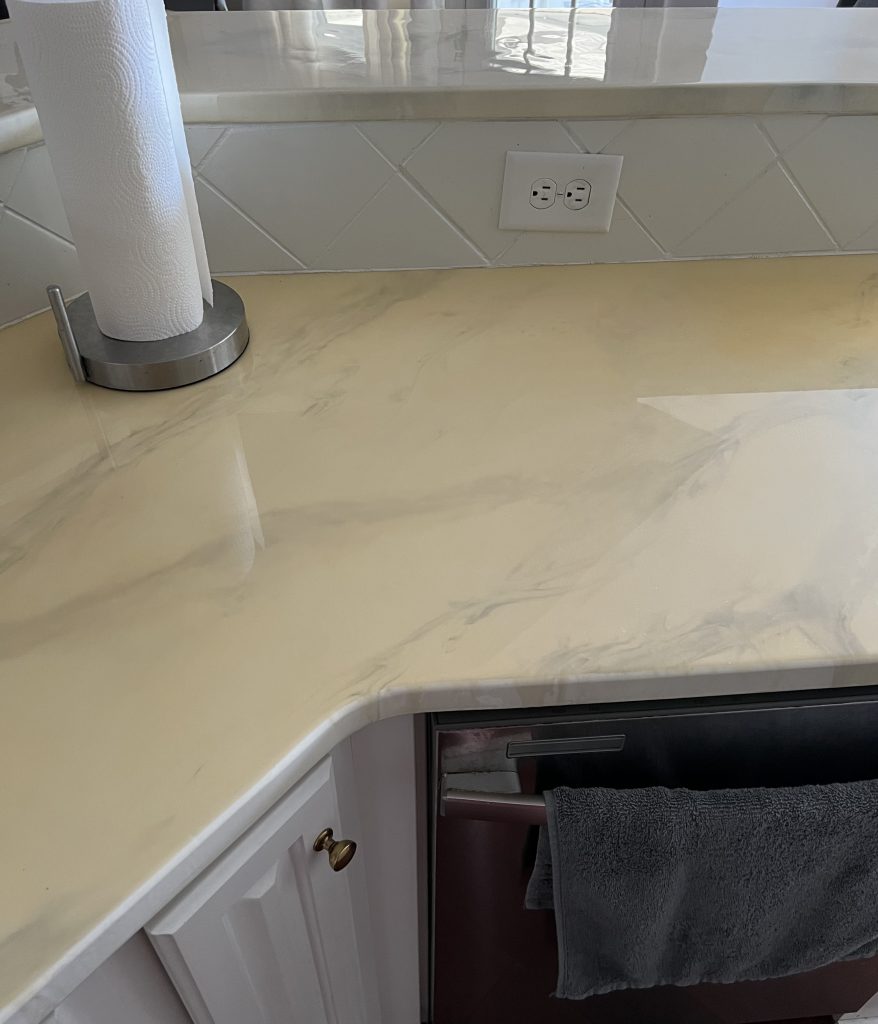
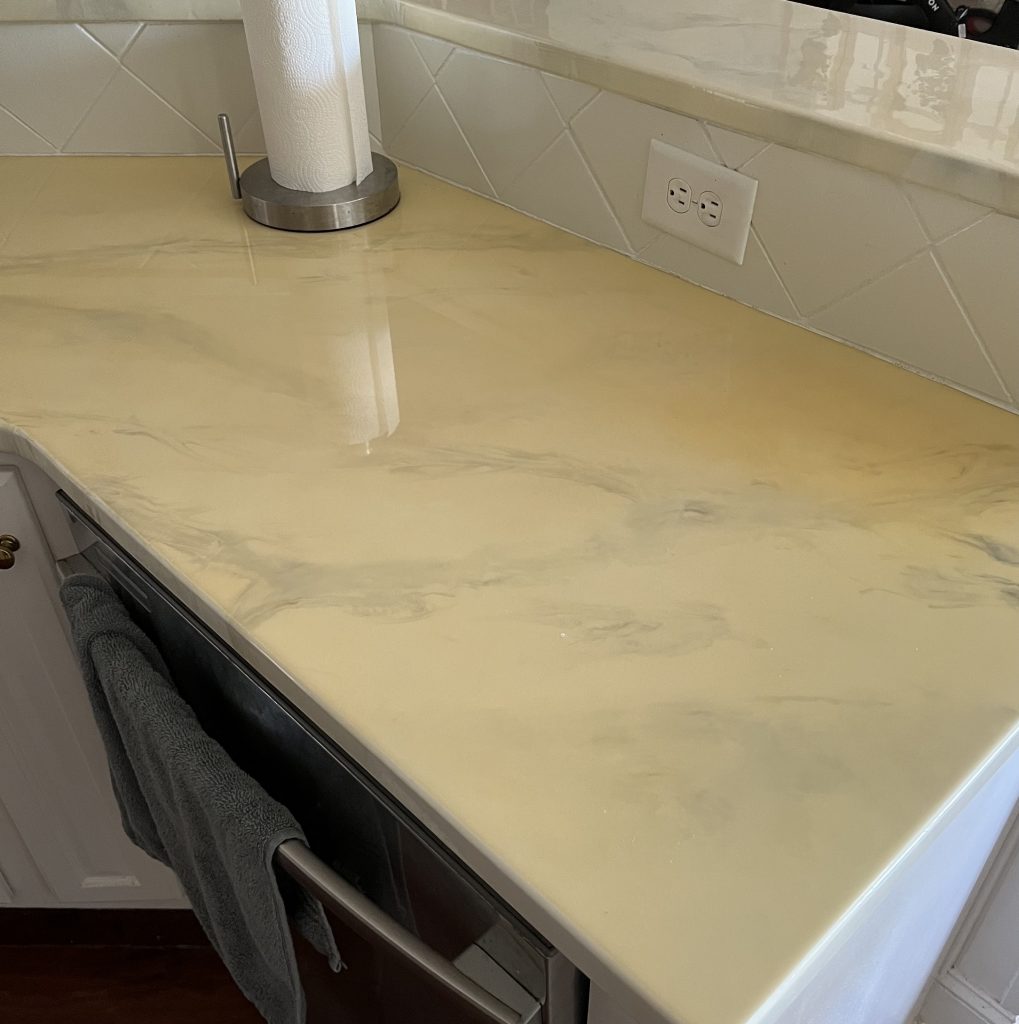
On that note, SCC has released some additional products in the six years since I completed my project (as well as their tape-dam technique, which wasn’t a ‘thing’ at SCC in 2017). One of those products is an epoxy called “art coat” which many claim will prevent the yellowing. I’m not completely sure of the entire basis for this claim, but art coat is supposed to be more UV resistant. Unfortunately, this product has still proven to turn yellow as well by many of its users. Honest professionals will attest to this fact, while some will either deny reality, or place blame on the person who completed the project by saying their was an error in their application. So many variables can cause epoxy to yellow….all epoxy, that is. Heat, sun, and chemical off-gassing, just to name a few. My kitchen gets zero sunlight, but that didn’t matter. It still yellowed. By far the worst spot is over the dishwasher…..yep, from the heat generated by the appliance. Thankfully not all areas are as severe, and truly most people wouldn’t notice or think twice about it. Really think about it, how often do you study other people’s countertops? Usually our attention is more focused on what’s on the countertops.
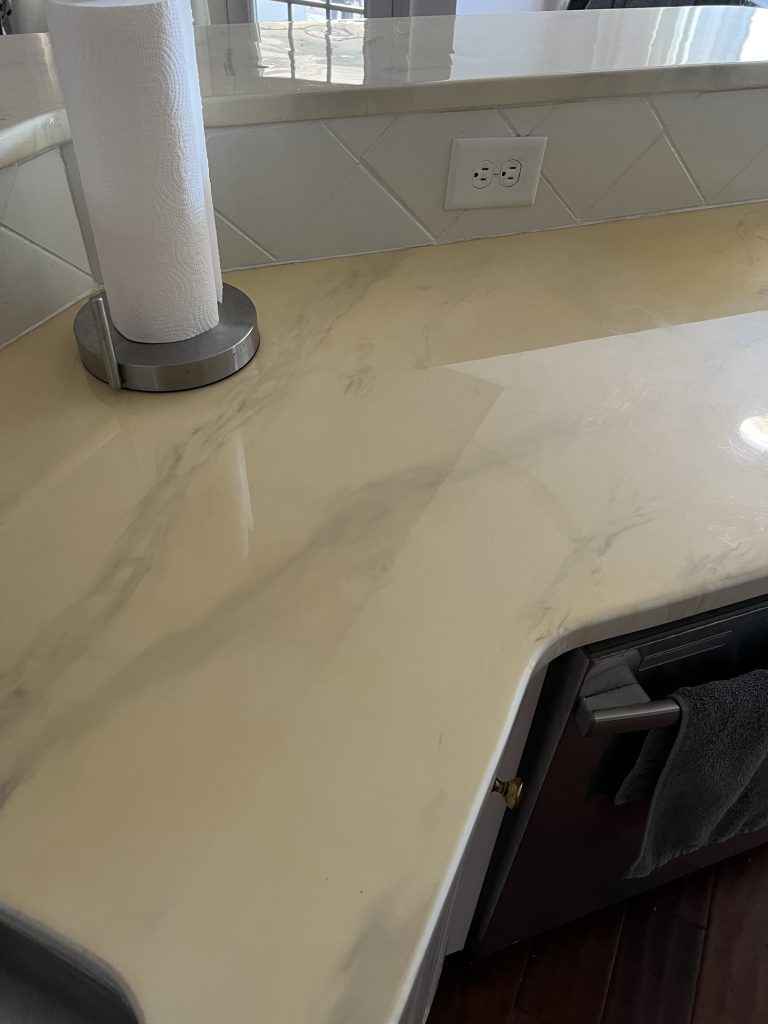
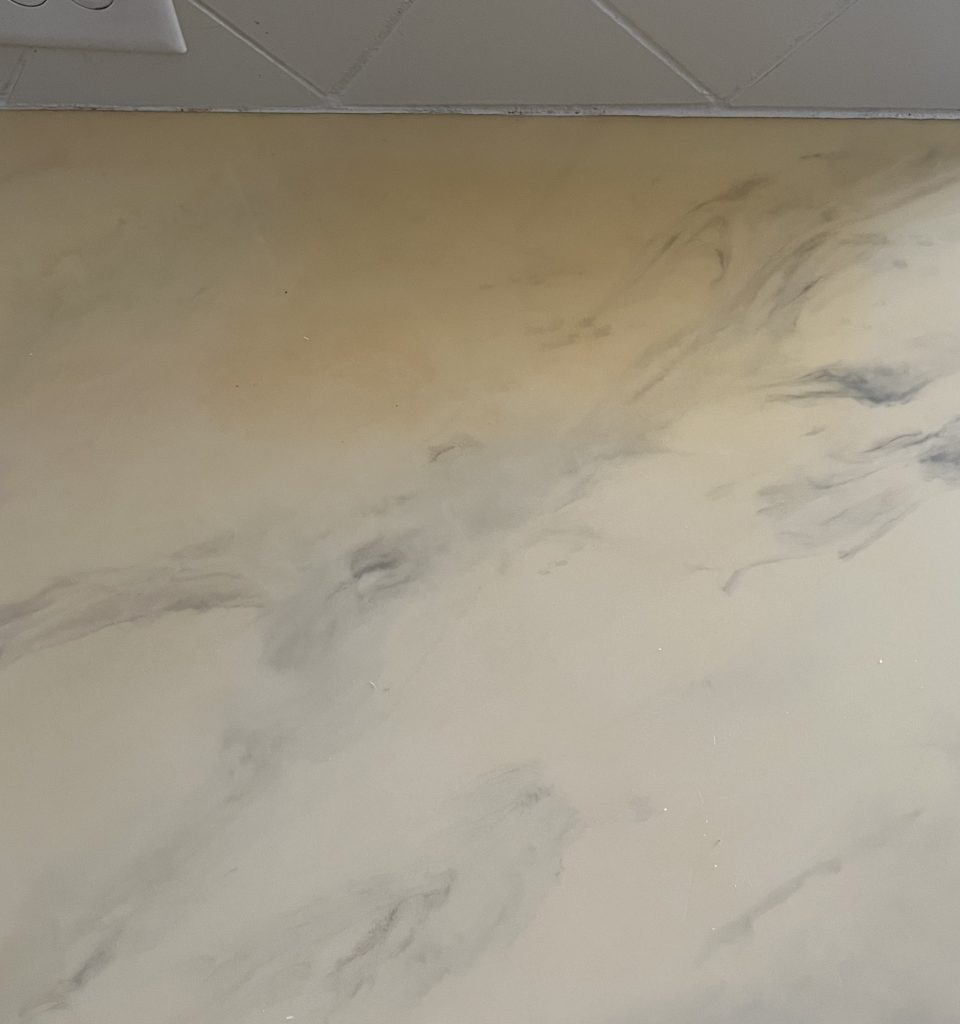
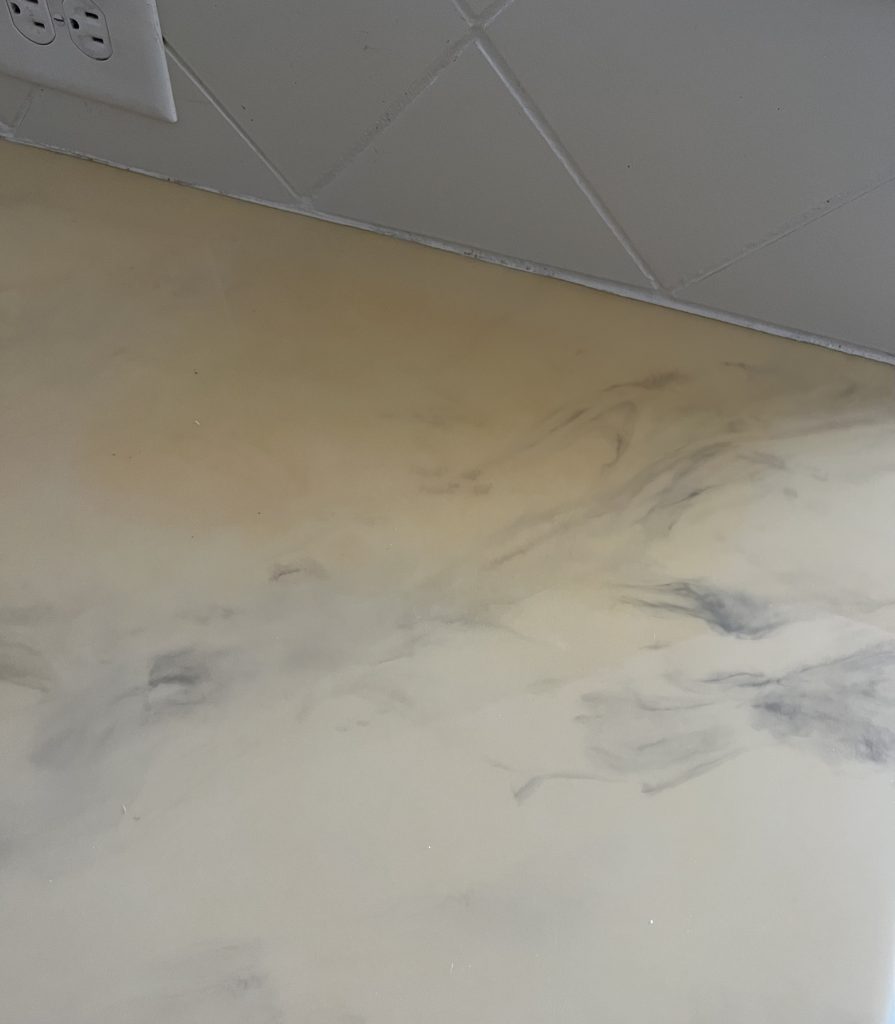
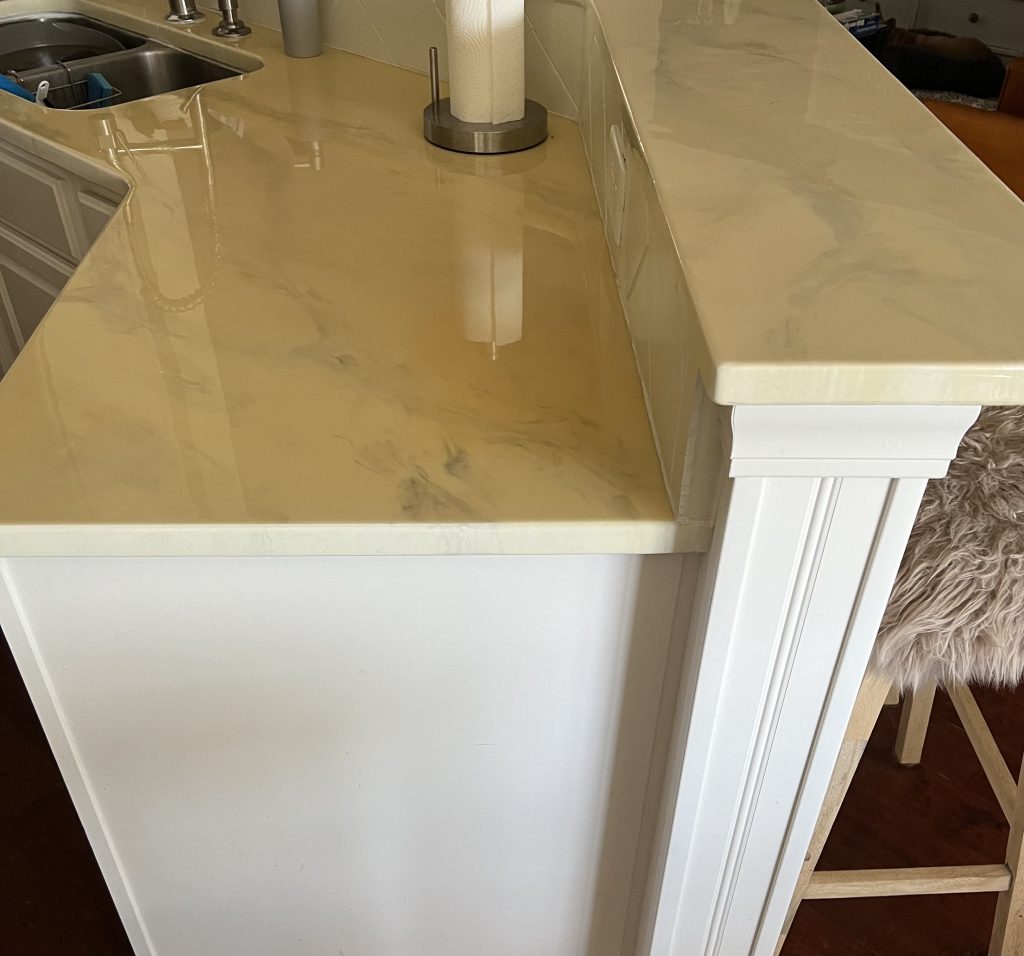
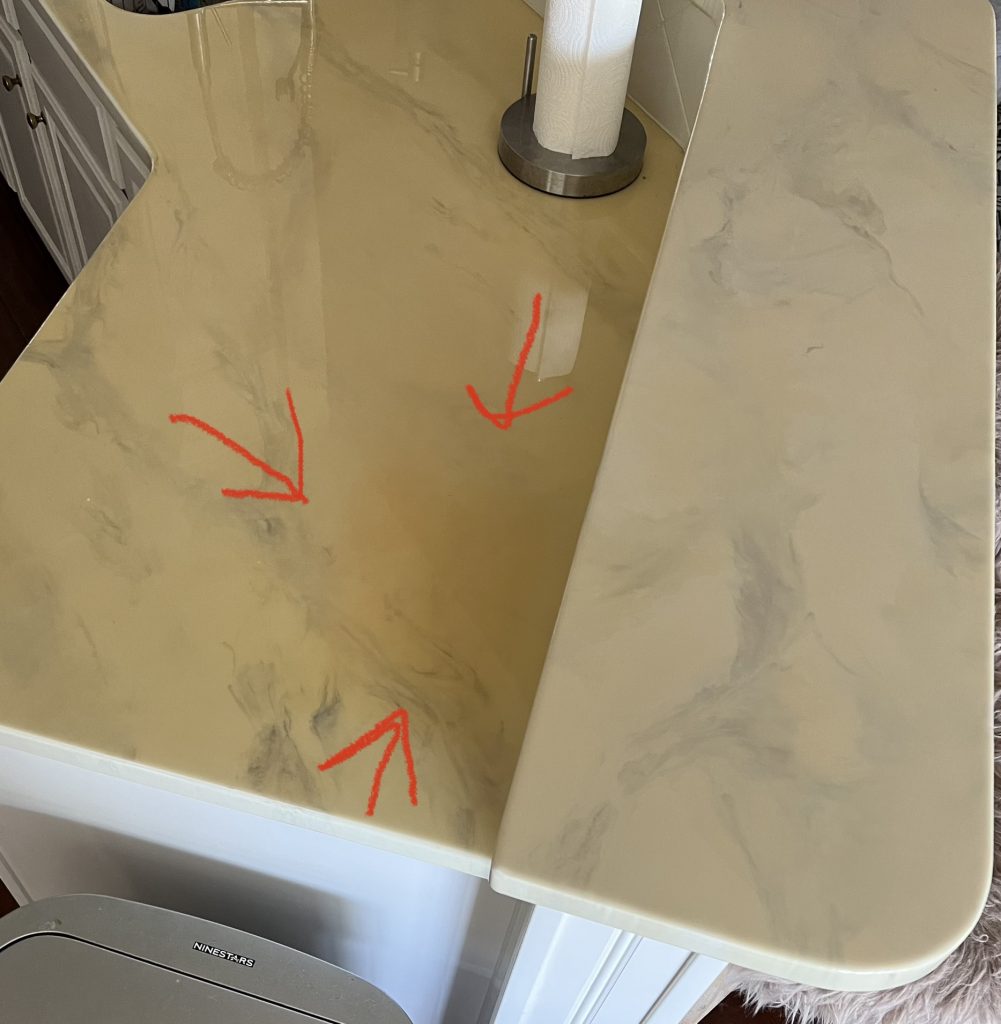
Mail Stacking Area (inside the arrows) is the most severely discolored, but this whole section of countertop is discolored due to being above the dishwasher
Two other areas where it’s significantly more discolored is where we stack our mail and other papers, so there must be some type of chemical reaction between the paper and the epoxy that accelerated the yellowing in those spots. So we keep stacking stuff there, and guess what? Nobody notices because they’re always covered with junk.
If we didn’t have white cabinets and a white backsplash (note: I simply painted over our existing builder grade tile backsplash), then it wouldn’t be quite so noticeable. Outside of the dishwasher and paper-stacking areas, the remaining surfaces don’t really look yellow per se. They’re just no longer as stark white as when I completed the project. I can happily live with them for the time being, as the overall look is still 1000x better than the dark brown granite.
In the future we would like to redesign our kitchen island, so when that time comes we’ll likely get new countertops just for the island, and I’ll probably re-do the perimeter countertops with SCC epoxy. Though honestly I would be perfectly happy to keep the perimeter countertops as they currently are (if they coordinate well with whatever we choose for the island), as they’re not as discolored as the island.
So to summarize, I still recommend this product if you’re DIYing on a budget. If you’re dead set on a marble finish, I would do a mix of gray tones, and note that any white used is unlikely to stay that way. It may not turn yellow, but over time it will not stay the same shade of white.
Hopefully this update has been useful, and I apologize if it’s come too late for some of you. If I had known this was an issue prior to taking on my own countertop project, I probably would have chosen a different color combo, but here we are….
¯\_(ツ)_/¯

Omg how amazing is this!?!? Seriously that marble countertop is TO DIE FOR! What an incredible transformation! Great job, girl!
Thanks Megan!! I’m sooooo glad I took he plunge and tried it out. Definitely worth the slight inconvenience of not having a working kitchen for a few days;)
Hi Bree! You seem to be a lot like me and yoyr hisb a lot like mine!☺️🙈
How have the countertops helD up? Are you happy with their durability?
They look amazing!!!!
Hi Haley! They’ve held up amazingly! I tackled the project in 2017, and since then there’s only been one teeny tiny little nick on the edge of my sink that’s probably way less than a centimeter long. The epoxy isn’t as thick on the edges since it runs off, and my husband always sticks our big frying pan in our sink (vs washing it and putting it away), so the metal handle always rests in the same spot and finally caused a chip in the epoxy finish. I just took some white paint to conceal it and it’s like it never happened;)
Is the finish still holding up as of august of 2020? it looks fantastic and I may take the leap this week! great job!
It sure is! If anything, it gets more durable with age:). Though if you’ve read though the comments you’ve probably seen that if I were to do it all over again I’d probably use more of a grey background, vs white, just because it’s oil based and the white does get a patina over time. It really doesn’t bother me though, or look bad (nobody else notices), but I do get a lot of questions about that on here and that’s the only thing I may have changed in hindsight. Hope that helps! If you have any questions when you tackle your project, feel free to DM me on instagram, or email me and I’ll see the message more quickly:). Good luck!!
I’m curious to know if it is still in great shape or have you any new do’s / dont’s?
NEVERMIND answering this.. i read on and saw my answer.
You did a fantastic job! I’m doing this after thanKsgiving and Went thRough your article severAl times, looking for Your advice on how to seal/epoxy the backsplash behind your sink. I saw another Blogger used spray expOxy but i wanr iT to look seemless. We have a siMilar area behind our stove leading up to our sitting bar. If you could kindly sharr with us how uou tackles your little backsplAsh area, i’d appReciate it! Thank you for shaRing your Wisdom and detailed pics/info!
Great question! For a good year I just had it painted white with a durable sherwin williams oil based paint, which is the same paint I had already used to paint over my tile backsplash in the rest of the kitchen (it was a beige color previously). I had plans to tile that area behind my sink/under the bar, but it just took me a while to get around to it. So the long answer is I eventually ended up tiling that spot using foam adhesive (instead of mastic) to apply the tiles. If there’s a bit of a lip/overhang, perhaps you could cut a piece of some type of solid plastic sheeting, and epoxy it separately, and then use an appropriate construction adhesive to secure it to the existing vertical surface. I hope that makes sense =\. I’m not very good at explaining my ideas.
You make perfect sense, thank you! I’m impressed you were able to read my previous message due to typo’s and weird sizes of letters 😉 Thank you again — we didn’t get to it over Thanksgiving because let’s be real–I NEEDED MY KITCHEN! But the whole month of January is now dedicated to this project. I’m doing my homework this month 🙂 Thanks again!! ~Ruth
I think that’s around the time I tackled mine too….after the holidays when I knew I wouldn’t have to entertain guests for a while.;) Best of luck to you!
So very beautiful, creative and intricate!!! HOW well does it resist scratches?but a pan, pate or cookie sheet were to be drug across with crumbs or other substance, would it scratch????
Hey Lisa! For the first few months you definitely have to be a bit careful. It doesn’t scratch terribly easily from my recollection, but of course we were also trying not to damage them in the beginning bc we were paranoid. I would say the bigger concern (though it’s not really a big deal) is if you leave something heavy on it overnight it can leave a dent (which can be buffed out easily with the help of a hairdryer). With time though it gets harder and harder as it cures. About 6 months in we started treating them like we would any solid surface countertop, and now years later they still look totally smooth….like a perfect glassy finish. I hope that didn’t totally confuse you!;)
OMG your countertops are gorgeous! i would never guess this was a diy project.
Thank you so much!! It surprisingly wasn’t that hard either!
Such an incredible transformation, I love how bright, larger, and clean it makes the kitchen! You must be so happy!
xx
Lauren
http://www.shoesandsashimi.com
Yasssss girl!! I thought I was going to be stuck with my old kitchen foreverrrrr! I was getting pretty desperate when I was looking for a way to slap some paint on my counters haha…..thank goodness I found SCC before I did something completely disastrous lol;)
You did this all by yourself?! Wow I can’t believe it. This is such a great work. Your kitchen looks amazing, it’s like taking out a picture of a magazine!!! Stunning! I’m obsessed with your kitchen. I absolutely love marble. I wish I could do this at my apartment.
Candace
http://www.thebeautybeau.com
Ahhh…I’ve soooo been there! Well at least you know this is an option when you’re house hunting in the future;) Thanks so much for reading Candace!
Oh my gosh this looks amazing!! You literally transformed your kitchen! It looks gorgeous! I want this look in my kitchen!!!
Thank you soooo much Delia!!
WOW the update looks fantastic! I really love the marble!
Oh my goodness! I loooVe how yoi transformed your kitchen! I love the white and white marble counter top! I Did not know you can actually paint over a graNite counter Top to another colour. Thank you for sharing This❤️
Thanks so much Helena! The paint is only a small part of it….the epoxy is what really adds that durability factor;)
Let me start by saying this looks absolutely amazing! I am in awe of how beautiful it turned out! Great job!!!
I AM amazed by your new kitchen and how you transformed it !Ihate our kitchen too, it looks exactly like yours before! I could not even imagine that this was possible, Thanks for the tips!
I AM AMAZED BY YOUR NEW KITCHEN AND HOW YOU TRANSFORMED IT! I HATE MY KITCHEN TOO AND I COULD NOT EVEN IMAGINE THAT IT WAS POSSIBLE TO CHANGE IT. THANKS FOR THE TIP.
wait this looks amazing! I legit have your old color scheme in my kitchen and I have it. I totally want to be able to do that! it looks awesome!
xo, Whitney
Omg! This looks amazing!!
Your counter tops are flipping amazing !!!
Thank you Alexia! Let me know if you decide to tackle the same project!:)
This look so incredible! It looks ex like marble😮
Thank you so much Jessica!! It’s holding up amazingly well too, thankfully!;)
Hi bree, wow amazing job!!! Thank you for all thw helpful info too! i am planning to do this exact same thing on my counters. i was wondering how you added the mica powders into the Color coat? Did you add then to the alcohol in the squirt bottles ans then squirt it in then chop it with the brush? I havent been able to find any videos from stonecoat on the mica powders and how to incorporate them.
Hi Alexa!! So I mixed them with alcohol, and I since I didn’t exactly know how things would go, I had mixed batches in both a spray bottle, and squirt bottles (similar to the bottles that boxed hair color comes in). The spray bottles clogged up a bit throughout the project, so I found myself using the squirt bottles (I think I linked the ones I used, but I’ll double check). Then I either chopped them in, or swirled them in with a paint stick. Different areas called for different techniques because if I didn’t like the way something was looking, I tried to basically blend everything in and start over. As far as the yellowing goes, the only area I’ve had this issue is around my sink (after a couple years), and I think it’s basically bc of the chemical reaction with the water, but I’m really the only one who notices. I’m in the process of trying to convince my husband to let me rebuild the section of our cabinets/counter that our sink is on so we can have a big island (and remove the section of wall where we have the single cabinet), and I figure we’ll just do MDF countertops and use Stone Coat again bc I truly love the product and it’s held up amazingly. I’d probably end up doing more of a grey base for that section though to avoid the yellowing issue, and leave the rest of the counters as is bc they still look the way they did when I first did them. Hope that all helps! Good luck!!!
Hi there, you did AWESOME. Can you share what you mean by gray base? Does that mean your base paint will have a tint of gray? If so, will you buy a paint separate?Just trying to make sure i unde before i begin. Lastly, can you eXplain a little what Chopping is? I cant find any examples. Thanks again.
Hi there! You got iT! Your base would be tinted gray, so when the epoxy gets a bit of a yellow tinge as it ages, the yellowing will be less noticeable. Hopefully that makes sense! As far as what “chopping” is, the best way to learn about all the various application techniques is definitely at Stone Coat Countertop’s YouTube channel. Mike as oodles of tutorials, so you’ll have more info available than you’ll ever need. After watching you might decide you like a different look (perhaps a striated marble? That would be exciting;)). Send me pics when you’re done! And don’t hesitate to shoot me an email at [email protected] if you have any other questions:)
Oh also i was wonderinG if they have yellowed at all? I know stonecoat talks about that and i dont mind it not being a pure white if it does yellow as long as it Still looks natural.
hello! First of i am obsessed!! dID YOU EVER UPLOAD THE VIDEO ? i WOULD LOVE TO SEE HOW YOU DID IT EVEN IF IT IS 45 MIN LONG! hOPING TO TACKLE THIS NEXT WEEKEND!!!
tHANK YOU!
Hi Allyson! Ack sorry! I haven’t uploaded the video yet…but it’s not a tutorial or anything, so probably not all that helpful;) . I basically just set the camera up to show me doing all the work (and I’m sure making strange faces in the process as I was doing it;)). I just wanted to record it to show it was totally possible to do it alone. SCC has loads of great videos that are immensely helpful. Let me know once you’ve done it…I’d love to know how it turns out!:)
What type of material could I try this on just to get a Idea and feel COMFORTABLE with it first. Before you actually tackle your granet countertop
Hi Shirley! You could do this on a small piece of MDF (medium density fiber board…at least I’m 99% sure that’s what it stands for;)). I apparently have no patients, so I just went for it, but practicing first is definitely a better idea haha;)
Some of the counters appear to have a bit of tan in some of the coloring. Am I just imagining that? Absolutely beautiful job. I’m quite impressed. I too have a husband that’s not interested in helping with some diy. I’m sure he’ll help when it comes time FOR the blowtorch too.
Hi Jen! No you’re not imagining that;)….I added gold mica powders bc a lot of natural marble has gold, tan, or brownish undertones:) And the struggle is so real on the lack of help! I’m working on wallpapering our guest bathroom now and it’s a total nightmare doing it alone, but it’s even worse when I try to get my hubby to help bc he absolutely detests it haha.;) Let me know if you end up tackling your counter tops! I need to make sure my discount code is still active for yall!
WoW Bree! You DID SUCH A GREAT JOB ON THESE. tHEY ARE STUNNING AND EXACTLY WHAT i WANT TO DO TO MINE. tHANKS FOR SHARING. i LOVE THE COLOUR AND THE SUBTLE LOOK YOU DID. sOME OF THE ONES OF i’VE SEEN ARE JUST A BIT TOO SWIRLY, CRAZY FOR MY TASTE. yOURS IS PERFECT!
Thank you so much Chris! If you want less swirly and crazy, definitely do lots of “chopping” with the brush! By the time I got to the last piece of countertop space (thankfully it ended up being the most prominent section where my sink is) I had finally learned that chopping in the swirls was my favorite look bc it was more subtle (apparently I like subtle too;)). Let me know when you tackle your project and send pics!! Good luck!:)
Has tHe epoxy yellowed at L? Thx
Hi LyNeah! I talk about this in a previous comment…please let me know if you have any other questions!:)
How did you do your bacKsplash? I want to do this but im worried about the drips coming uneven at the backsplash.
Hi Kate! We only had the one granite backsplash section behind the sink/under the little bar and I did not use the SCC on that section. I just painted it white, and it sat like that for about a year, and then I eventually tiled it to match the rest of our kitchen. I would check out the tutorials on the SCC website about this, but if I recall correctly (it’s been years now since I did my countertops) I think they have a special epoxy formula for vertical applications, otherwise I think they also recommend removing the backsplash, applying the epoxy, and then reinstalling, which sounds terrible but I’m kinda lazy;) I think the regular formula would ultimately work on the backsplash, but you would have to do your project in sections and do the back splashes first (masking off your countertops really well so that the excess epoxy doesn’t dry on the counter surface), and then do your counters. The backsplashes would likely require some buffing since it won’t level the same way as the counter surface. If you don’t have a tile backsplash, perhaps use this as an opportunity to remove your counter backsplash, and install a cool tile backsplash and really make an impact on your kitchen refresh;) . Sorry for the random stream of consciousness! This is how my brain works;) . Let me know how it goes!!
I love love love your countertops and cant wait to dive in and try this on mine. I am having a really tough time trying to figure out how much epoxy to purchase. May I ask how many square feet your counters were to help give me a better idea?
I’m so glad you’re going to tackle this! I don’t have the exact measurements because it’s been years now since I completed the project, but I remember emailing SCC with my measurements to confirm how much I needed. Ultimately we had more than enough, but seemed like it was going to be really close as we were finishing the clear (flood coat)!
I know it’s been some years since this post, but i cannot find the links you mentioned you would “pOst below” of all the products you used for this project other than the scc prOducts THEMSELVES. Your countertops look FABULOUS btw!
Thank you so much Lisa! I linked everything in that carousel toward the bottom of this blog post (you can scroll through and if you click on the product pics, it’ll link you to amazon or where ever I purchased the products). Please let me know if you have any trouble (some may be out of stock), and email me pics when you finish your project!! Good luck!!! I just had a bunch of people over for a wine tasting last weekend and they couldn’t believe my countertops were epoxy!;)
I AM ImpressEd!!! Great job! Now this kitchen looks Sooo nice! Beautiful! Congrats and keep working, keep doing whatever you do!
Thank you so much!
This looks amazing! I was just going to put vinyl over my countertops (which are the same as your before) but then I found this! so did the epoxy have a smell? i was told that the smell is hazardous. is that true?
Thanks so much! I think regular epoxy can be hazardous, but according to the website (from what I recall….it’s been about 3 years since I tackled this project) this is a different type of epoxy (it’s also food grade), so you don’t have to wear a mask or anything when applying. I don’t remember all of the technical terms for it, sorry!!=\ When I was applying it, I didn’t notice a smell at all, but my husband woke up in the middle of the night to check up on me and said he could smell it, which surprised me. It definitely doesn’t smell after it dries though;) Hope that helps!
Hi Bree, it looks great! I didnt see a link to the dark charcoal grey spray paint you used for the veining. I foUnd the others, but this one didnt seem to make it. Can you share? Also, did you only need one can of the bonding priMer and the white base coLor?
Hi Sarah! I actually only used the charcoal spray paint for fogging the countertops before applying the epoxy (I used the micca powder for the veining) and sorry I didn’t link that paint, but I no longer had the can when I wrote up this post.=\ I just did a deep dive through my old emails with SCC from 2017 when I tackled this project bc I remembered sending him a pic of the products I was planning to use to be sure they were all compatible with the epoxy, and unfortunately the charcoal paint must not have been purchased yet so it wasn’t in any of those pics. However, I can almost guarantee it was the same type of rustoleum universal spray paint I used for the gold, only in some type of charcoal color….that’s my ‘go to’ spray paint;). If it wasn’t the “universal” line, it would have been some other rustoleum spray paint product. The good news is I can at least answer one of your questions now (after doing my email deep dive)….I bought two containers of bonding primer and two containers of the white base paint to paint my counters and also to tint the epoxy. In hindsight I might recommend using a light grey tint and/or base coat bc after 3 years I’m noticing that the finish has yellowed a bit, which is only noticeable to me, but if I had used more color it wouldn’t be noticeable at all. It honestly does not bother me….they’re still really beautiful and holding up like any professionally installed stone or solid surface countertops.:)
Your counters look so amazing ! the best diy counters i`ve seen. i know you`re picky about your own work but honestly it looks so realistic and i wouldn`t have know they weren`t.
Thank you so much Kathy! You’ve made my day!:)
This turned out beautifully! (Sorry about the all caps–computer broken, it seems)
I have a question: How did you coat the side-back splashy part without major drips? I am really worried about painting that part properly.
Once again, beautiful!
Hey Laura! Do you mean the vertical granite part where the bar top is? I didn’t apply the product to that part, and I did have a few stray drips there bc I didn’t prep it very well, but that was bc I knew I was eventually going to tile that section to match the rest of my backsplash. They do have a formula for vertical applications, but I’ve never used it. Hopefully that clarifies things somewhat =\
omg that is simply beautiful and i am so APPRECIATIVE for the encouragement. I am wanting to do something like this to my kitchen
It’s really such a neat product! My countertops are holding up so well….years later!
This looks amazing and i have been SCOURING all the pinterests looKing for how to transform my yellow-gold-brown granite. Did you end up using a blowtorch? That part kind of Scares me 😳
Omigosh you sound exactly like me before I randomly found this product….I was desperate to get rid of our old countertops! Yes I used the blow torch….you definitely have to in order to properly complete the application. I’m normally a huge scaredy cat when it comes to candles, fire, chemicals etc, but I promise it wasn’t scary at all!;) When my husband helped me with the clear flood coat, he insisted on torching (men…), but I did all of it myself with the first coat. You got this!!
Hi Bree! I LOVE your countertops!!! Can I ask if they have yellowed at all?
Hi Bree, thanks to your post I’m tackling this in a couple of weeks! Yay! I’ve purchased your mica powders you suggested. In terms of mixing with the alcohol, how much alcohol and mica powder did you use in your bottles? Also, for the gold spray paint, did you spray that on it chop in with your brush? Thank you!
Hi April! I had bought several bottles of the alcohol to make sure I didn’t run out so I used it pretty generously. The mica powders go a loooong way, but really I don’t know exactly how much I used in each bottle. I had a pretty significant amount of alcohol in each squirt/spray bottle, but you’ll see when you start mixing that a relatively small scoop or so of the powder will instantly turn the whole mixture that color. I also recall adding alcohol or more powders to each mixture as I went along whenever I was running low. As far as the gold spray paint, I would spray that on and then either swirl or chop it in, depending on what the area needed. Honestly, you can skip the gold spray paint because you’ll get the same effect from the mica powders (actually even better bc they seem to blend better in the epoxy, and they’re so beautifully pigmented). I hope that helps! Don’t overthink it, and just have fun with it:). I’d love to see it when you’re done! Good luck!
Hi,
i love how IT TURNED! HOW DO YOU CLEAN THE COUNTERS. ARE THERE CERTAIN PRODUCTS TO AVOID USING?
THANKS!
Thank you so much! I use almost anything and everything on it, as long as it’s not abrasive (like comet), but essentially any cleaner in a spray bottle is fair game;). Fantastic, Clorox Cleanup, Windex….basically whatever I blindly grab from under the sink. Hope that helps!
Hi Bree! My husband i are getting ready to tackle our old farmhouse Kitchen! I do have a question about yoir first coat of epoxy. What all did you mix together if you had the mica poder mixed in squirt bottles? I’ve watched a few of Mike’s videos, and DIDN’T he mix in the poWders with the Resin? Did you just mix equal parts of resin and hardEner, pour it on, then squirt your veining Over the epoxy before chopping it in? It seems so scary, but your comments make me think that i can do this! Maybe when thr toddler is SLEEPING though!
You got it, Lisa! Hope you got my email reply (and hopefully it didn’t confuse you more=\)…but you’re exactly right. You’ll trowel on the epoxy and get it leveled and then squirt or spray on your mica powder mixture (91% alcohol + mica powder). If you mess up somewhere, you can erase it with some white spray paint (or whatever your base color is going to be) and start over;). Have fun with it and please let me know how it goes!!
Hi bree. so glad i stumbled upon your blog! your countertops look incredible…how long ago did you do this and do they still look good?
Sylvia I’m so glad you found me! I think it’s been at least three years now (what year is it even?? jk;)), and yes, they still look great! They get more durable with time:)
Now can you do an article on how to convince your husband to paint over old granite!?
Hahaha! I’ve learned over the years to skip that step, and instead ask for forgiveness afterwards;)
Hi bree, you did an amazing job and your counters are just what i would love if i were doing this project! I know its been some time sonce you wrote this post. Have you noticed any yellowing? I really appreciate this post you wrote. Your home is BEAUTIFUL!!
Hey! Was wondering if it feels like granite/quartz to the tOuch? Is it still cool and hard like Real stone?
Yep it’s still as solid as stone….especially since in my case it was applied over solid granite. People can’t believe it’s epoxy when they see it in person:)
Hi! You inspired me, I’m trying this next week! Is the only gray you added to the epoxy the mica powder? (it’s unavailable so I’m searching for a replacement!) I know you used spray paint for the base fogging, but I didn’t know if you purchased something gray from the Stone Coat company?! Also, both links are for the spray bottle, do you still have the link for the squirt bottle?! Thank you in advance! (:
Hi Jessi! I’m so glad you’re going to take this project on…..it’s going to make such a big impact! I didn’t purchase any gray paint from SCC….ultimately I ended up just using the mica powders. I did have a gray spray paint, but it had a blue tint, so I ended up spray painting white over it to basically erase it. The mica powders blend so well too, so it’s probably easiest to try to stick with them as much as possible. Sorry about the out of stock items. I would take a look at this seller https://bit.ly/37VHIZO for a replacement gray mica powder (lots of beautiful options), and here are the squirt bottles I used https://bit.ly/3ngMjwf :). Email me pics when you’re done! Good luck!!
YAYYY, THANK YOU for your help, I’m so excited! Did you use his method of multiple small buckets of epoxy (1 gray, 1 white, etc.) poured all into 1 bucket, then poured on? Or did you just add color directly onto the countertops? Sorry for so many questions, I just want to make sure I’m ready before I’m panicking with fresh epoxy on my counters! HA!
Love the finish Look of Your couNtertops. Its the first time ive Seen imitation sparkle with mica flakes and spRay paint turn out amaZing.
Thank you so much for the wonderful compliment, Sandy!!:)
Do you have a video of how you did these?
Sorry Kelsie, I don’t have one handy that I can link. Getting some of my projects (including this one) up on youtube is on my long list though;). Fortunately there is no shortage of video tutorials on Stone Coat Countertops’ youtube channel, and theirs are exponentially more helpful than anything I could do;)
HelLo , your projects is amazing. Did you tOurch it. Love it !
Hi Abby, yes I did torch it!:) I’m actually in the process of pulling video I filmed of me doing the first section of this project and I just started a youtube channel, so I’ll be uploading it there. Of course I’ll add it to this post too once I finish editing it.:) I did this project way back in 2017, so I’m really digging in the archives trying to put something decent together;)
Amazing!!! If you live in the Boston area i would love to hire you to come do our counter. A long shot, I know…
Well I’ve never been to Boston, so maybe we can work something out haha;)
Hey Bree! Was wondering about putting weight on the countertops…I noticed you mention not to leave bowls or cups on the counters over night for a few months after application, does this mean yOu left yOur countertops bare for that long? I have thinGs like a knife block, toaster, kitchen aId mixer on my counters and just wondering if i can put those back after a few days or if i should wait. Thank you, Your countertops look ABSOLUTELY gorgeous!
Great question! I waited for a good month before I put those things back on the counter:)
1. I think you’re my spirit person. 2 this transformation rocked so hard! 3. I bet those muffins taste better in your killer new kitchen. Ha! Thank you kindly for this post. I will be doing this soon on an upcoming project (pronounced “pro-jaaay”) and appreciate how you were So willing to share! ♥️
Love it!!!! I’m so glad you’re gonna give it a go! Please let me know how it turns out!! I’m currently working on putting a video together showing some of the process, but since I tackled this “pro-jaaaay” back in 2017, I’m basically having to gather up scraps to put something decent together=\ Thank goodness SCC has no shortage of great tutorials;)
Love. Do you reme what color white paint you used on the cabinets?
Sure do! It’s sherwin williams “snow bound”, and we used their Pro Classic trim and door paint (based on the guidance of the SW employee). 10 years later, I haven’t even had to do any touch ups. They still look great:).
hi bree! I’ve been begging my boyfriend to let me tackle our counters and i finally got the ok by showing him your blog…. so thank you!!! I’m wondering about how long your working time was for each section of your counters and did you mix additional epoxy as you finished each section or mix one large batch?
Hi Macy! The youtube video should hopefully help give you an idea of the working time (it’s also better if the room is warmer), and you definitely just want to mix small batches at a time. You can estimate how much you’ll need for each section if you have an idea of the square footage.:) I hope that helps!
hI, How did you construct the veining?
Hi Jennifer…I think you might find this video helpful:) https://youtu.be/78Mj_He4eaA
Hi!! I just finished my cOlor coat, but in the directions From Scc it sAys To peel off the tapIng that touches the expoy when You scrap the edges.
When Its time to go back and apply the clear coat. Do you again tape everything off?
LOve the counters! This is my first big diy and youVe inspired me 🙂
So in May of 2022, is this still good? What about scratches? I’ve been looking into doing literally the same color of stone Coat, just wondering about durability and scratches….Let me know!
Sorry, I’m terribly behind on my blog and comments….yes it’s still in great shape! However, I would advise against using a primarily white base like I did, as it does amber. I’m eventually going to re-do ours with a darker mix bc it really is a great product:)
Did you Use a Top coat ? And which one?
No top coat….none of that fancy shmancy stuff existed back when I did my counters;). Just the standard countertop epoxy with a color coat and flood coat. Hope that helps!
How durable have these been?
Still going strong!:)
Your countertops are beautiful! I plan to tackle this project in the neXt week, but i have a quicK question, did you use scc’s ultimaTe top coat, or just the Regular Clear epoxy to do the top coat? Thank you!
It was bare bones back when I did my project….just the standard SCC epoxy with a flood coat. UTC, art coat, craft coat etc didn’t exist yet;)
I just moved and have the exact granite you had and i hate them!! I am so happy to see that “painting” these is an option!!!